If you love Reese’s-style flavors and low-stress desserts, this Chocolate-Peanut Butter Delight is going to be your new party trick. It’s a no-bake, layered chocolate and peanut butter dessert with a buttery peanut butter cookie crust, a fluffy peanut butter cream layer, silky instant chocolate pudding, and a cloud of whipped cream on top.
It looks like something that took all day, but it comes together with simple pantry ingredients and some chilling time. In this guide, I’ll walk you through exactly what to buy, how each layer should look and feel, how far ahead you can make it, and how to tweak it for your crowd. If you can run a hand mixer and use a rubber spatula, you can absolutely pull this off on the first try.
Time and Serving
- Prep Time: about 35 to 40 minutes (hands-on, including layers)
- Chill Time: at least 6 hours; overnight gives the cleanest slices
- Total Time: about 6 hours 40 minutes, or up to 24 hours if chilling overnight
- Yield: about 16 small squares from an 8×8-inch pan (more generous 9 to 12 portions if you cut larger pieces)
Insight Of Chocolate-Peanut Butter Delight
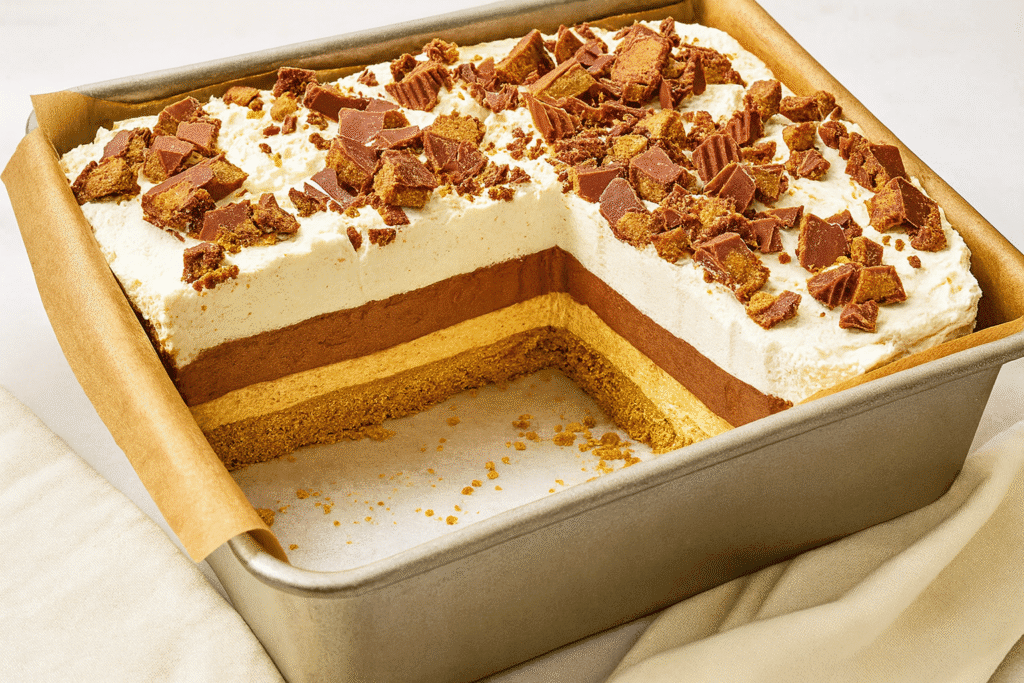
Chocolate-Peanut Butter Delight is a no-bake layered dessert that feels like a cross between an icebox cake and a pudding dessert. Classic “delight” recipes usually have a cookie or shortbread crust, a cream cheese layer, a pudding layer, and whipped topping. This version leans hard into the peanut butter cup vibes:
- Bottom layer: a crunchy peanut butter cookie crust (made from crushed peanut butter sandwich cookies and melted butter).
- Middle layers: a creamy peanut butter layer (cream cheese + peanut butter + whipped cream) and a thick layer of instant chocolate pudding.
- Top layer: a fluffy whipped cream topping, plus chopped peanut butter cups or other crunchy garnishes.
The texture is what makes this no-bake dessert so special:
- The crust is firm enough to lift and slice, but still easy to cut.
- The peanut butter cream is light and mousse-like, not heavy.
- The chocolate pudding adds smooth, cool richness.
- The whipped cream topping keeps it feeling airy instead of over-the-top dense.
It’s ideal for:
- Holidays and family gatherings: Make it the day before and keep it chilled.
- Potlucks: It travels well and serves a crowd.
- Hot weather: No oven required, just a fridge and a bit of freezer time.
Ingredients

These amounts are designed for an 8×8-inch square pan.
For the Peanut Butter Cookie Crust
- Nonstick cooking spray, for the pan
- 20 peanut butter sandwich cookies (such as Nutter Butter)
- 1/8 teaspoon kosher salt
- 4 tablespoons (2 ounces) unsalted butter, melted
Note: If your cookies are very sweet, the pinch of salt keeps the crust from tasting one-note.
For the Peanut Butter Cream Layer
- 3 ounces cream cheese, at room temperature
- 2/3 cup (about 75 g) powdered sugar
- 1/2 cup creamy peanut butter (regular shelf-stable style, like Jif or Skippy)
- 1 teaspoon vanilla extract
- 1/8 teaspoon kosher salt
- 1 cup cold heavy cream
Why not natural peanut butter?
Natural peanut butter tends to separate and be runnier. In a no-bake cream layer, that extra oil can make the mixture greasy and less stable, so standard creamy peanut butter works much better for clean layers and a whipped, mousse-like texture.
For the Chocolate Pudding Layer
- 1 (5.9-ounce) box instant chocolate pudding mix (the larger box typically labeled for 6 servings)
- 2 1/2 cups cold whole milk or half-and-half
Milk vs half-and-half:
- Whole milk – softer, more spoonable pudding layer
- Half-and-half – firmer set, cleaner slices
- Combination – a nice middle ground (for example, half milk, half half-and-half)
For the Whipped Cream Topping & Garnish
- 1 cup cold heavy cream
- 1/4 cup (about 28 g) powdered sugar
- 1 teaspoon vanilla extract
- 1/2 cup chopped peanut butter cups (from about 4 miniature or regular cups), optional
Garnish alternatives:
- Chopped salted peanuts
- Shaved or grated chocolate
- Crushed peanut butter cookies
- A drizzle of slightly warmed peanut butter and/or melted chocolate
Tools You’ll Need
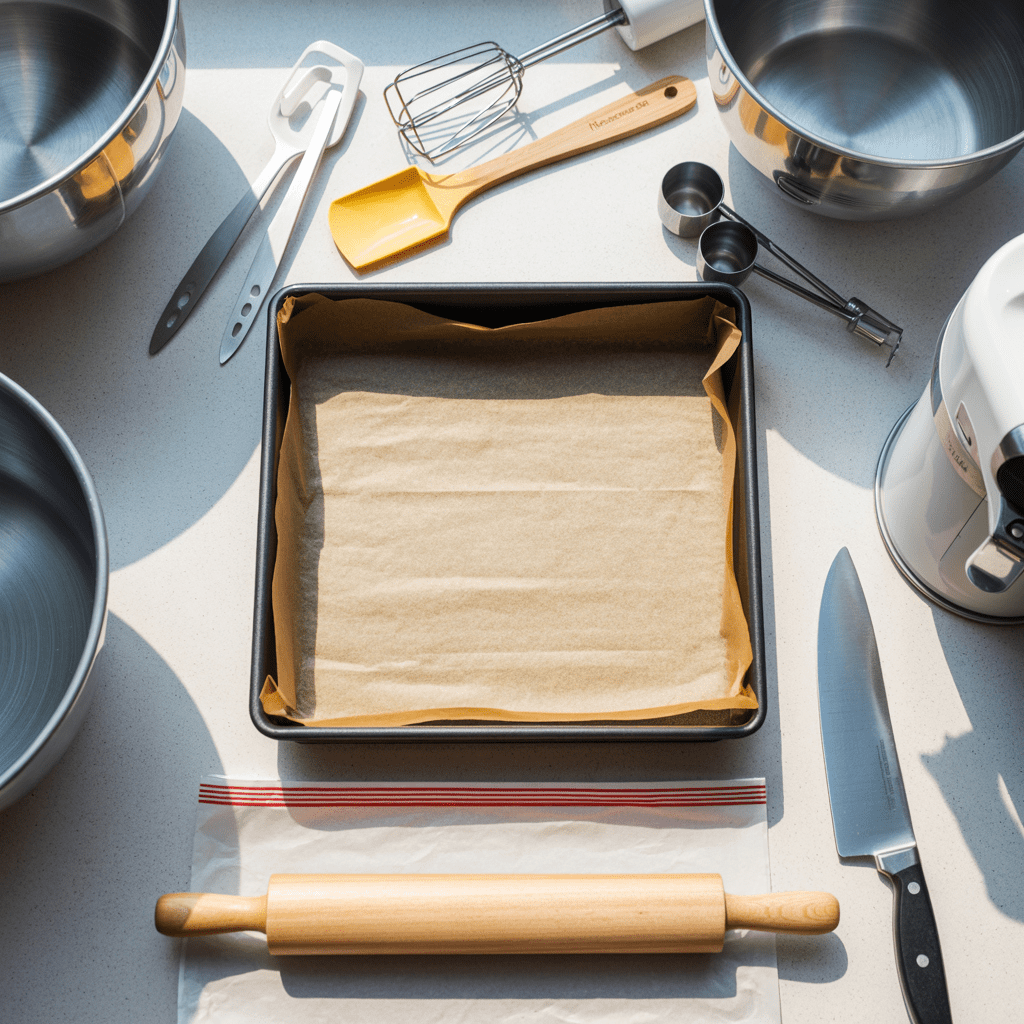
You don’t need special equipment, just a few basics:
- 8×8-inch baking dish: Glass or metal both work.
- Parchment paper: Two strips, criss-crossed, make “handles” so you can lift the dessert out to slice.
- Food processor – or a zip-top bag and rolling pin for crushing the cookies.
- Mixing bowls: At least two medium/large bowls.
- Hand mixer or stand mixer: A whisk attachment is helpful for whipping cream smoothly.
- Measuring cups and spoons
- Rubber spatula: For scraping bowls and smoothing layers.
- Sharp knife: For slicing squares and chopping peanut butter cups.
If you don’t have a mixer, you can whisk by hand, but expect a mini arm workout – especially for the whipped cream and peanut butter layer.
Step-by-Step: How to Make Chocolate-Peanut Butter Delight
Step 1. Prepare the Pan and Make the Crust

- Prep the pan.
Lightly coat an 8×8-inch pan with nonstick spray. Line the pan with two sheets of parchment paper arranged in a cross, leaving overhang on all sides. These parchment “handles” will make it easy to lift the whole dessert out later. - Crush the cookies.
- Food processor: Add the peanut butter sandwich cookies and salt. Pulse until you have fine crumbs with no large chunks left.
- No processor: Place cookies and salt in a sturdy zip-top bag. Crush with a rolling pin or the bottom of a pan until finely crumbled.
- Add the butter.
Drizzle the melted butter over the crumbs and pulse or stir until the crumbs are evenly moistened. The mixture should still look loose but clump together when you squeeze it in your hand. - Press the crust.
Transfer the crumbs to the lined pan. Spread them out, then use your fingers or the bottom of a flat measuring cup to press very firmly into an even layer. Pay attention to the corners – if they’re too thin, they’ll crumble when you cut the dessert. - Chill the crust.
Slide the pan into the fridge while you make the peanut butter layer. Even 10 to 15 minutes helps the butter firm up and gives you a sturdier base.
Experience tip: If you don’t press the crust firmly enough, you’ll see crumbs breaking away when you lift out the first piece. The crust should feel compact and slightly firm to the touch before adding the next layer.
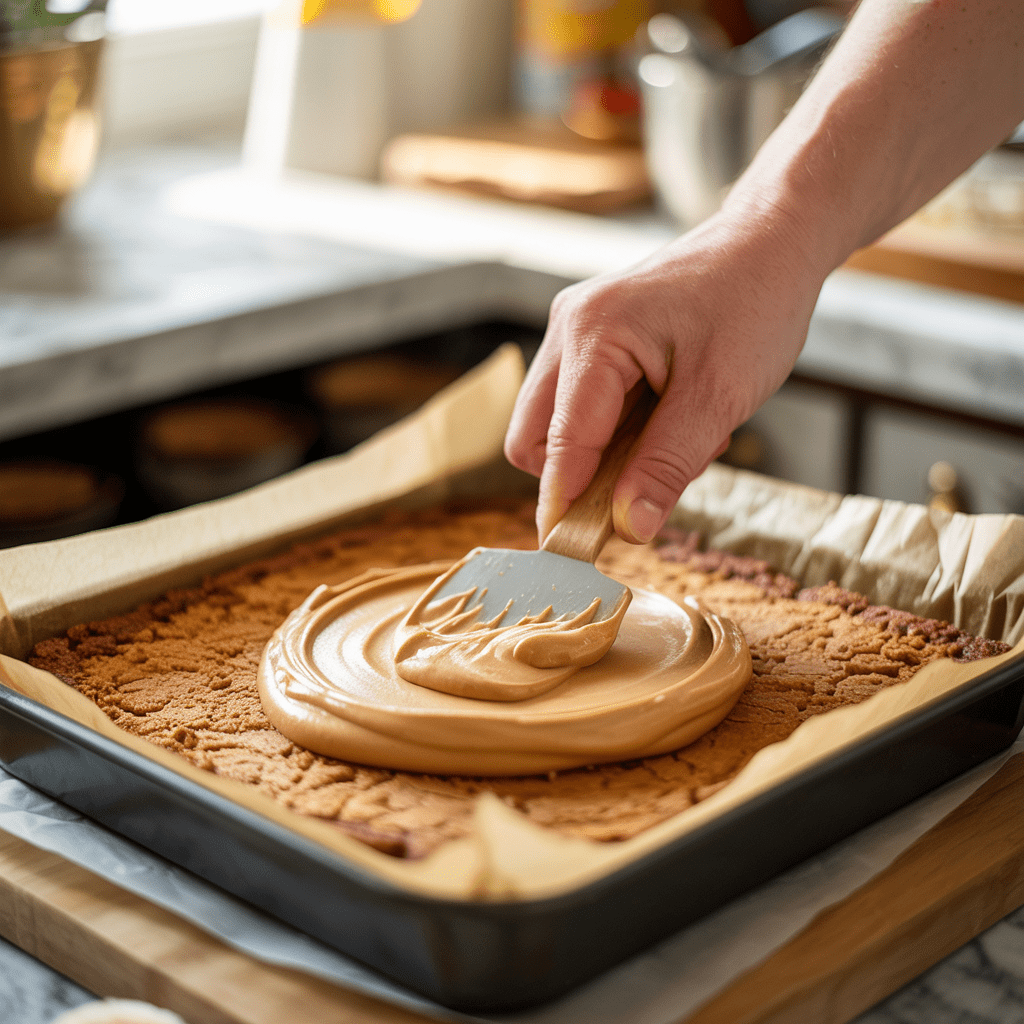
Step 2. Make the Peanut Butter Cream Layer

- Beat the base.
In a large mixing bowl (or the bowl of a stand mixer), combine the softened cream cheese, powdered sugar, peanut butter, vanilla, and salt. Beat on medium speed until smooth and creamy, scraping down the sides as needed. - Add the cream slowly.
With the mixer on low, slowly stream in the cold heavy cream. This helps it blend without splashing or lumping. Once it’s mostly combined, increase the speed to medium. - Whip to stiff peaks.
Continue whipping until the mixture is thick, fluffy, and holds stiff peaks – when you lift the beaters, the peaks should stand up and barely droop. The texture should feel like a light peanut butter mousse. - Spread over the crust.
Scoop the peanut butter cream onto the chilled crust. Use a spatula to spread it into an even layer, making sure you go all the way to the edges. - Briefly freeze.
Transfer the pan to the freezer for about 10 minutes. This quick chill firms the peanut butter layer enough so the pudding can sit on top without sinking.
Why this matters: The pudding is heavier than the peanut butter layer. If you skip the quick freeze, the layers can blur together and you lose that beautiful stacked look when you slice.
Step 3. Mix the Chocolate Pudding Layer
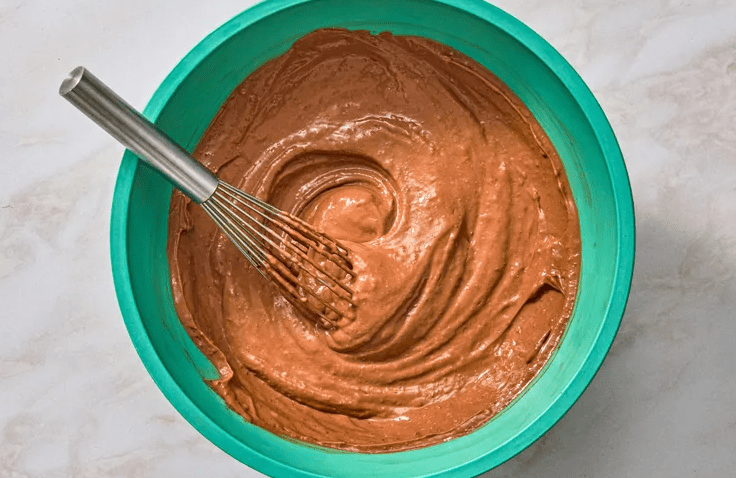
- Whisk the pudding.
In a separate bowl, add the instant chocolate pudding mix and cold milk or half-and-half. Whisk for about 2 minutes, until the mixture thickens slightly and no dry mix remains. - Let it thicken briefly.
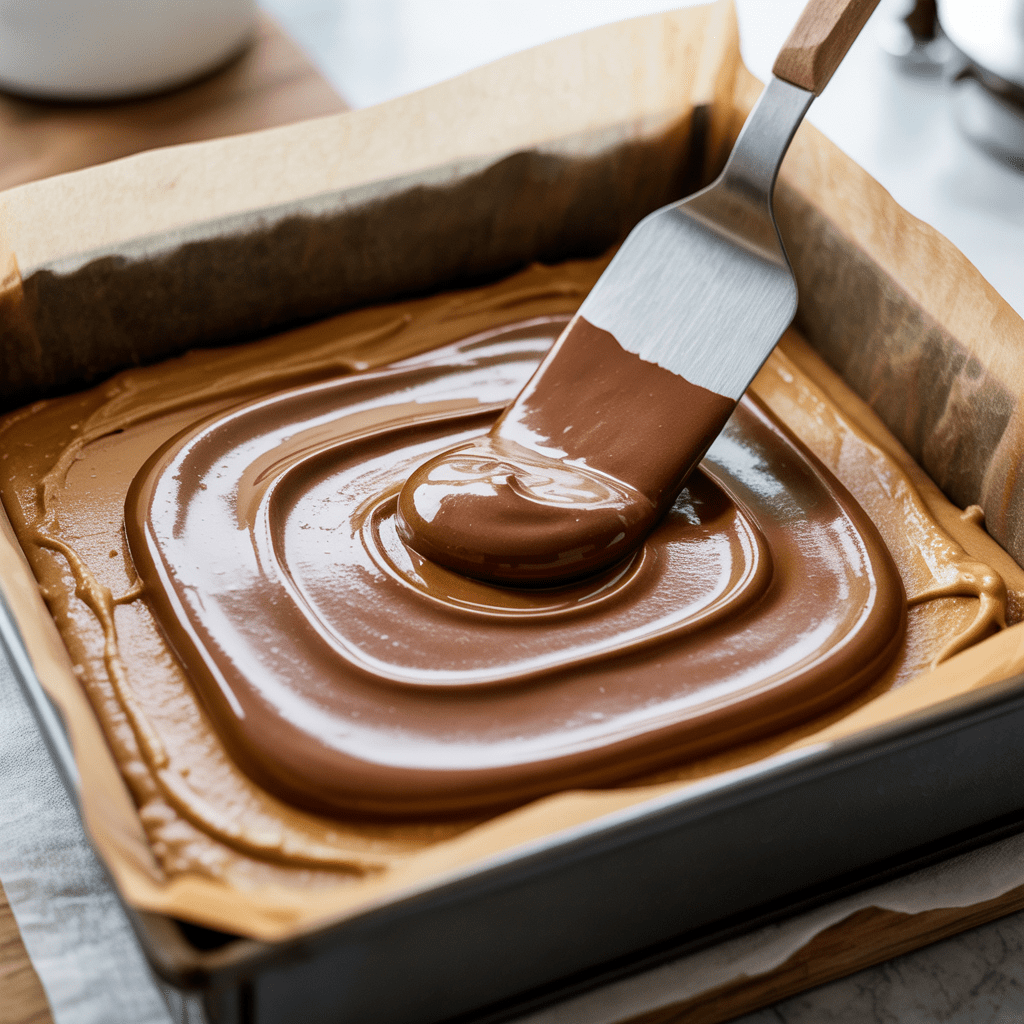
Let the pudding sit for a minute or two so it continues to thicken but is still pourable. It should feel like a soft pudding – not runny, not fully set. - Add on top of the peanut butter layer.
Remove the pan from the freezer. Gently pour or spoon the pudding over the peanut butter cream and use a spatula to spread it into an even layer. Take your time and avoid pressing too hard so you don’t disturb the layer underneath. - Chill while you whip the topping.
Put the pan in the fridge so the pudding starts to firm up while you make the whipped cream topping.
Instant pudding only: This method relies on instant pudding, which thickens with cold milk. Cook-and-serve pudding must be heated and cooled, so it doesn’t behave the same way here.
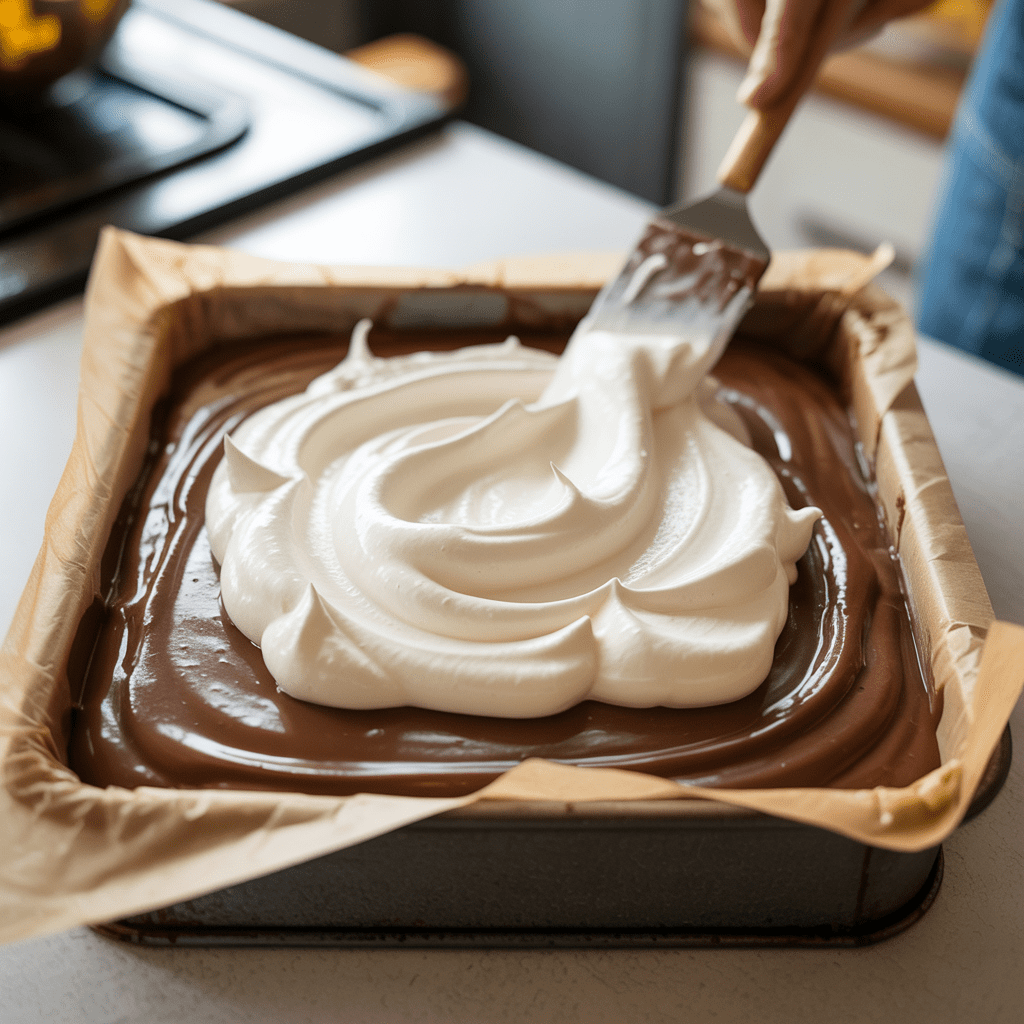
Step 4. Whip the Cream Topping

- Combine ingredients.
In a clean bowl (you can reuse the peanut butter bowl without washing completely if there aren’t big streaks), add the cold heavy cream, powdered sugar, and vanilla. - Whip to soft, then stiff peaks.
Start on medium speed until the cream looks frothy, then increase to medium-high. Whip until you see stiff peaks: the cream should be thick, billowy, and hold its shape when you lift the beaters. Don’t whip so long that it starts to look grainy. - Spread over the pudding.
Take the pan out of the fridge and gently spread the whipped cream over the pudding layer. Use light strokes so you don’t pull up the pudding underneath. You can swirl the top for a rustic look or smooth it completely flat.
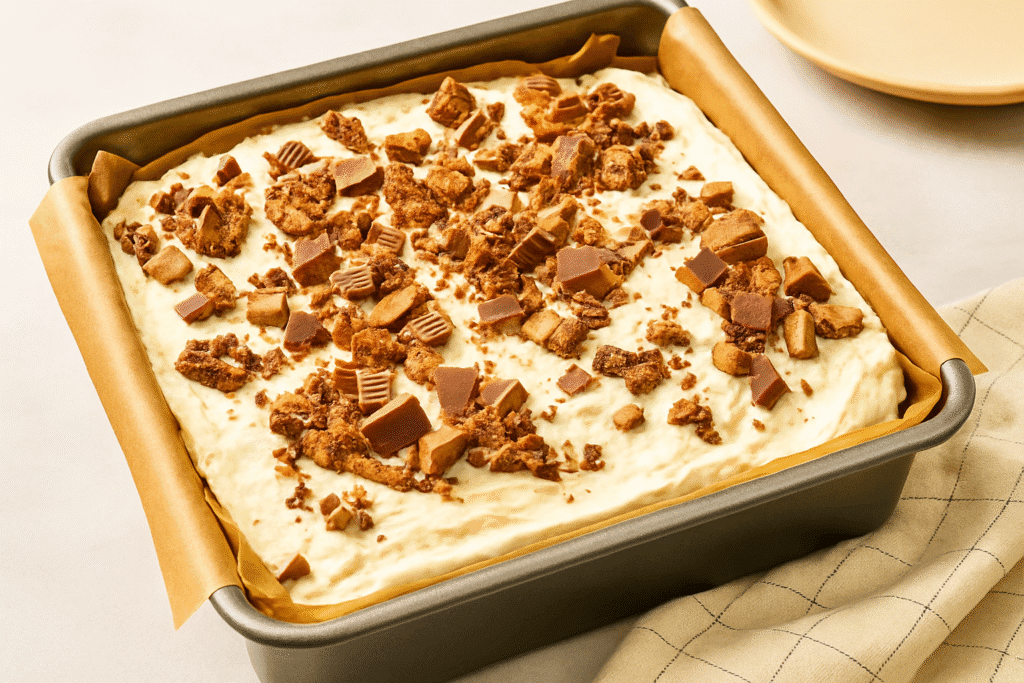
Step 5. Chill, Garnish, and Slice
- Final chill.
Cover the pan lightly with plastic wrap (avoid pressing it directly onto the whipped cream if you care about the look). Refrigerate for at least 6 hours, or overnight. This time lets all the layers fully set so you get sharp layers when you cut. - Garnish.
Just before serving, sprinkle the top with chopped peanut butter cups or your favorite toppings. If your kitchen is warm, briefly chilling the chopped candy in the fridge can help keep it neat while you scatter it. - Slice and serve.
Use the parchment overhang to lift the entire dessert out of the pan and onto a cutting board. Use a sharp knife to cut into squares, wiping the blade with warm water between cuts for the cleanest edges.
Texture cue: When fully chilled, the dessert should feel solid enough to lift a square with a spatula without the layers sliding around, but soft enough to cut easily without sawing.
Variations and Easy Tweaks
Once you’ve made the classic chocolate peanut butter delight, it’s fun to play:
- Extra-chocolate version:
Swap the peanut butter sandwich cookies for chocolate sandwich cookies (like Oreos) for a chocolate cookie crust. Add shaved chocolate or mini chocolate chips on top of the whipped cream. - Extra-peanut version:
Stir a spoonful of extra peanut butter into the whipped cream and garnish with chopped salted peanuts as well as peanut butter cups. - Nut-free topping idea:
Keep the peanut butter in the cream layer but skip the peanut butter cups on top. Use shaved chocolate, mini chocolate chips, or crushed plain cookies instead. - Lighter-feeling option:
Use a lighter whipped topping in place of the heavy cream topping. The dessert will be a bit sweeter and more stabilized, but taste and texture will still be dessert-worthy. - Different pan size:
You can make this in a 9×9-inch pan for slightly thinner layers or double the recipe for a 9×13-inch pan when feeding a big crowd (chill time may increase).
Key Advantages of Making Chocolate-Peanut Butter Delight
- Truly no-bake dessert:
No oven, no stove. Perfect when it’s hot out or your oven is already busy with other dishes. - Make-ahead dessert:
This layered dessert actually improves with time in the fridge. As long as it’s kept refrigerated, you can assemble it a day ahead and have it ready to go. - Big crowd appeal:
The combination of chocolate and peanut butter is a classic for a reason. Most people recognize the flavor as “peanut butter cup in dessert form.” - Beginner-friendly:
There’s no tempering chocolate or baking cake layers; you’re mostly whipping and spreading. It’s a great confidence-building recipe for new bakers. - Customizable:
You can adjust the crust, toppings, or even the pudding flavor while keeping the basic layered dessert structure intact.
Common Mistakes to Avoid
- Not pressing the crust firmly enough:
A loosely packed crust will crumble when you slice and serve. Press it down firmly so it feels compact and unified. - Skipping the quick freeze on the peanut butter layer:
If you don’t briefly freeze that layer, the chocolate pudding can sink into it, leading to blurred layers and uneven slices. - Using natural peanut butter:
Natural peanut butter can separate and make the cream layer oily or too soft. For this recipe, regular creamy peanut butter is much more stable. - Over-whipping the pudding:
Instant pudding only needs a couple of minutes of whisking. If you whip it too long or let it sit too long before spreading, it can become so thick that it’s hard to spread without tearing the layer underneath. - Not chilling long enough overall:
The dessert may taste fine if you’re impatient, but the slices will slouch and the layers won’t look clean. Give it the full 6 hours (or overnight) so it sets properly. - Leaving it out too long:
Because this dessert contains dairy and whipped cream, it should be kept refrigerated except while serving. Food safety guidance typically recommends refrigerating perishable, dairy-based leftovers promptly and enjoying them within about 3 to 4 days.
Expert Tips
- For ultra-clean slices:
Chill the dessert until it’s very cold. Use a sharp knife dipped in hot water, wipe it dry, make a cut, then repeat the dip-and-wipe routine between each slice. It’s a small extra step that makes a big difference. - Make it party-pretty:
Cut the dessert into neat squares and transfer each piece to a small plate. Add a little extra chopped candy or a drizzle of chocolate on top of each serving to make it feel special. - Transporting to potlucks:
Leave the dessert in the pan, cover tightly with plastic wrap or a fitted lid, and keep it chilled until you leave. If you’re driving a long distance, a small cooler with ice packs is a smart idea for any cream-based dessert. - “It looks so complicated!” moment:
In my kitchen, this has become the go-to “bring a pan of something” dessert. Every time it shows up at a gathering, someone assumes it took hours of skill and baking. You don’t have to tell them it’s mostly whisking and chilling – unless you want to convert them to no-bake desserts, too.
Nutrition Facts (Per Serving)
Based on the ingredients and cutting the pan into 16 servings, an approximate nutrition estimate per piece is:
- Calories: ~393
- Total Fat: ~25 g
- Carbohydrates: ~39 g
- Protein: ~6 g
These numbers are approximate and can vary depending on the brands you use, any substitutions (like half-and-half vs milk), and how large you cut the pieces. Treat them as a general guide, not lab-tested nutrition data.
Frequently Asked Questions (FAQs)
1. Can I make Chocolate-Peanut Butter Delight ahead of time?
Yes. This is an excellent make-ahead dessert. You can assemble the entire layered dessert, cover it, and refrigerate it up to 24 hours before serving. The flavors meld and the layers slice more cleanly when fully chilled.
2. How long does Chocolate-Peanut Butter Delight keep in the fridge?
Because it contains cream cheese, milk, and whipped cream, it should be stored in the refrigerator and eaten within about 3 to 4 days for best quality and food safety, in line with general leftover guidelines for dairy-based dishes.
3. Can I use natural peanut butter?
It’s not recommended here. Natural peanut butter tends to separate and can make the peanut butter cream layer oily and unstable. Regular creamy peanut butter (the no-stir kind) gives the best texture and clean layers.
4. Can I make this without a food processor?
Absolutely. Place the peanut butter cookies in a zip-top bag and crush them with a rolling pin, a heavy skillet, or even your hands until you have fine crumbs. Mix in the melted butter and salt in a bowl and proceed as directed.
5. Can I freeze Chocolate-Peanut Butter Delight?
You can freeze it, but the texture changes slightly. The layers become firmer and can lose a bit of their creamy softness once thawed. If you do freeze it, wrap tightly and thaw in the refrigerator before serving, and aim to eat it within a few weeks for best quality. For both food safety and quality, most guidance suggests frozen leftovers are best within a few months.
6. What can I use instead of instant pudding?
This recipe is designed specifically for instant chocolate pudding, which thickens with cold milk. If you prefer scratch-made pudding or cook-and-serve pudding, you’ll need to cook it, cool it completely until thick but spreadable, and then layer it very gently. The timing and texture will be different, so treat that as an advanced variation rather than a straight swap.
Conclusion

Chocolate-Peanut Butter Delight is one of those no-bake chocolate peanut butter desserts that looks dramatic on the table but is secretly very simple to make. A peanut butter cookie crust, a fluffy peanut butter cream, cool chocolate pudding, and a pillow of whipped cream all stack up into a dessert that tastes like a chilled, creamy peanut butter cup.
It’s make-ahead friendly, travels well, and can be dressed up or down depending on your toppings and pan size. Once you’ve made it once, you’ll find yourself reaching for this recipe whenever you need a crowd-pleasing, layered dessert that doesn’t tie up your oven.
Pull out your 8×8 pan, grab your cookies and pudding mix, and give it a try – you may end up adding Chocolate-Peanut Butter Delight to your regular holiday and potluck rotation.
Chocolate-Peanut Butter Delight – An Easy No-Bake Layered Dessert