If you love a splash of creamy sweetness in your coffee but do not love the price or ingredient list on many store bought creamers, this homemade coffee creamer is for you. It is a simple, three ingredient vanilla coffee creamer that you can make in a small saucepan with ingredients you probably already have in the fridge and pantry.
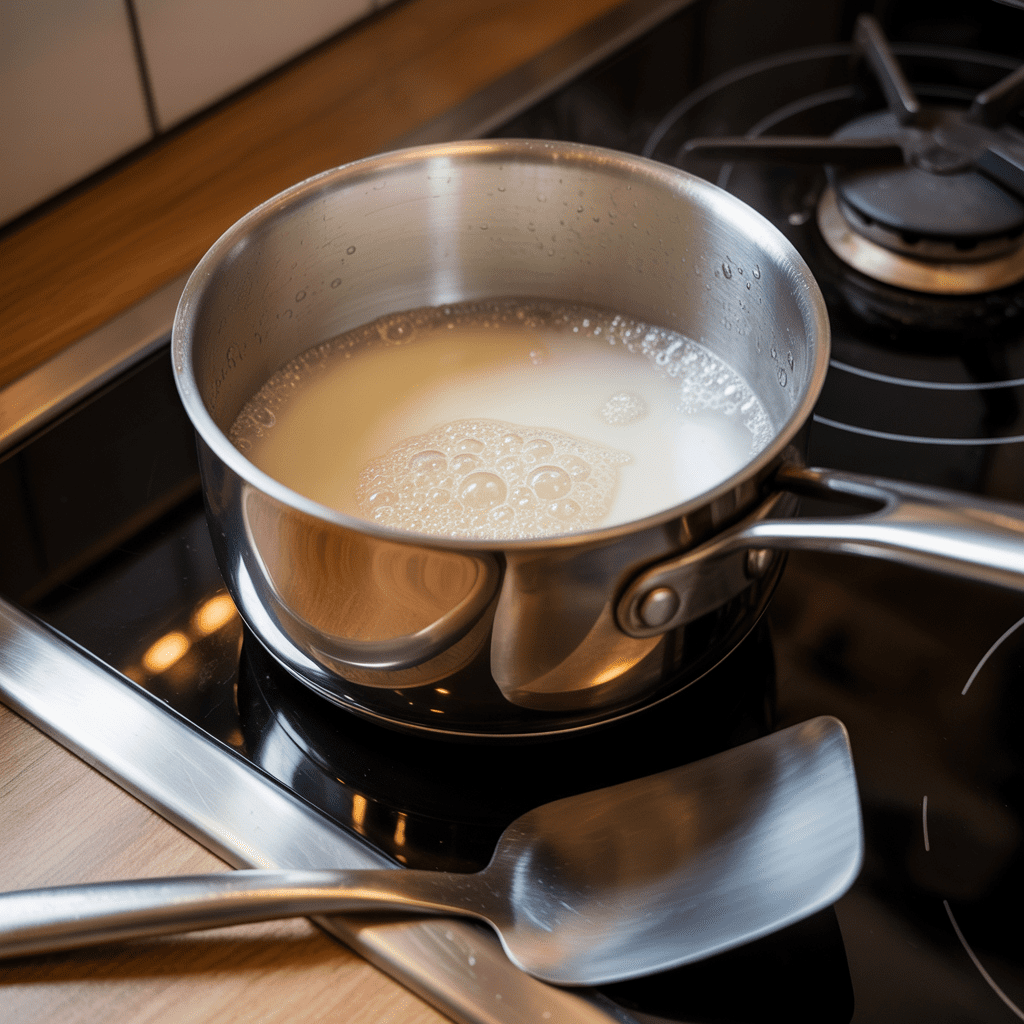
You slowly simmer milk with sugar to make a lightly thickened milk syrup, then stir in more milk and vanilla. The result is a smooth, lightly sweet, budget friendly coffee creamer without stabilizers or mystery additives that often show up in commercial creamers.
The active cooking time is roughly half an hour, most of it hands off while the milk mixture gently simmers. You can flavor it in many different ways, keep it ready in the fridge for your morning cup, and adjust the sweetness for everyone in the house.
Time and Serving
- Prep time: about 5 minutes
- Cook or simmer time: about 30 to 35 minutes
- Total time: about 40 minutes, plus chilling time
- Yield: about three and three quarter cups of creamer, roughly 900 ml
- Servings: about 60 servings, assuming about one tablespoon per cup of coffee
These times match the method below, where you simmer part of the milk into a syrup, then cool, mix, and chill before using.
Insight of the Homemade Coffee Creamer

Homemade coffee creamer is simply milk that has been gently sweetened and flavored so it blends smoothly into coffee and adds body, sweetness, and aroma. Instead of pouring plain milk or half and half into your mug, you are using a little concentrated, flavored milk mixture.
This particular recipe works in two stages. First, you simmer part of the milk with sugar to create a milk syrup. Slow simmering helps dissolve the sugar completely and slightly concentrates the milk, which gives a richer flavor and a creamier mouthfeel without adding heavy cream. Then you cool that base and stir in more fresh milk and vanilla.
Here is how it compares to other options.
Compared with plain milk or half and half
- Plain milk softens the bitterness of coffee but does not add sweetness or flavor on its own.
- Half and half or cream adds more body and fat, but again no built in flavor or sweetness.
- This homemade creamer adds gentle sweetness and vanilla flavor, so you can skip separate sugar and still feel like you are having something special.
Compared with store bought flavored creamers
Many commercial creamers are designed to be very stable on the shelf and in hot coffee, so they often include ingredients such as corn syrup solids, hydrogenated or refined vegetable oils, stabilizers, and emulsifiers. (Wikipedia+3BUBS Naturals+3Wisdom Library+3) Those ingredients are not necessarily unsafe, but they are there to extend shelf life and keep everything perfectly smooth in a factory bottled product.
This homemade version is much simpler. It is a dairy based coffee creamer made from real milk, sugar, and vanilla. There are no added stabilizers, thickeners, or artificial flavorings. Because of that, it usually will not last as long as commercial creamer, but you have much more control over what you are actually drinking.
Who this recipe is perfect for
- People who drink coffee every day and want a make ahead coffee creamer that feels like a small daily treat.
- Anyone who wants fewer additives and prefers to recognize every ingredient on the label.
- Coffee lovers who watch their budget and want to cut back on coffee shop runs or pricey flavored creamers.
- New home baristas who are starting to brew better coffee at home and want a simple, customizable creamer to match.
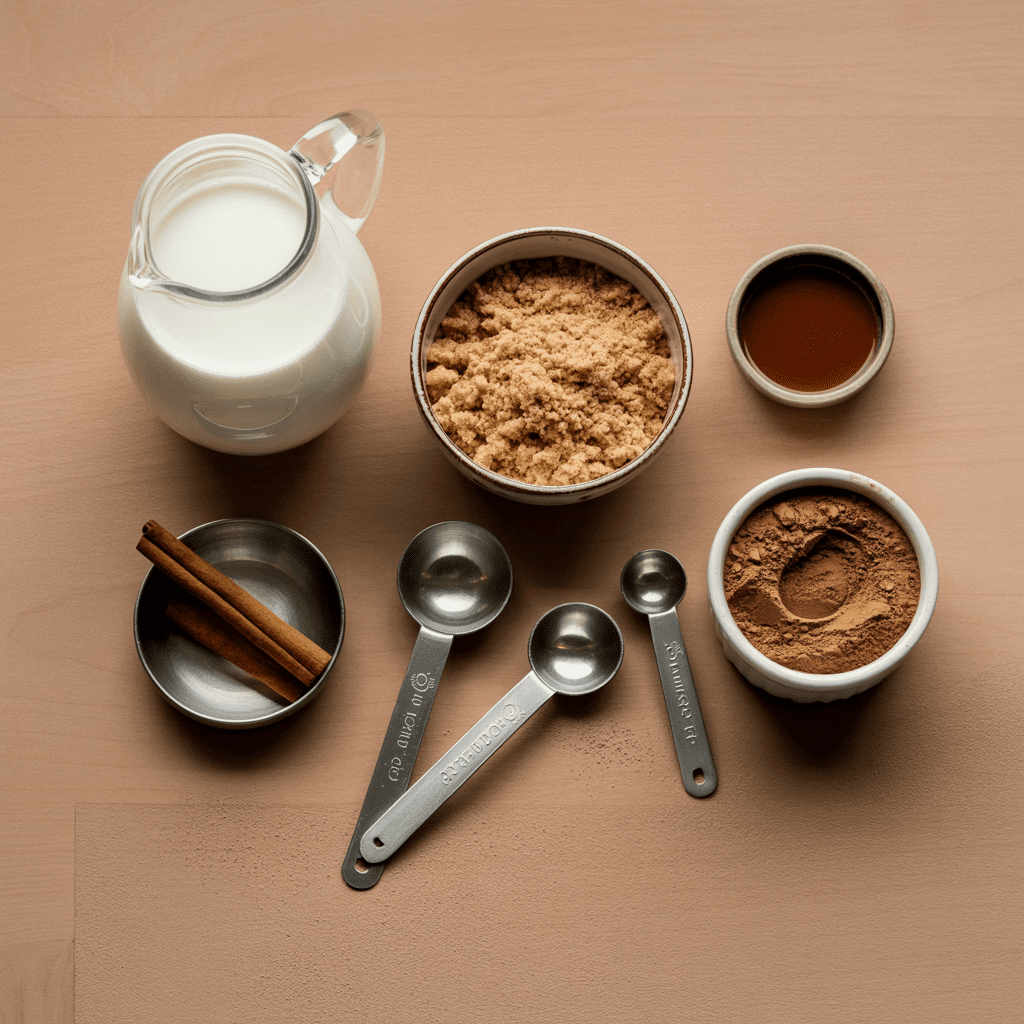
Ingredients
This batch makes about three and three quarter cups of creamer. You can cut the recipe in half if you drink less coffee or are testing it for the first time.
Core three ingredient vanilla coffee creamer
- Four cups whole milk, divided
- Whole milk gives the creamiest texture and richest mouthfeel because of its higher fat content. Lower fat milk will still work but will taste lighter and thinner. Wikipedia
- One half cup packed dark brown sugar
- Brown sugar adds sweetness plus a gentle molasses note that makes the creamer taste almost caramel like. You can use light brown sugar for a milder flavor or granulated white sugar if that is what you have.
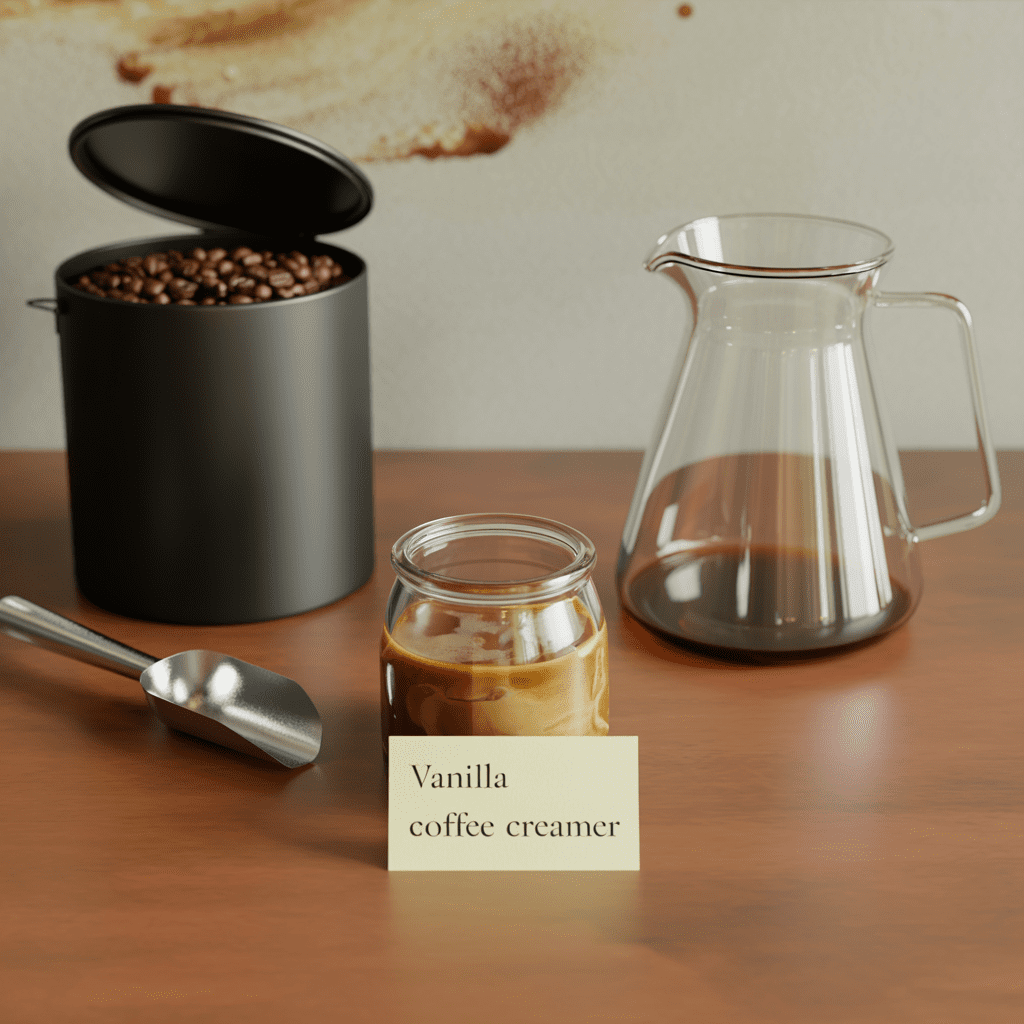
- Two teaspoons pure vanilla extract or vanilla bean paste
- Vanilla extract is the most common choice. Vanilla bean paste gives a stronger vanilla flavor and characteristic specks but is more expensive.
Optional sweetener swaps
You can replace the brown sugar with the same amount of:
- Granulated white sugar for a cleaner sweetness.
- Honey for a floral note.
- Maple syrup for a cozy maple flavor.
Keep in mind that liquid sweeteners may make the creamer slightly thinner, and the flavor will be more prominent.
Optional flavor additions
Choose one or two to keep the flavor clear and balanced.
- One or two small cinnamon sticks, added during the simmering stage and removed before cooling.
- A few lightly crushed cardamom pods for a warm, spiced, cafe inspired creamer.
- One to two tablespoons unsweetened cocoa powder, whisked into the warm milk syrup for a mocha style creamer.
- A tiny pinch of fine salt to round out the sweetness and enhance the vanilla.
Required Tools for making the recipe
You do not need barista level equipment. A small home kitchen setup is enough.
- Small heavy bottomed saucepan
- A pan with a thicker base helps distribute heat evenly so the milk does not scorch during the long gentle simmer.
- Heat safe spoon or silicone spatula
- You need this for stirring, occasionally scraping the bottom of the pan, and skimming any foam from the surface.
- Measuring cups and spoons
- For accurate ratios of milk, sugar, and vanilla so the texture and sweetness are consistent each time.
- Fine mesh strainer
- Helpful if you simmer whole spices such as cinnamon sticks or cardamom pods and want to strain them out cleanly.
- Clean glass jar or bottle with a tight fitting lid
- A quart size jar works well for this batch. A tight lid helps keep out fridge odors and slows down spoilage. Food safety guidance emphasizes keeping dairy in clean, covered containers at refrigerator temperatures below forty degrees Fahrenheit, about four degrees Celsius.
If you do not have a heavy pan, choose your most sturdy small pot and keep the heat slightly lower, especially during the simmering stage.
Method: Detail Step by Step Preparation Guide
Step by step method
- Measure and divide the milk
Pour two cups of the milk into a measuring cup and set the other two cups back into the fridge to stay cold. Using chilled milk later helps cool the syrup more quickly and protects its fresh taste. - Combine the first part of the milk with sugar
Add the two cups of milk you measured and the half cup of brown sugar to the small heavy bottomed saucepan. If you are using whole spices, such as a cinnamon stick, add them now. Stir over low heat until the sugar has completely dissolved and the mixture looks uniform. - Bring to a gentle simmer
Keep the heat on low. You want small, lazy bubbles around the edges, not a full rolling boil. A vigorous boil increases the risk of scorching and can cause the milk proteins to cook too quickly, changing the texture. - Simmer into a milk syrup
Let the mixture simmer slowly for about thirty to thirty five minutes. During this time it will:- Reduce in volume to roughly three quarters of what you started with, so you will have about one and a half cups of milk syrup in the pan.Turn slightly deeper in color, from pure white milk to a pale golden shade.Smell sweet and subtly caramel like as the sugar dissolves and the milk sugars gently concentrate.
- Skim any foam
While the milk simmers, you may see a thin film or foam forming on the surface. Use your spoon to gently skim it off and discard it. This helps keep the finished creamer very smooth. - Remove from heat and cool slightly
When the mixture is reduced and lightly thickened, take the pan off the heat. If you used whole spices, lift them out now. Let the milk syrup cool until it is warm but not hot, so that it feels comfortable if you touch the side of the pan. This usually takes ten to fifteen minutes at room temperature. - Add the remaining milk and vanilla
Pour in the remaining two cups of cold milk and the vanilla. Stir well until everything is fully combined. The cool milk helps bring the temperature down quickly, which is safer for refrigeration and helps protect the fresh dairy flavor. Food safety agencies advise cooling hot foods promptly before refrigeration to keep them out of the temperature range where bacteria grow fastest. - Strain if needed
If you see any small bits of cooked milk or spice fragments, pour the creamer through a fine mesh strainer into a large measuring jug or bowl. This step keeps the texture silky, especially if you used whole spices or cocoa powder. - Transfer to a clean jar and chill
Pour the finished homemade coffee creamer into a clean glass jar or bottle. Seal tightly. Let it cool to room temperature if it is still slightly warm, then refrigerate. Aim to get it fully chilled before using. - Shake before each use
Before you pour, give the jar a good shake. Homemade creamer sometimes separates slightly during storage because it does not contain stabilizers or emulsifiers. A quick shake brings it back together.

Variations
Cinnamon vanilla creamer
Add one or two cinnamon sticks to the milk and sugar at the beginning of simmering. Remove them before you add the remaining milk and vanilla. The result is a warm, spiced vanilla creamer that pairs beautifully with medium roast coffee.
Cardamom coffee creamer
Lightly crush four to six cardamom pods and add them to the milk and sugar while it simmers. Strain them out when you cool the syrup. This gives an aromatic, cafe style flavor that is especially good with strong drip coffee or espresso.
Mocha style creamer
Whisk one to two tablespoons unsweetened cocoa powder into the warm milk syrup after simmering, then add the remaining milk and vanilla. This gives a gentle chocolate note that makes home brewed coffee taste like a coffeehouse drink.
Richer half and half style creamer
Replace one of the four cups of whole milk with heavy cream or with half and half. This raises the fat content, giving a thicker, more luxurious texture and more body in coffee, similar to commercial cream style products. Higher fat dairy gives more richness because fat helps carry flavor and provides a smoother mouthfeel. Wikipedia+1
Plant based milk adaptation
You can use oat milk, soy milk, or another plant based milk instead of dairy. Choose an unsweetened version so you can control the sweetness. These milks do not behave exactly like dairy in hot coffee and may separate more easily, especially in very acidic or very hot brews. To reduce curdling, try warming the creamer slightly before adding coffee, or pour the coffee slowly into the creamer while stirring.
Adjusting sweetness
If you like very sweet coffee, increase the sugar to about three quarters cup. If you prefer just a hint of sweetness, start with one third cup and taste after everything is mixed; you can dissolve a little extra sugar or syrup into a small amount of warm creamer and stir it back in.
Key Advantages of making Homemade Coffee Creamer
- Budget friendly
A batch uses mostly milk and pantry sugar. When you compare the cost per serving to bottled flavored creamers or coffee shop drinks, this homemade version usually comes out significantly cheaper over time, especially if you drink coffee daily. - Fewer additives
Many non dairy and even some dairy based creamers use corn syrup solids, vegetable oils, stabilizers, and emulsifiers to control texture and shelf life. Here you are using real milk, sugar, and vanilla. That is it, plus any spices you choose. - Customizable flavor
You can make one batch vanilla, another batch mocha, and a third batch with cinnamon or cardamom. You decide how strong the vanilla is, whether you want a pinch of salt, and how sweet you prefer your cup. - Flexible with different coffees
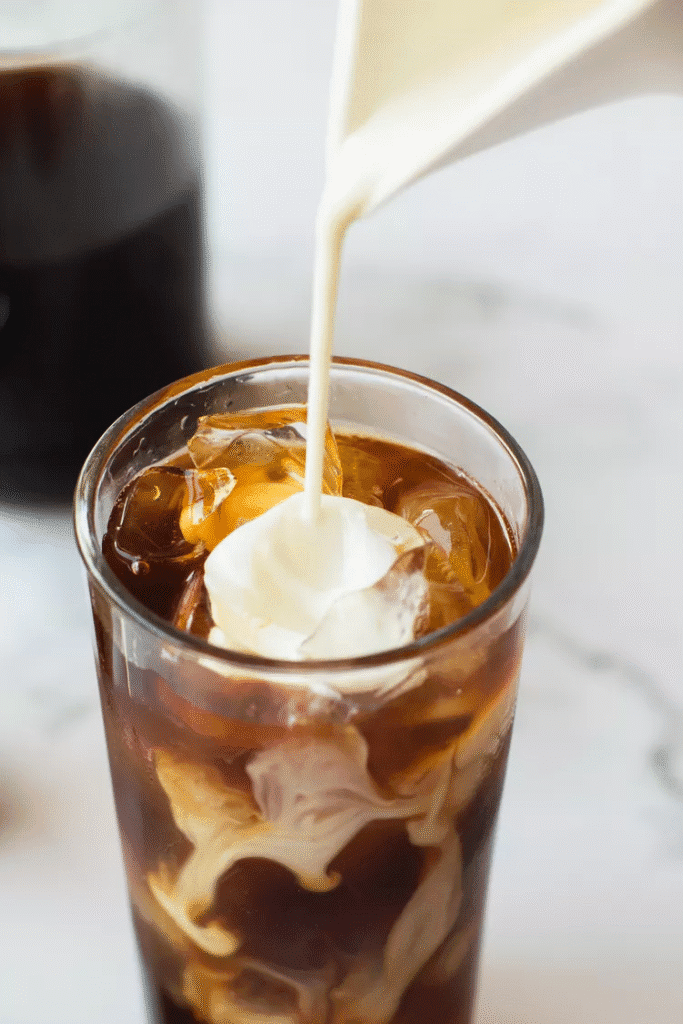
This creamer works in hot coffee, iced coffee, and cold brew. A small splash softens the bitterness of a dark roast, while a larger amount turns a strong cold brew into something closer to a dessert style drink. - Make once, use all week
When you keep a jar in the fridge, mornings feel easier. Instead of measuring sugar and milk each time, you give the jar a quick shake and pour.
Mistakes to Avoid
Turning the heat too high
If you use medium or high heat, the milk can scorch on the bottom of the pan or form clumps. Scorched milk tastes bitter and can make the entire batch taste off. Prevent this by keeping the heat low and watching for a gentle simmer instead of a boil.
Letting the mixture boil rapidly
A full rolling boil causes the milk proteins to tighten quickly, which can lead to a grainy or curdled texture and increase the risk of boiling over. Slow simmering keeps the proteins more stable and gives better control over the reduction.
Using milk that is close to its sell by date
Food safety and dairy organizations note that milk quality declines faster once the container is opened and as it approaches its printed date. For homemade creamer, start with fresh milk that has several days left before the sell by date for the best flavor and safety margin.
Keeping the creamer too long in the fridge
Because this creamer contains no preservatives, it will not keep as long as many commercial creamers. Based on guidance for milk storage and similar homemade creamer recipes, a practical range is about five to seven days in a cold fridge, always checking smell, appearance, and texture before use. If it smells sour, looks lumpy, or has a strange color, discard it.
Storing it in the warmest part of the fridge
Experts advise storing milk and other sensitive dairy products toward the back of the refrigerator, not in the door, because the door warms up every time it opens. Keep your jar of creamer on a cold middle or lower shelf instead of in the door.
Not shaking before pouring
A little separation is normal in homemade coffee creamer. If you pour without shaking, the first few cups may be thinner and less sweet, and the last few may be thicker and sweeter. Always shake the jar before each use to keep the flavor consistent.
Adding a large splash of very cold creamer to very hot coffee
When icy cold creamer hits near boiling coffee, especially coffee that is quite acidic, the sudden temperature shock can sometimes make dairy look slightly curdled. This is mostly a visual issue, but it can be unappetizing. To reduce the risk, let the creamer sit at room temperature for a few minutes, use slightly cooler coffee, or pour coffee into the creamer while stirring.
Expert Tips
- In a busy week, it is practical to make a batch of creamer on Sunday afternoon while you are already in the kitchen. By Monday morning, it is fully chilled and ready to use.
- Label the jar with two notes written in marker or on a small piece of tape: the date you made it and the sell by date from the milk carton. Use whichever date comes first as your upper limit, but still rely on your senses to check smell and texture.
- If different people in your home like different levels of sweetness, make one batch at the base sweetness and let others add a tiny drizzle of syrup or a bit of sugar to their own cup. That keeps the main jar versatile.
- Keep a dedicated glass bottle or jar for coffee creamer so it always smells like vanilla and not like last week’s leftovers. A container with a narrow spout or flip top lid makes it easy to pour just a splash into iced coffee.
- Pair flavors with your coffee style. For example, cinnamon vanilla creamer is wonderful with medium roast drip coffee, while mocha style creamer really shines in cold brew. A simple vanilla version works with almost anything.
- If you like iced coffee in the afternoon, remember to give the jar an extra shake. The creamer blends especially easily into cold drinks when it is well mixed.
Nutrition Facts (per serving)
These values are approximate and will vary slightly with the type of milk and sweetener you use. The estimate here assumes whole milk and brown sugar, with one serving equal to about one tablespoon of creamer.
- Calories: about sixteen
- Total fat: about one gram
- Carbohydrates: about two grams
- Sugars: about two grams
- Protein: about one gram
This serving size is a starting point. Many people use one to two tablespoons in a typical mug of coffee.
Frequently Asked Questions
Q1: Can I make this homemade coffee creamer with plant based milk
Yes. You can make a similar creamer with oat milk, soy milk, or other unsweetened plant based milks. The simmering step still helps dissolve the sugar and intensify the flavor. However, plant milks sometimes separate in very hot or acidic coffee. To help avoid this, warm the plant based creamer slightly first, or pour the coffee slowly into the creamer while stirring. The flavor and body will also differ depending on the fat content of the milk you choose.
Q2: How long does homemade coffee creamer last in the fridge
Based on guidance for milk storage and similar homemade dairy drinks, a careful range for this creamer is about five to seven days in a cold refrigerator when stored in a clean, tightly sealed container. Always check smell, appearance, and texture before using it. If it smells sour, looks lumpy or curdled, or has an unusual color, discard it, even if you are still within that time range.
Q3: Can I freeze homemade coffee creamer
You can freeze portions of this creamer for longer storage. Food and recipe sources suggest that homemade coffee creamer can be frozen for up to about three months in an airtight container. The texture may become slightly grainy after thawing, but a good shake usually helps. Always thaw in the refrigerator, not on the counter, and discard if it smells or looks off after thawing.
Q4: Can I make a version with less sugar or a sugar substitute
Yes. The sugar level is flexible. You can reduce the sugar to one third cup for a lightly sweet creamer. The texture will be slightly thinner because there is less dissolved sugar in the syrup. Using sugar substitutes is more complex, because they do not always behave like sugar when heated and do not provide the same body. Some heat stable sweeteners can be added toward the end of cooking or even stirred into the cooled creamer. If you experiment, start with a small batch and follow the storage guidelines carefully, since sugar helps with both taste and shelf life.
Q5: Why did my homemade coffee creamer separate or look grainy
Mild separation, such as a thin layer on top or a slightly different color at the bottom, is common in homemade creamer because there are no emulsifiers or stabilizers. A good shake usually brings it back together. Visible graininess or curdling, especially in hot coffee, can be caused by very high heat, very acidic coffee, or older milk. If the creamer smells sour or does not smooth out after shaking, it is safer to discard it.
Q6: Does this homemade coffee creamer work in both hot coffee and iced coffee
Yes. The base recipe works well in hot brewed coffee, cold brew, and iced coffee. In hot drinks, it melts in and adds sweetness and creaminess. In iced coffee, it gives a smooth, dessert like feel without needing flavored syrups. Make sure the creamer is well chilled and well shaken before adding it to cold drinks.
Conclusion
This homemade coffee creamer takes a few simple ingredients and turns them into something that genuinely improves your daily cup of coffee. You simmer milk and sugar into a gentle milk syrup, cool it, stir in more milk and vanilla, and end up with a creamy, subtly sweet, vanilla scented coffee creamer that feels like a small luxury every morning.
It is budget friendly, flexible, and made from ingredients you recognize. You can start with the basic vanilla version, then branch out into cinnamon, mocha, or cardamom as you get comfortable. If you label your jar, store it cold, and rely on your senses to check freshness, it becomes a safe, reliable part of your home coffee routine.
If you have never tried making coffee creamer from scratch, this is an easy place to begin. Once you have a jar waiting in the fridge, it is hard to go back to plain milk.

Homemade Coffee Creamer: Easy Three Ingredient Refreshing Drinks