Retro three ingredient sausage balls are the kind of appetizer that quietly shows up at every good party and somehow disappears before anything else. They are made from a simple mix of seasoned bulk sausage, baking mix, and shredded cheese, rolled into bite size pieces and baked until the edges turn golden and the cheese smells toasty.
For many families, these sausage cheese puffs are tied to Christmas brunch, New Year gatherings, church potlucks, and game day snack spreads. Someone in the family has “always” made them, often from a handwritten card in a stained recipe box.
This version keeps that nostalgic feel but is written with beginner home cooks and busy hosts in mind. You will get clear ingredient ratios, step by step instructions, food safety guidance, make ahead and freezer tips, serving ideas, and answers to common questions so your sausage balls come out tender, cheesy, and fully cooked every time.
Time and Serving
- Prep time: about 15 to 20 minutes
- Cook time: about 20 to 25 minutes at 350 degrees F, depending on oven and size of the balls
- Total time: about 35 to 45 minutes
- Yield: about 32 to 36 sausage balls, using about one rounded tablespoon of mixture per piece
Serving guidance:
- As an appetizer, plan on 3 to 4 pieces per person for a larger spread with other snacks.
- For a small party where sausage balls are the main nibble, plan on 5 to 6 pieces per person.
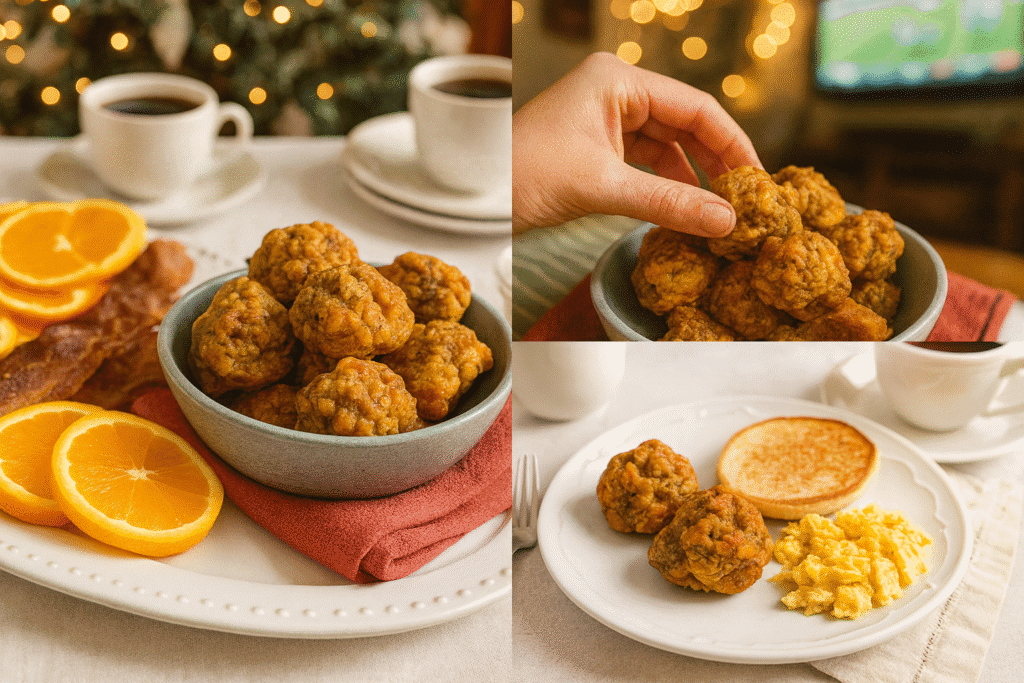
- Leftovers are popular at breakfast with eggs, fruit, or toast.
Insight of the Retro 3-Ingredient Sausage Balls

Close-up of a hand holding a golden, cheesy retro 3-ingredient sausage ball above a bowl filled with more sausage balls, set on a light green towel with drinks blurred in the background.
Close-up of a hand holding a golden, cheesy retro 3-ingredient sausage ball above a bowl filled with more sausage balls, set on a light green towel with drinks blurred in the background.
Close-up of a hand holding a golden, cheesy retro 3-ingredient sausage ball above a bowl filled with more sausage balls, set on a light green towel with drinks blurred in the background.
Retro sausage balls are a simple three ingredient appetizer made from bulk pork sausage, a biscuit style baking mix, and shredded cheese. The mixture is stirred or kneaded together, rolled into small balls, then baked until the outside is lightly crisp and the inside is cooked through and tender.
They are popular because:
- The ingredients are pantry and fridge friendly.
- The flavor is familiar, salty, cheesy, and comforting.
- They work for many occasions, from Christmas brunch and office potlucks to tailgates and game day snack tables.
You can mix the dough in one bowl, line a tray with parchment for easy cleanup, and bake a batch in about twenty minutes. Leftover sausage balls reheat well in the oven or air fryer, and the unbaked mixture can be shaped and frozen for last minute guests, which fits nicely into a busy modern schedule.
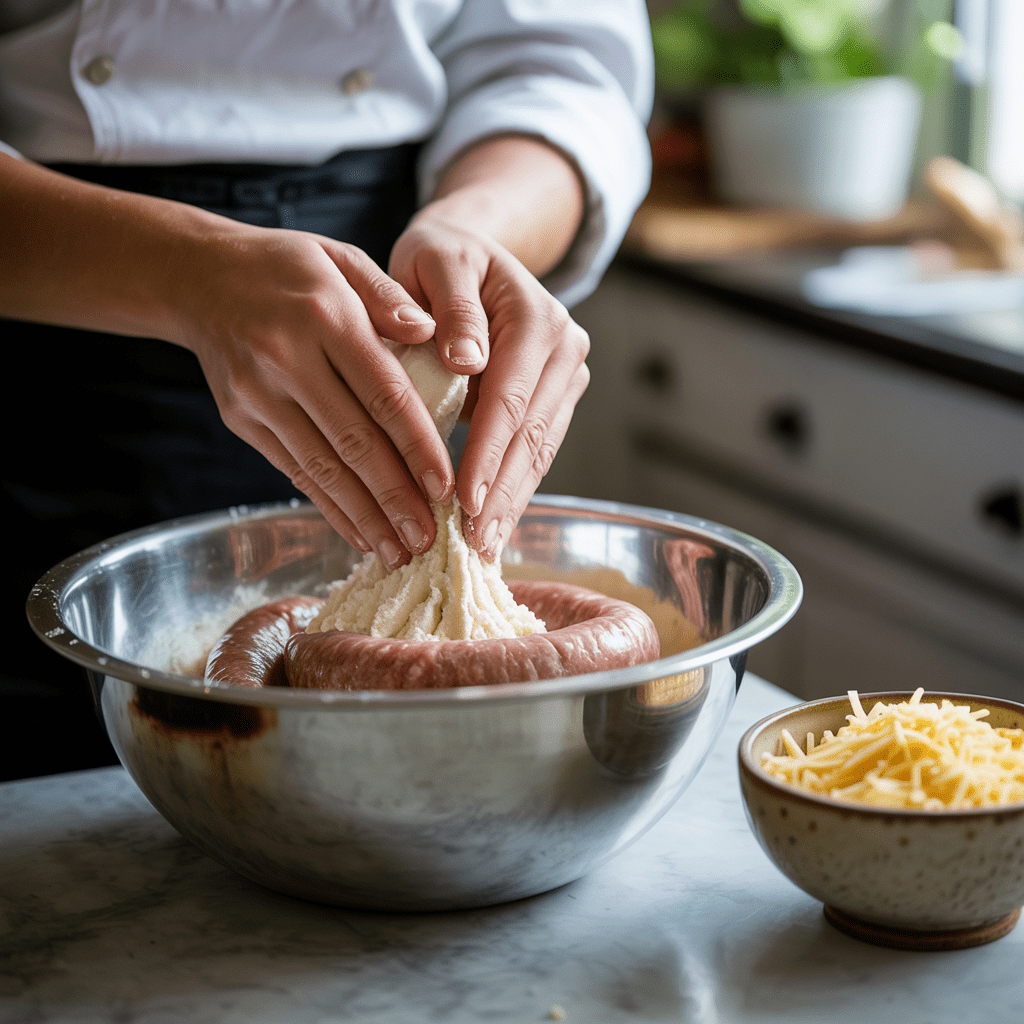
Ingredients
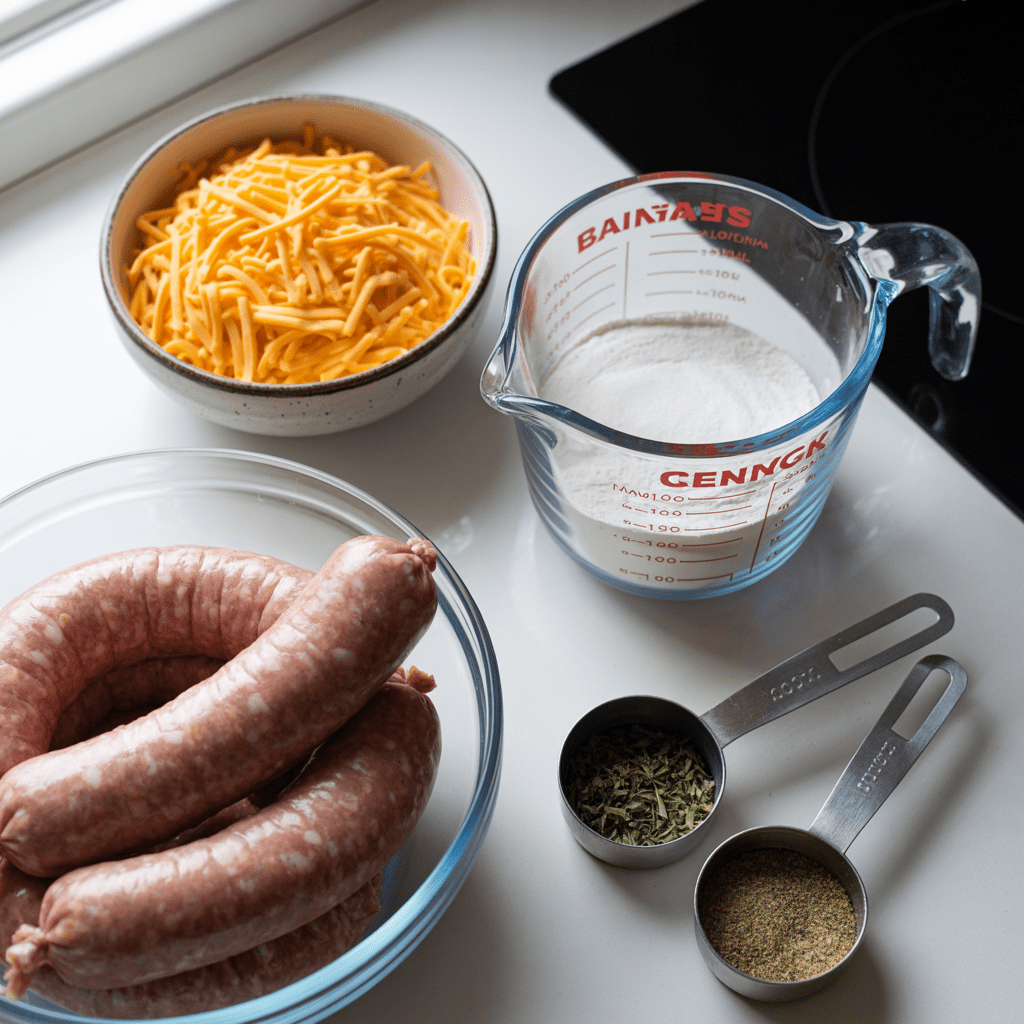
Core three ingredient base
For about 32 to 36 sausage balls:
- One pound bulk pork sausage
- Use mild breakfast sausage for a classic flavor.
- Use hot or spicy sausage if you want more heat.
- Two cups baking mix
- Use a biscuit or pancake style baking mix that already contains flour, fat, and leavening, often sold under brands similar to the well known Bisquick sausage balls recipes.
- Two cups shredded cheddar cheese
- Medium or sharp cheddar melts well and gives good flavor.
- Freshly shredded cheese melts very smoothly, but pre shredded cheese also works and is common in real home kitchens.
Ingredient notes
- Sausage temperature: Let the sausage sit at room temperature for about twenty to thirty minutes before mixing so it is not ice cold. This helps it blend evenly with the baking mix. Keep it covered and out of the temperature danger zone longer than needed. Food Safety and Inspection Service
- Cheese temperature: Keep the cheese cold when you stir it in. Cool cheese holds its shape a bit longer, which helps the mixture feel less greasy as you roll the balls.
- Baking mix type: A mix that contains both fat and leavening helps the balls puff slightly and stay tender instead of dense.
Optional flavor additions
These keep the spirit of a three ingredient appetizer while adding a little personality:
- One quarter teaspoon garlic powder
- One quarter teaspoon onion powder
- One quarter teaspoon smoked paprika or regular paprika
- A pinch of black pepper or red pepper flakes
- One to two tablespoons finely chopped fresh parsley or chives
You can also offer dipping sauces instead of adding many extra ingredients directly to the dough, which keeps the base recipe simple.
Required Tools for Making the Recipe
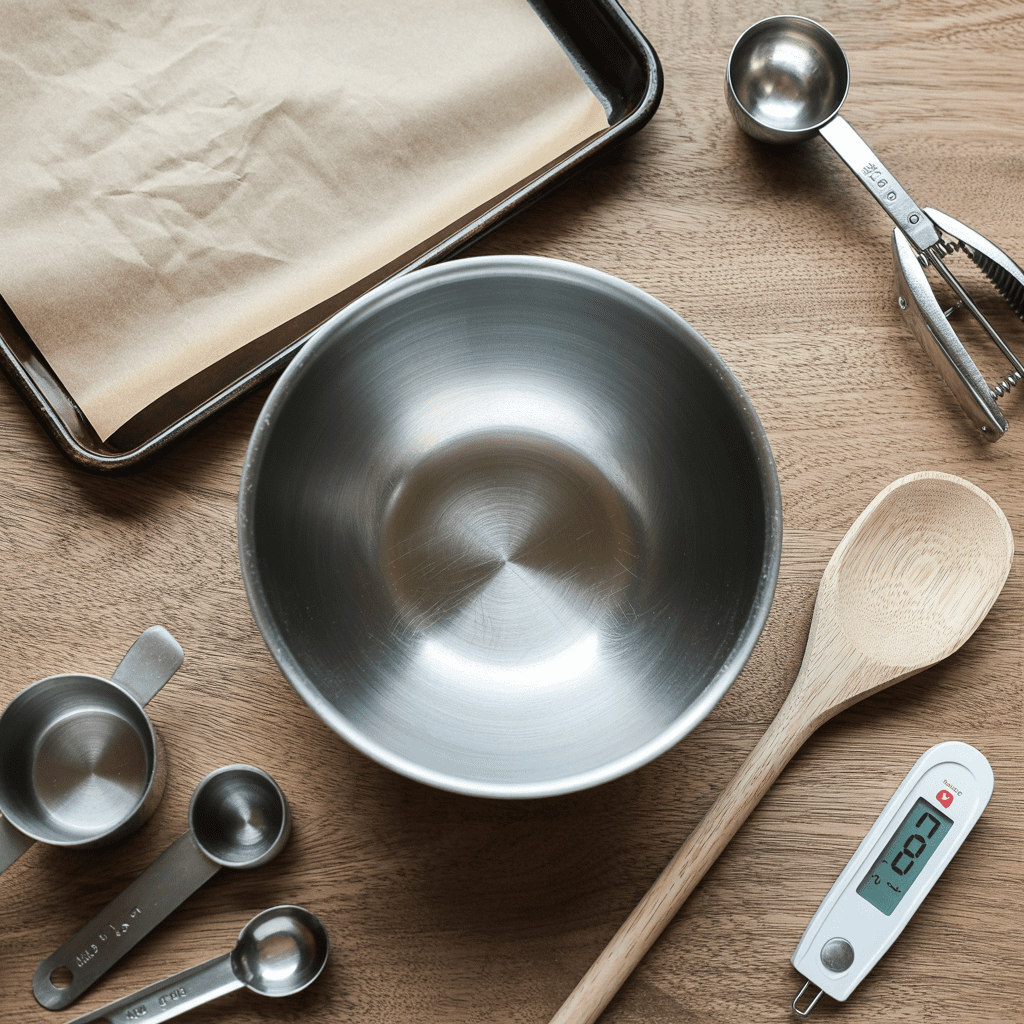
You do not need special equipment to make retro sausage balls, but a few basic tools make the process smoother.
- Large mixing bowl: Big enough to hold one pound of sausage plus baking mix and cheese with room to stir.
- Measuring cups and spoons: For accurate amounts of baking mix and any optional seasonings.
- Sturdy mixing spoon or clean hands: The mixture is thick. A strong spoon, silicone spatula, or your hands make blending easier.
- Rimmed baking sheet or sheet pan: A rim keeps any fat from the sausage contained as it renders.
- Parchment paper or silicone baking mat: Prevents sticking and makes it easy to lift the sausage balls off the tray after baking.
- Small cookie scoop or tablespoon (optional): Helps portion even balls so they bake in the same amount of time.
- Oven: Preheated for consistent results.
- Instant read thermometer (recommended): To confirm that the center of a sausage ball has reached at least 160 degrees F, the current safe minimum internal temperature for ground pork and sausage.
Method: Step by Step Preparation Guide
Step 01: Preheat the oven and prepare the pan
- Set your oven rack in the center position.
- Preheat the oven to 350 degrees F. Many trusted sausage ball recipes use a range from 350 degrees F to 375 degrees F. Three hundred fifty degrees gives a good balance of browning and even cooking.
- Line a rimmed baking sheet with parchment paper or a silicone mat. This helps prevent sticking and makes cleanup easy.
Step 02: Bring the ingredients to the right temperature
- Place the bulk sausage in a large mixing bowl and let it sit at room temperature for about twenty minutes while the oven heats. The sausage should soften slightly but still feel cool to the touch.
- Keep the shredded cheese in the refrigerator until you are ready to stir it in.
According to food safety guidelines, raw sausage and other perishable foods should not remain in the danger zone between 40 and 140 degrees F for more than two hours in total, including preparation and serving time.
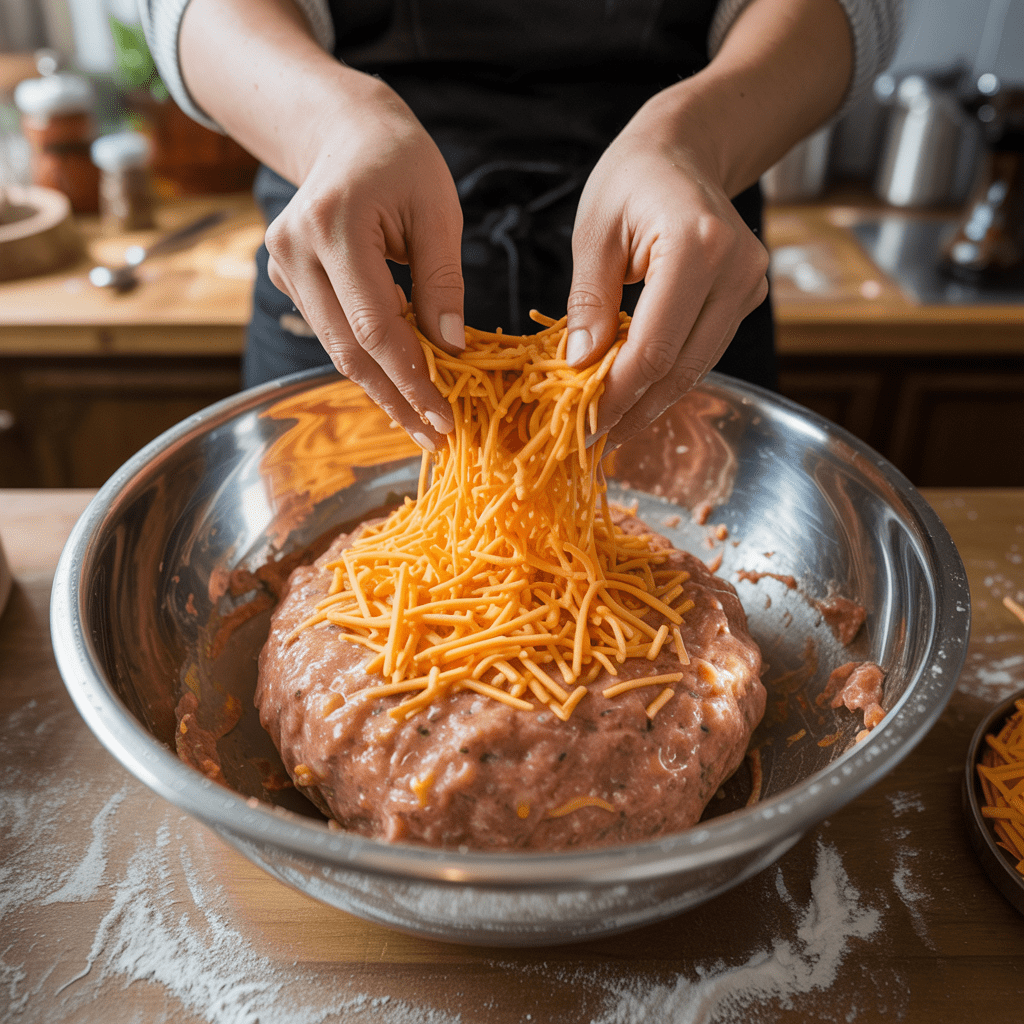
Step 03: Mix the base
- Sprinkle the baking mix over the softened sausage in the bowl.
- If using optional dry seasonings, add them now.
- Use a sturdy spoon or your hands to begin working the baking mix into the sausage. At first it will look dry and crumbly. Keep pressing and folding until the mixture starts to clump together.
- Add the shredded cheese in two batches, mixing thoroughly after each addition.
What the mixture should look and feel like:
- When properly mixed, the dough feels dense and slightly tacky but not wet or greasy.
- You should be able to squeeze a handful and have it hold together without cracking apart.
- If it crumbles, keep mixing a little longer so the fat from the sausage hydrates more of the baking mix.
If the mixture still seems too dry after several minutes of mixing, many experienced cooks add about one to three tablespoons of milk to help it bind. Add only a small splash at a time so the dough does not become sticky or loose.
Step 04: Shape the sausage balls

- Scoop about one rounded tablespoon of the mixture for each ball. A small cookie scoop helps keep them even.
- Roll each portion gently between your palms until it forms a smooth, firm ball about one to one and one quarter inches across.
- Place the balls on the lined baking sheet, leaving at least one inch of space between them. This allows hot air to circulate so they brown instead of steam.
Optional chilling step:
For very neat, round sausage balls, cover the tray and chill the shaped pieces in the refrigerator for about twenty to thirty minutes before baking. Many recipe developers note that chilling helps the balls hold their shape and reduces spreading.
Step 05: Bake

- Place the baking sheet on the center rack of the preheated oven.
- Bake for about twenty to twenty five minutes, until:
- The tops are lightly golden.
- The bottoms are a deeper golden brown.
- The sausage balls feel firm when gently pressed with a spoon.
To be sure they are safe to eat, use an instant read thermometer. Insert it into the center of one of the larger sausage balls. The internal temperature should reach at least 160 degrees F for ground pork and sausage according to current USDA and FoodSafety guidelines.
If your oven runs cool, you may need a few extra minutes. If you made very small balls, start checking around the fifteen to eighteen minute mark.
Step 06: Cool and serve

- Remove the tray from the oven and let the sausage balls rest for about five minutes on the pan.
- Transfer them to a serving platter while still warm.
- Serve plain or with toothpicks and a variety of dipping sauces, such as ranch dressing, honey mustard, barbecue sauce, or spicy ketchup.
Variations and flavor ideas
You can keep the base recipe the same while changing the personality in small ways.
- Spicy sausage balls: Use hot or spicy sausage and add a pinch of red pepper flakes.
- Different cheeses: Try part cheddar and part pepper Jack or smoked cheddar for extra depth. Many trusted recipes encourage cheese variations.
- Breakfast twist: Serve the sausage balls alongside scrambled eggs, fruit, or biscuits for Christmas brunch.
- Mini size: Make smaller balls using about two teaspoons of dough each. They may bake in about fifteen to eighteen minutes. Watch closely since small pieces cook faster.
- Larger size: If you form slightly larger balls, add a few minutes to the baking time and always check the internal temperature in the center.
Key Advantages of Making 3-Ingredient Sausage Balls
- Only three main ingredients
- You need just sausage, baking mix, and cheese. Everything else is optional, which keeps this recipe very approachable for beginners.
- Nostalgic, crowd pleasing flavor
- The combination of seasoned sausage and melty cheddar tastes familiar and comforting, which is why these sausage cheese puffs often show up at retro holiday appetizer spreads and long running family gatherings.
- Easy to scale for parties
- Doubling the recipe is straightforward. Use two pounds of sausage, four cups of baking mix, and four cups of cheese, then bake on two trays.
- Great for make ahead cooking
- You can mix, shape, and chill the balls in advance, or freeze them either before or after baking. This lets you work ahead for Christmas brunch or a game day snack table.
- Flexible serving ideas
- Serve them as an appetizer, tuck leftovers into breakfast sandwiches, or pack a few in a lunchbox with raw vegetables and fruit.
Mistakes to Avoid
Mixture that is too dry and crumbly
If the sausage is very cold or the baking mix ratio is too high, the mixture may not hold together.
- Make sure the sausage has softened slightly at room temperature.
- Work the dough longer so the fat coats more of the baking mix.
- If needed, add a small splash of milk at a time until the dough just holds together.
Mixture that is greasy or loose
This can happen if the sausage has a very high fat content or if you add too much liquid.
- Use standard breakfast sausage rather than extremely fatty specialty sausage.
- Avoid adding extra milk unless the dough truly seems dry.
- Chill the shaped balls for twenty to thirty minutes before baking so they firm up.
Undercooked sausage balls
Raw or undercooked sausage is unsafe to eat.
- Do not rely only on color because cheese and baking mix can brown even while the center is undercooked.
- Use an instant read thermometer to check that the center reaches at least 160 degrees F.
Over baked sausage balls that are dry
If baked too long, sausage balls can become tough and dry.
- Start checking around the eighteen to twenty minute mark.
- Remove them when they are just golden and firm.
- Remember that they continue to firm up slightly as they rest on the hot pan.
Crowded baking sheet
If the balls are packed tightly together, they may steam instead of browning.
- Leave space between each piece.
- Use two trays if needed rather than stacking everything onto one pan.
Expert Tips and Real Life Examples
- Adjusting bake time for different sizes
- Smaller pieces cook faster. If you roll very small balls, begin checking for doneness at around fifteen minutes. Larger balls may need up to twenty five minutes but always verify with a thermometer.
- Chilling for tidy shapes
- For neat, round sausage balls that look nice on a platter, chill the formed pieces before baking. The slight chill helps them keep their shape while the cheese melts.
- Keeping them warm for a party
- After baking, you can keep sausage balls warm at about 200 degrees F in the oven for thirty to forty five minutes. Cover loosely with foil so they do not dry out.
- For a long buffet, transfer them to a small slow cooker set on warm, and stir occasionally so they heat evenly.
- Make ahead strategies – Mix and refrigerate
- Mix the dough and refrigerate it, tightly covered, for up to one day. Shape and bake just before serving.
- Shape the sausage balls, arrange them on a tray, cover well, and refrigerate for up to about twenty four hours before baking.
- Place the shaped balls on a tray and freeze until firm.Transfer to a freezer bag or airtight container.Bake from frozen at 350 degrees F, adding about five minutes to the baking time, and check the internal temperature to confirm doneness.
- Real life serving ideas
- For Christmas brunch, place the sausage balls next to a platter of scrambled eggs, cinnamon rolls, and fruit salad so guests can mix sweet and savory bites.
- For a game day snack spread, keep them warm in a small slow cooker and offer ranch, barbecue, and hot sauce on the side.
- For a quick weekday breakfast, reheat a few in the air fryer and serve with orange slices.
Nutrition Facts (Per Serving)
The exact nutrition will vary depending on the brand of sausage, cheese, and baking mix you use. The following is an estimate based on standard ingredient data for a batch made from:
- One pound pork breakfast sausage
- Two cups biscuit style baking mix
- Two cups shredded cheddar cheese
If the recipe yields 36 sausage balls and one serving is three sausage balls, then one serving provides approximately:
- Calories: about 250 to 280 kcal
- Total fat: about 20 grams
- Saturated fat: about 8 to 10 grams
- Carbohydrates: about 7 to 9 grams
- Protein: about 12 to 14 grams
- Sodium: roughly 450 to 550 milligrams
These values are estimates calculated from typical USDA style ingredient databases and should be used as a general guide only, not as medical or dietary advice. Ingredient brands, fat content, and ball size can change the numbers.
Frequently Asked Questions
Q1: Can I make sausage balls ahead of time and reheat them?
Yes. You can bake sausage balls a day in advance, cool them completely, and store them tightly covered in the refrigerator. Reheat in a 325 to 350 degree F oven for about ten minutes, until hot in the center. This matches guidance from many trusted recipe developers who reheat cooked sausage balls at a similar temperature and time.
Q2: Can I freeze sausage balls, and how do I do it safely?
You can freeze both unbaked and baked sausage balls. For unbaked, freeze the shaped balls on a tray, then store them in an airtight container for up to about three months. Bake from frozen at 350 degrees F, adding a few extra minutes and checking that the internal temperature reaches at least 160 degrees F. For baked sausage balls, cool completely, freeze, and reheat later in the oven or air fryer until hot. These time frames are consistent with common freezer storage guidance for cooked sausage and similar foods
Q3: What kind of sausage and cheese works best?
Mild pork breakfast sausage is the most classic choice for retro holiday appetizer versions, while hot sausage adds more spice. Use bulk sausage rather than links, since it mixes more easily. For cheese, shredded cheddar is the standard, but many cooks use sharp cheddar, extra sharp cheddar, or a blend that includes pepper Jack or mozzarella for different flavor profiles.
Q4: How do I know when sausage balls are fully cooked?
Look for a golden brown color on the outside, firm texture when gently pressed, and no visible raw sausage in any cracks. The most reliable method is to use an instant read thermometer. Insert it into the center of a sausage ball. The internal temperature should reach at least 160 degrees F, which is the current safe minimum for ground pork and sausage according to USDA style guidance.
Q5: How should I store leftovers and how long do they keep in the fridge?
Cool leftover sausage balls, then store them in an airtight container in the refrigerator. According to USDA and FoodSafety storage charts, cooked sausage keeps safely for about three to four days at or below 40 degrees F, which aligns with recommendations from many cooking sites that discuss sausage balls specifically
Conclusion
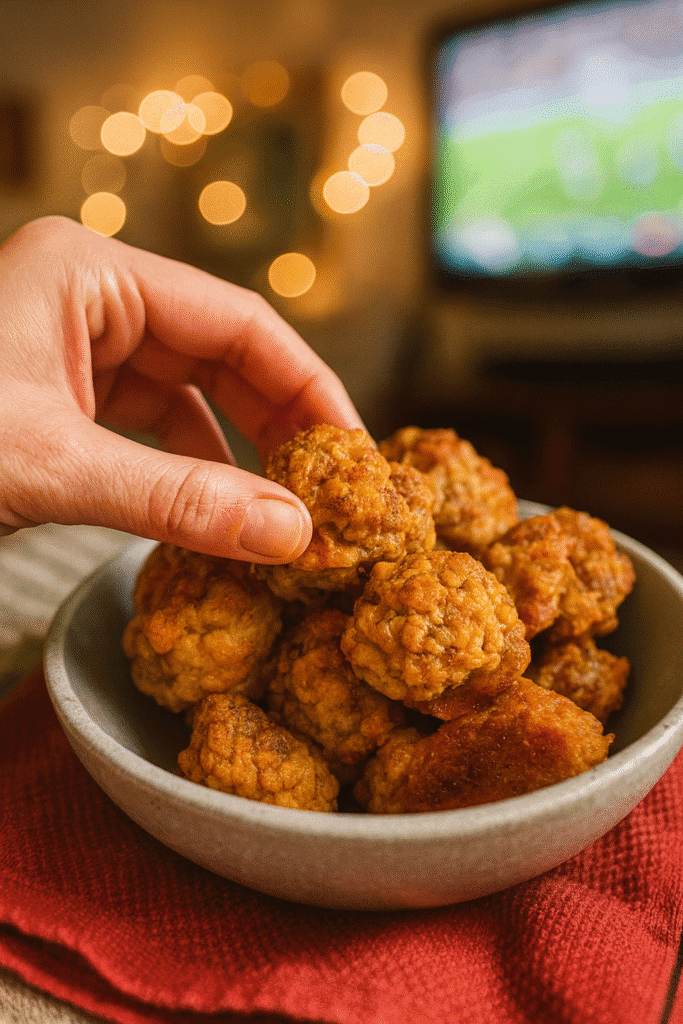
Cozy close up of a hand reaching for a baked large size sausage ball from a festive platter, with soft focus lights or a game on television in the background to emphasize the nostalgic feel.
Retro three ingredient sausage balls are a perfect example of why simple recipes last for generations. With just sausage, baking mix, and cheese, you can create a warm, savory snack that fits just as easily on a Christmas brunch table as it does on a casual game day snack spread.
By understanding the right ratios, mixing until the dough is cohesive, shaping evenly, and baking to a safe internal temperature, even a brand new cook can turn out a tray of sausage cheese puffs that taste like a long time family favorite.
Use this base recipe as a starting point, then play with different sausage flavors, cheese blends, and dipping sauces. Over time, your version of sausage balls can become one of those recipes that friends and family request every year, scribbled on a card and pulled out whenever the holidays roll around.

Retro 3-Ingredient Sausage Balls for Parties and Brunch