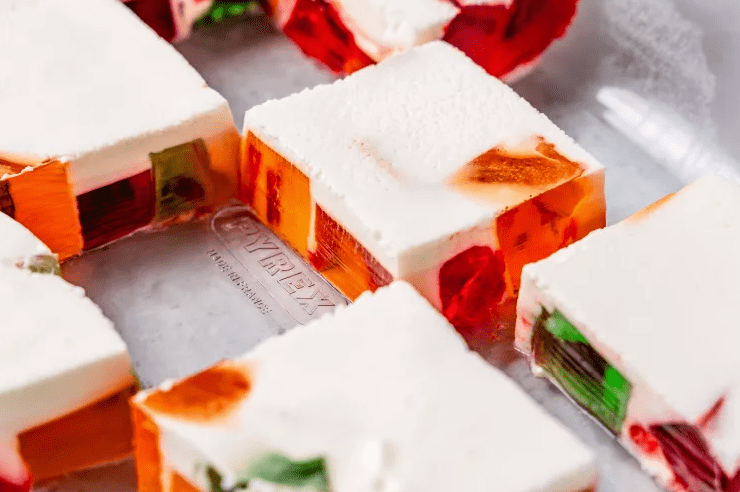
Broken Glass Jell O looks like something from a fancy bakery window, but it is really a simple creamy gelatin dessert filled with colorful cubes of flavored gelatin. People also call it stained glass Jell O, broken window Jell O, or cathedral window gelatin. It is cold, jiggly, and sweet, with a mosaic pattern that makes kids and adults stop and stare before they take that first bite.
I started making this for family gatherings when my nieces were small, and it quickly became the dessert they requested for report card celebrations, birthdays, and holiday parties. It does ask for some chilling time, but the actual hands on work is very straightforward. You mix, chill, cube, and pour, then let the refrigerator do the rest.
Time and Serving
Plan this dessert at least one day before you want to serve it. The cubes need to set fully, and the creamy layer needs its own chilled time so that slices hold their shape. Many home cooks, and several well known recipes, spread the work over two or three days for convenience.
Time guide
• Prep time, mostly mixing and cutting: about 30 to 40 minutes total
• First chilling, colored gelatin: at least 6 hours, up to overnight
• Second chilling, after assembly: at least 8 hours, up to 2 days
• Total time: about 14 to 24 hours, mostly inactive refrigerator time
Yield and serving size
• Yield: about 8 generous servings from a standard bundt mold or a 9 by 13 inch dish
• Serving size: 1 slice or square, roughly one eighth of the dessert
Because this is a fully chilled, dairy rich dessert, it should stay refrigerated until serving and returned to the fridge within about two hours, in line with general food safety advice for perishable foods.
Insight of the Broken Glass Jell O

What it is
Broken Glass Jell O is a creamy gelatin dessert made by folding small cubes of brightly colored flavored gelatin into a lightly sweet white creamy gelatin base. When you slice it, the cross section looks like stained glass or a mosaic in a church window. The texture is soft and wobbly, with bouncy fruit flavored cubes suspended in a smooth, milky layer.
The flavor depends on the gelatin you choose. Citrus cubes give a refreshing, almost sherbet like taste. Red berry flavors make it taste like a cream soda float. The creamy base mellows everything so it never feels too strong or sugary in one bite.
Other names and variations around the world
In American style cookbooks and online recipes you will often see names like stained glass Jell O, broken window dessert, or cathedral window gelatin. The basic idea is the same each time, a creamy base wrapped around colorful cubes.
In the Philippines and other parts of Southeast Asia, there is a similar dessert made with gulaman, which is a jelly dessert made from agar agar, a gelling substance derived from seaweed. Many cathedral window or broken glass style Filipino recipes use agar agar together with coconut milk or cream to create a plant based version that sets more firmly than animal based gelatin.
This recipe focuses on the supermarket style version that uses flavored gelatin powders and unflavored gelatin packets that most readers will find easily in American or Western grocery stores.
Why it matters to you as the cook
This dessert is especially useful when you need:
• A make ahead dessert for holidays, birthdays, graduation parties, and potlucks
• A kid friendly project older children can help with, especially cutting cubes and arranging colors
• A centerpiece dessert that looks impressive on the table without requiring baking skills or special pastry tools
You can match the colors to the occasion, use simple pantry style ingredients, and rely on basic equipment you likely already own. It is a great recipe to keep in your back pocket for times when you want something nostalgic and playful that still feels polished on a serving platter.
Ingredients
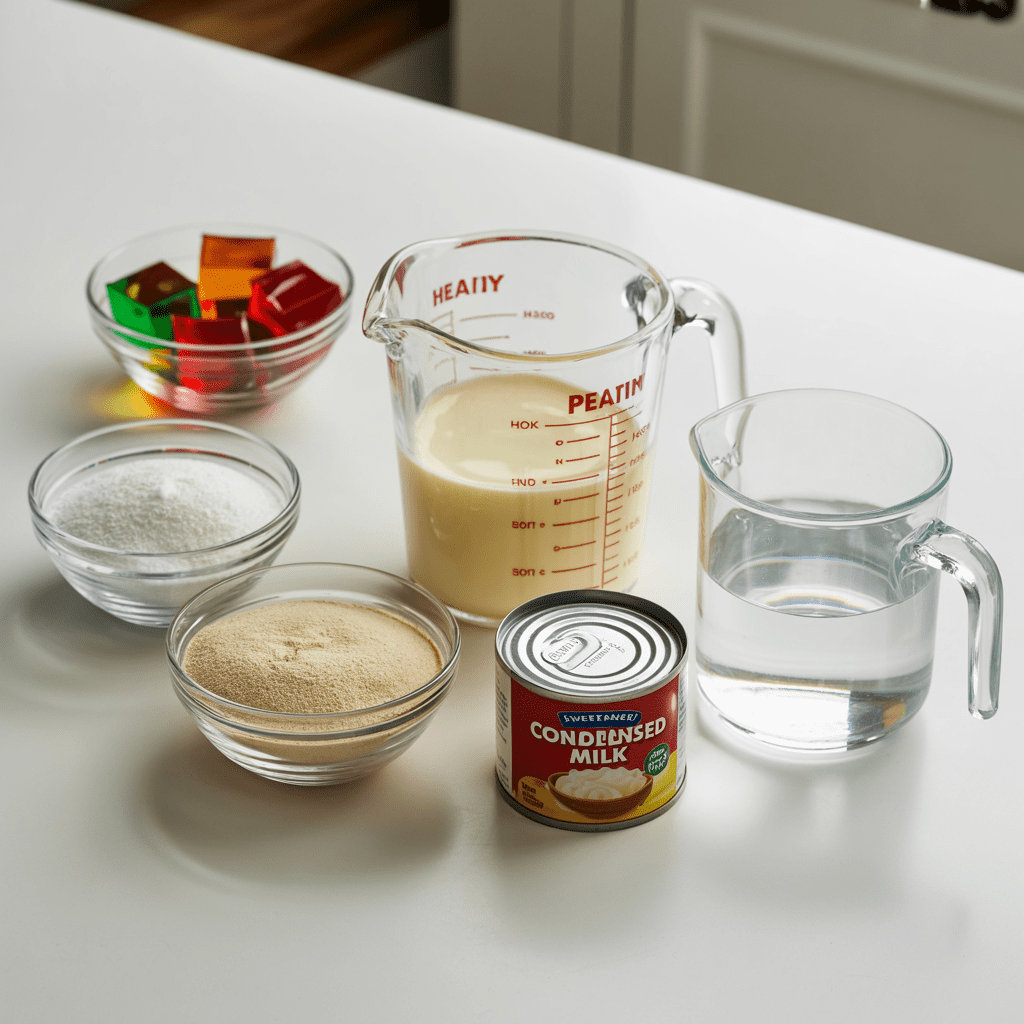
The amounts below make one standard bundt mold or one nine by thirteen inch glass dish.
For the colored gelatin cubes
• Four small boxes flavored gelatin, about three ounces each, in different colors and flavors
Think strawberry, cherry, lime, orange, or grape
• Boiling water and cold water as directed on each box
Most three ounce boxes call for about one cup boiling water and one cup cold water per box
For the creamy white gelatin base
• Four envelopes unflavored gelatin, about one quarter ounce each
• Two cups boiling water
• One and one half cups heavy cream, well chilled
• One can sweetened condensed milk, about fourteen ounces
Optional add ins and garnishes
These are not required but can make the dessert more festive.
• Extra whipped cream for topping
• A few small berries or canned fruit pieces on the side
• Colorful sprinkles scattered on the plate or just around the dessert
• Thin curls of white chocolate as a garnish on the platter
Possible substitutions
• For a slightly lighter but still creamy base, you can replace about half of the heavy cream with evaporated milk. The dessert will be a little less rich and the texture slightly firmer.
• For a softer, less bouncy base, you can reduce the unflavored gelatin to three envelopes. This makes slices more delicate and may be better for serving in a dish rather than unmolding.
• For a lower sugar approach you can use sugar free flavored gelatin mixes and a light sweetened condensed milk, keeping in mind that the flavor and sweetness will change.
Required Tools for Making the Recipe

You do not need fancy equipment, but having the right containers makes the job smoother.
• Four medium heatproof bowls, one for each flavor of gelatin
• Heatproof measuring jug or kettle for boiling water
• Whisk and large spoon or silicone spatula
• Two or more shallow containers or pans to set the colored gelatin
Flat surfaces make it easier to cut neat cubes later
• One clear nine by thirteen inch glass baking dish or one decorative bundt mold
• Sharp knife and cutting board for slicing the set gelatin
• Large mixing bowl for whipping the cream
• Hand mixer or stand mixer for the cream, or a sturdy whisk if you prefer to whip by hand
• Plastic wrap or snug fitting lids for covering containers during chilling
Using a clear glass dish makes the stained glass pattern visible from the side, which is fun when you bring the dessert to the table. Using a bundt mold gives you a tall centerpiece shape with fluted sides that looks especially elegant on a cake stand.
Method: Step by Step Preparation Guide
Step One: Prepare the colored gelatin cubes
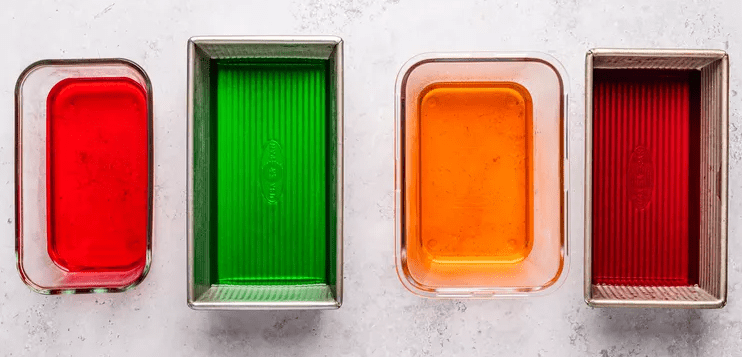
- Lightly clear some space in your refrigerator. You will need room for several shallow containers and for the final dish or mold.
- Empty each flavored gelatin packet into its own bowl. For example, strawberry in one bowl, lime in another, and so on.
- Add the amount of boiling water specified on each box, usually about one cup. Whisk slowly at first so the powder does not puff up, then more briskly until the mixture looks completely clear. There should be no visible grains or streaks of sugar at the bottom. Following the package directions helps ensure the gelatin concentration is correct for a firm, sliceable texture.
- Add the cold water called for on the box and stir again until the liquid is uniform.
- Pour each color into its own shallow container. A container that holds about two cups and allows the liquid to sit in a layer about one inch deep works well. A rectangular shape makes cubing much easier later.
- Cover each container and place them carefully in the refrigerator. Chill for at least six hours. Overnight is even easier, which is why many people make the colored cubes the day before assembling the dessert.
The gelatin is ready when it feels very firm and there is no wobble under the surface when you press gently with a fingertip.
Step Two: Cube and arrange the gelatin
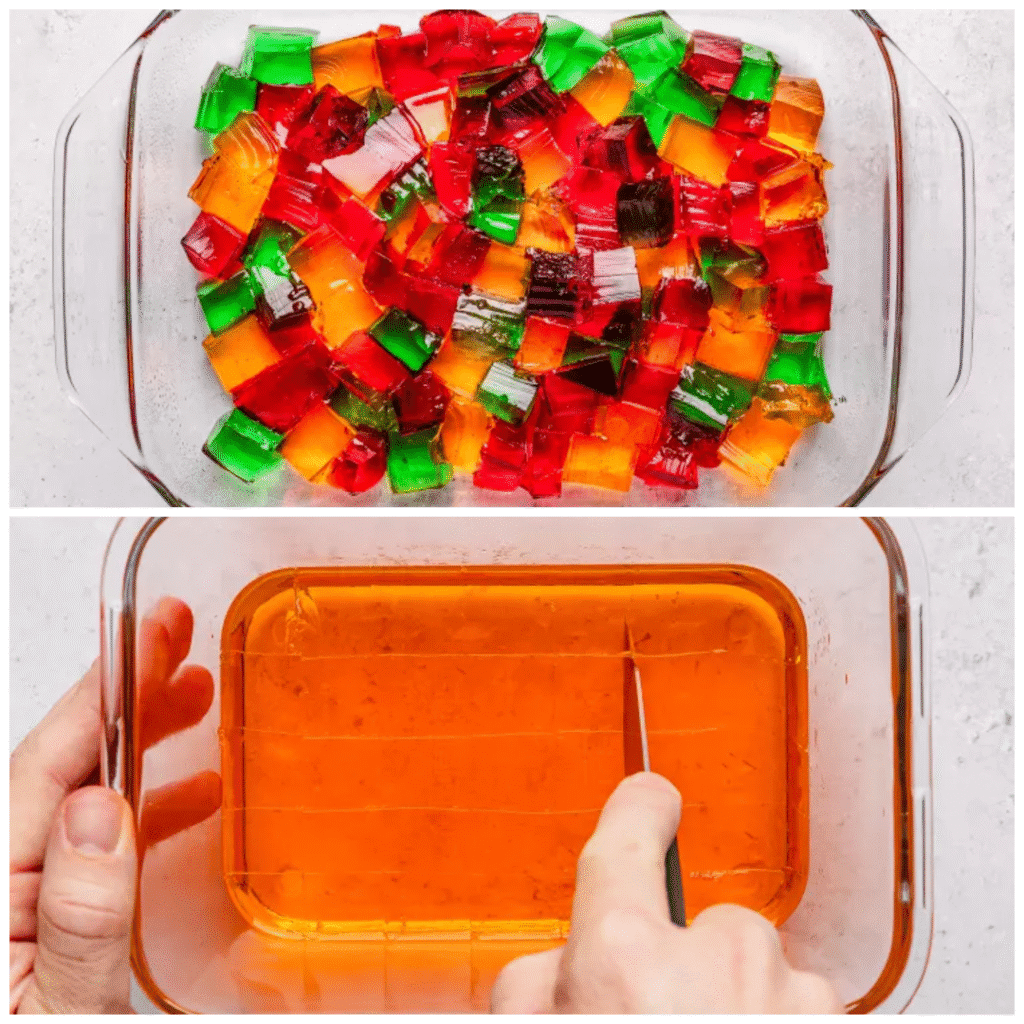
- Run a thin knife around the edge of each container to loosen the gelatin slightly.
- Turn the container so the gelatin is on a cutting board, or cut it directly in the container if that is easier. Slice into even strips one direction, then turn and slice again to form small cubes. They do not need to be perfect; part of the charm is the slightly uneven shapes that catch the light.
- Transfer the cubes from all colors into your serving dish or bundt mold. As you go, lightly mix the cubes with your hands or a spoon so that the colors are evenly distributed. I usually have a child helper for this part, and it turns into a game of making sure no one color clumps in one corner.
- Place the dish or mold with the cubes back into the refrigerator while you prepare the creamy base. This keeps everything cold and ready for the next step.
Step Three: Prepare the creamy white gelatin base

This step uses unflavored gelatin, which sets the creamy mixture around the cubes.
- Pour the unflavored gelatin into a medium bowl. Add the boiling water and whisk slowly at first, then more firmly, until every bit of gelatin is dissolved. The liquid should look completely clear.
- Let this mixture cool at room temperature until it feels just warm to the touch. You should be able to touch the outside of the bowl comfortably without feeling heat. This usually takes about fifteen to twenty minutes.
Letting the mixture cool matters because very hot gelatin can cause cream or milk to curdle when they are combined, which gives the dessert a grainy look and uneven texture.
Step Four: Whip the cream and combine
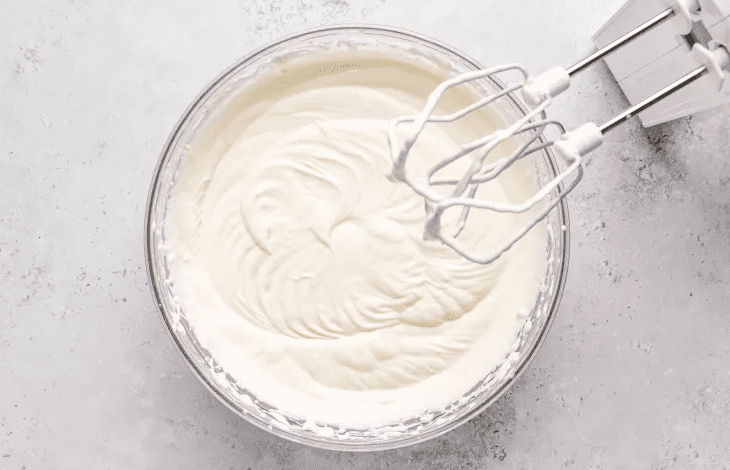
- While the unflavored gelatin mixture cools, pour the chilled heavy cream into a large mixing bowl. Using a hand mixer or stand mixer, whip the cream on medium speed until it forms soft peaks. The cream should hold gentle waves but still look silky and not stiff. This usually takes about three to five minutes, depending on your mixer.
- Add the sweetened condensed milk and whip for another minute or two until everything looks well blended and slightly thicker. The mixture will taste like a very rich, sweet cream.
- Check the unflavored gelatin mixture. If it is still quite warm, give it another few minutes. When it is just warm, slowly pour it into the cream mixture while gently whisking or stirring.
- Mix until you have a smooth, pourable creamy gelatin base with no streaks.
Step Five: Assemble and chill
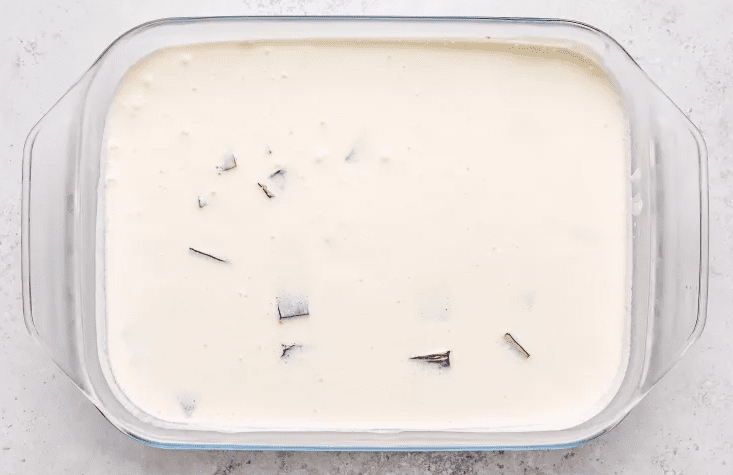
- Take the dish or bundt mold with the colorful cubes out of the refrigerator.
- Slowly pour the creamy gelatin mixture over the cubes. Pouring gradually helps the cream flow around the cubes without dislodging them too much.
- Using a spoon or spatula, gently nudge some cubes if needed so that the colors are distributed throughout the cream. Try not to stir vigorously. Over mixing can smear the colors and make the stained glass effect less clear.
- If you like, let the assembled dessert stand at room temperature for ten to fifteen minutes to release any small bubbles. Then cover the dish or mold tightly and return it to the refrigerator.
- Chill until the dessert is fully set. A realistic window is at least eight hours and up to two days. Many hosts assemble it in the evening and let it chill overnight for the neatest slices.
When you press the top gently, it should feel very firm and spring back without sticking to your finger.
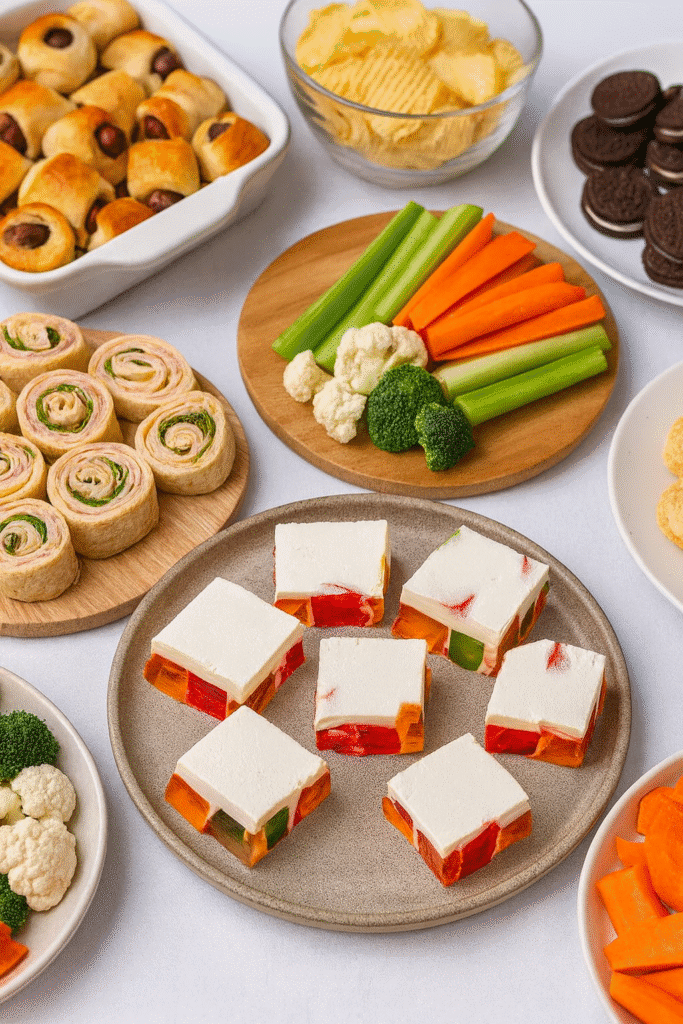
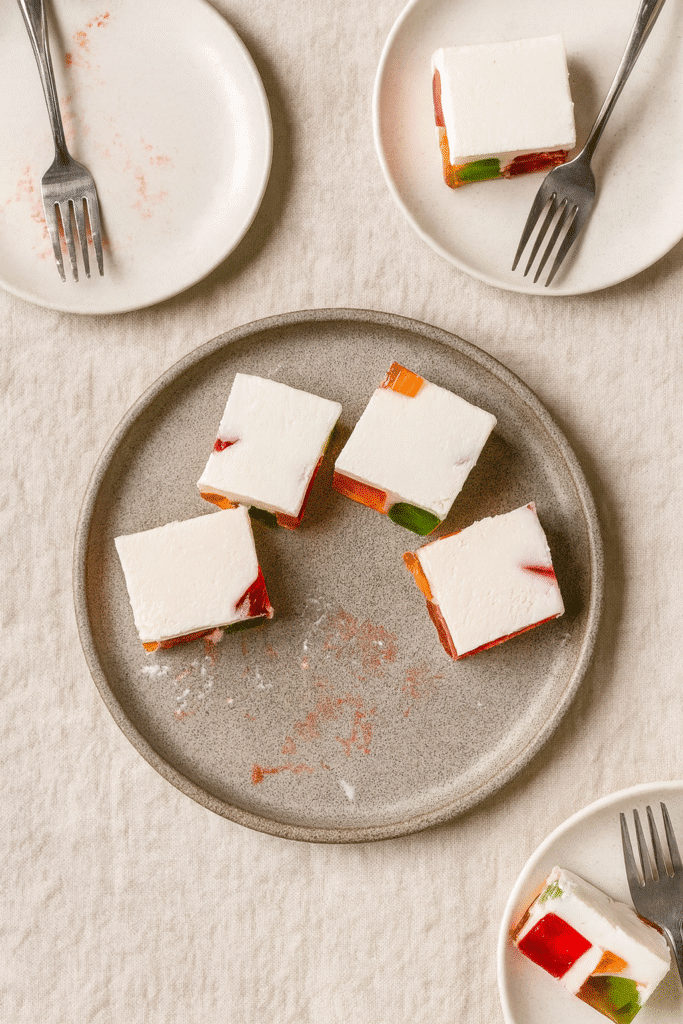
Step Six: Unmold or slice and serve
If using a glass baking dish
- Run a knife along the edges if needed.
- Cut the dessert into squares using a sharp knife, wiping the blade with a warm, damp cloth between cuts for clean edges.
- Lift squares with a small spatula onto plates.
If using a bundt mold
- Fill a larger bowl or your sink with warm water. Place the bottom of the mold in the water for about fifteen to thirty seconds. Avoid hot water, which can melt the edges.
- Gently run a thin knife around the top edge and the center tube to loosen the dessert.
- Place a serving platter over the mold, hold them together firmly, and flip. You may hear a soft release sound as the dessert drops onto the platter. If it does not release, repeat the warm water dip briefly and try again.
Serve slices plain, with a small dollop of whipped cream, or with a few berries or fruit pieces on the side.
Simple variations
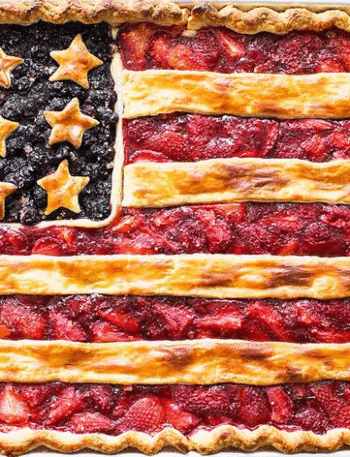
• Color themes for holidays such as red and green for winter holidays, red and blue with white cream for patriotic summer events, or pastels for spring parties.
• Add small pieces of firm canned fruit such as peaches or pears into the layers of cubes. Avoid fresh pineapple, kiwi, and papaya in the creamy layer because enzymes in these fruits can prevent gelatin from setting unless the fruit has been cooked or canned first.
• Make a lighter version by replacing part of the heavy cream with evaporated milk or plain yogurt. The dessert will taste tangier and the texture may be a bit less rich and slightly more jiggly.
Key Advantages of Making Broken Glass Jell O
• Make ahead friendly
You can complete the entire dessert a day or two before your event. This frees up your oven and your attention for main dishes and last minute tasks.
• Eye catching centerpiece
The colorful cubes against the creamy base look more complicated than they are. Guests often ask how long it took, and most are surprised to hear how simple the steps are.
• Customizable colors and flavors
You can match school colors for graduations, team colors for game day, or favorite flavors for birthdays.
• Kid friendly project
Older children can help whisk, cut cubes (with supervision), and arrange colors in the dish or bundt mold. It is a fun way to teach basic kitchen skills and food safety.
• Budget conscious
Flavored gelatin, unflavored gelatin, and shelf stable sweetened condensed milk are usually inexpensive and easy to store, so you can keep them on hand for last minute plans. International Food Ingredients (IFI)
Mistakes to Avoid
Not dissolving gelatin completely
If flavored or unflavored gelatin does not fully dissolve in the hot water, you may end up with grainy bits or areas that do not set properly. This happens when the powder clumps at the bottom of the bowl. To prevent it, always pour the powder into the bowl first, add the hot water, and whisk steadily until the liquid looks totally clear with no visible grains.
Adding dairy to gelatin that is still hot
When very hot gelatin meets cold cream or milk, the dairy can curdle or separate, leaving a lumpy base and sometimes visible little threads. Let the unflavored gelatin mixture cool until just warm before adding it to the cream mixture. If you do see a few tiny lumps, you can pour the mixture through a fine mesh strainer into a clean bowl before combining with the cubes.
Rushing the chilling times
Trying to cut or unmold Broken Glass Jell O when it is only partially set is a recipe for sagging slices and messy edges. Different refrigerators cool at different rates, and several recipes emphasize that the dessert needs to be thoroughly set, often overnight. Plan for the full chill time and resist poking and cutting too early.
Using fruits that interfere with setting
Raw pineapple, kiwi, papaya, and a few other tropical fruits contain enzymes that break down gelatin proteins, which can keep gelatin desserts from setting. Using canned versions of these fruits or cooking them briefly deactivates the enzymes and makes them safe to use in a gelatin dessert.
Over stirring the cubes once the creamy mixture is added
If you stir too much after adding the creamy base, colors can bleed and the neat glass like pieces become streaky. Instead, pour the cream slowly, give a few gentle nudges to redistribute cubes, then stop. The pattern will look crisp and more dramatic in the slices.
Expert Tips and Real Life Examples
Break up the work across days
On busy weeks, I often make the colored cubes on a weeknight. The next evening I prepare the creamy base and assemble the dessert. It chills overnight and is ready to slice the following day for an event. This three day rhythm fits comfortably around work and family schedules and mirrors the plan ahead suggestions from several recipe developers.
Hosting and transport tips
• If you are unmolding a bundt version for guests, unmold it about thirty to sixty minutes before serving, hold it in the refrigerator on its serving platter, and garnish right before it goes to the table.
• For potlucks, I often leave the dessert in a clear glass dish and cut squares on site. A snug fitting lid and a flat space in the car keep the dessert steady. Place the dish in a casserole carrier or on a folded towel to minimize sliding.
Matching colors to events
• For a spring baby shower or brunch, I pick pastel flavors and colors such as peach, lemon, and light berry.
• For winter holidays, red and green cubes in a creamy base look like holiday lights when sliced.
• For school events or graduations, using two gel colors that match school colors is a simple way to make the dessert feel personal. Guests love pointing out the colors before they even taste it.
How people usually respond
The first reaction from children is almost always about the colors. I have heard everything from “It looks like candy glass” to “It is like jelly Lego blocks” when I set it down. Older guests often mention childhood memories and say their mother, aunt, or neighbor made something similar in the nineteen seventies or nineteen eighties.
Portioning for a crowd
For larger gatherings, you can cut smaller squares, about sixteen to twenty pieces from a nine by thirteen inch dish. For a bundt dessert, slice thinner wedges. Label the dessert on a small card with a simple note such as “Broken Glass Jell O with dairy and gelatin” so guests who avoid dairy or gelatin know what is inside.
Nutrition Facts (Per Serving)
Nutrition values vary with exact brands of gelatin, cream, and sweetened condensed milk. Based on a version similar to the one developed by a well known recipe site, a serving that is about one eighth of the dessert made with heavy cream and sweetened condensed milk provides approximately:
• Calories: about 460
• Total fat: about 22 grams
• Carbohydrates: about 38 grams
• Protein: about 31 grams
These numbers are estimates calculated from a standard ingredient database using typical United States products. They do not include optional toppings or fruit. If you use lighter dairy products or sugar free gelatin mixes, the calories and carbohydrates will be lower. For exact numbers that match your ingredients, it is best to use a nutrition calculator with the specific brands and serving size you choose.
Frequently Asked Questions
Q1: Can I use agar agar or gulaman instead of gelatin for Broken Glass Jell O
Yes, but you need to adjust your expectations and follow an agar agar based recipe. Gulaman, often sold as agar agar bars or powder, comes from seaweed and sets more firmly than animal based gelatin. It also needs to be boiled to dissolve. Many Filipino cathedral window desserts use agar agar with coconut milk. You cannot simply swap agar agar for gelatin in this recipe at the same quantity and expect the same texture, so if you want a plant based version, follow a tested broken glass agar agar recipe instead.
Q2: How far in advance can I make Broken Glass Jell O and how long will it keep
You can make the colored cubes one or two days ahead and assemble the dessert one day before serving. Properly covered and refrigerated, many sources and home cooks suggest that this style of gelatin dessert keeps good texture for about three to four days, and is generally safe for up to about a week, as long as it stays chilled and is not left out of the refrigerator for more than about two hours at a time. For best flavor and appearance, I like to serve it within the first three days.
Q3: What flavors and colors of gelatin work best together
Choose colors that contrast with one another so the stained glass effect stands out. A common combination is one red, one green, one yellow or orange, and one blue or purple. Stick with fruit flavors that play nicely together, such as citrus with berry. Strong flavors such as coffee or cola flavored gelatin can overpower the creamy base, so it is usually better to keep those for other desserts.
Q4: How do I fix it if the dessert does not set properly
If the cubes are soft and wobbly, they may not have chilled long enough or the gelatin to water ratio may have been off. In that case, let them chill longer and make sure the refrigerator is cold enough. If the assembled dessert is still loose after many hours, it is difficult to repair without reheating, which would melt the cubes and blur the pattern. In that situation, the easiest approach is to serve it in bowls or glasses as a creamy trifle style dessert rather than neat slices. For the next batch, measure carefully and allow full chilling time.
Q5: Can I make a lighter or dairy free version
You can make a lighter version by using a mix of evaporated milk and half cream, or by using yogurt for part of the creamy base. The dessert will still be tasty but will feel less rich on the tongue. For a dairy free approach you can look for recipes that use coconut milk or other plant based milks together with agar agar or plant based gelatin style products. Because these ingredients behave differently in the refrigerator, follow a tested dairy free broken glass style recipe rather than guessing at substitutions.
Conclusion
Broken Glass Jell O is one of those retro desserts that never really left family tables. It is playful and colorful, yet surprisingly practical for hosts. You get a no bake, make ahead dessert that looks like it came from a fancy buffet, built from simple gelatin packets, cream, and sweetened condensed milk.
Once you understand why each step matters dissolving the gelatin fully, letting the mixture cool before adding dairy, and giving the dessert plenty of time to chill you can rely on this recipe any time you need a fun centerpiece dessert for a crowd.
If you have a holiday, birthday party, graduation, or casual potluck coming up, consider making a pan or bundt of Broken Glass Jell O. Play with different colors and flavors, let the kids help arrange the cubes, and watch it become one of those desserts people start requesting by name. Over time, it may become part of your own family traditions, just as it has in many kitchens around the world.
Broken Glass Jell O – Retro No Bake Make Ahead Dessert