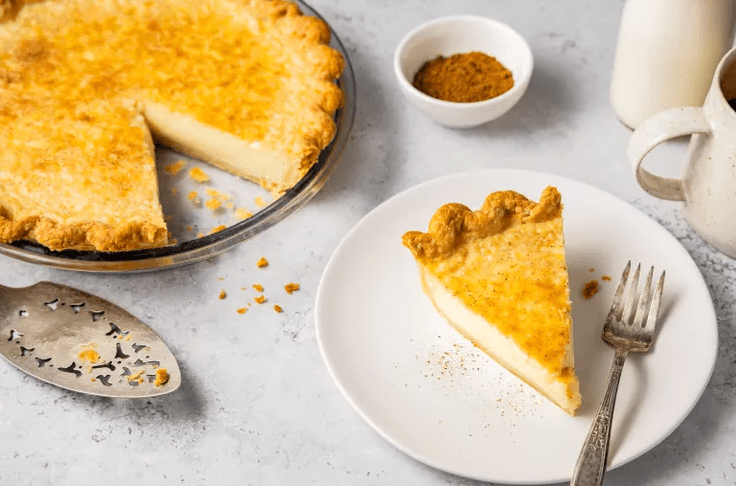
Egg custard pie is one of those quiet, old fashioned desserts that surprises people. It looks simple, but the first bite of silky custard and crisp, buttery crust wins over just about everyone at the table. It has deep Southern roots, uses very basic pantry ingredients, and feels like something a grandmother would pull from the oven on a Sunday afternoon.
In this guide, I will walk you through every step of making a classic egg custard pie at home, from choosing or making the crust, to blind baking, mixing the custard, baking it gently, cooling, chilling, and storing it safely. Along the way you will see why certain steps matter, how to avoid common problems, and how to turn this humble pie into a reliable signature dessert.
Time and Serving
Approximate timing for one nine inch egg custard pie:
- Active prep time (crust and custard): about 30 to 40 minutes
- Chilling time for homemade crust: about 60 minutes
- Blind baking the crust: about 20 to 30 minutes
- Custard baking time: about 40 to 55 minutes
- Cooling to room temperature: about 1 to 2 hours
- Chilling before slicing: at least 2 hours
- Total time including chilling: about 5 to 6 hours
- Servings: about 8 slices from a standard nine inch pie
These times are based on common, well tested custard pie recipes and typical home kitchen conditions.
Insight of the Egg Custard Pie

Egg custard pie is a single crust pie with a baked custard filling. The filling is a mixture of milk, eggs, sugar, and flavorings baked inside a blind baked crust until it is just set and softly jiggly in the center. The crust should be crisp and flaky, strong enough to hold the smooth filling without turning soggy.
Compared with similar Southern desserts:
- Buttermilk pie usually has a tangier flavor and often bakes with a slightly more set, almost cakey custard.
- Chess pie is richer and denser, usually includes cornmeal or a bit of flour for thickening, and is sweeter and more caramelized.
Egg custard pie sits in between. It is gentle, creamy, and lightly sweet, with warm vanilla and nutmeg notes that taste nostalgic and comforting rather than bold or showy.
Why it matters for a home baker:
- Comforting and nostalgic: It tastes like something that has been on family tables for generations.
- Budget friendly: Eggs, milk, sugar, and flour are about as basic as it gets.
- Perfect for gatherings: It works for holidays, church suppers, potlucks, and quiet Sunday dinners.
When you slice into a well baked egg custard pie, you should see:
- A smooth, pale yellow custard with no visible curdling or scrambled bits
- A gentle, even wobble in the center when warm that firms up once chilled
- A crust that feels crisp when the knife breaks through it and stays flaky under the custard
People often serve this pie:
- At Easter or other spring holidays
- At Thanksgiving alongside pumpkin and pecan pies
- After Sunday roast suppers
- At church socials and community potlucks where a familiar, not too rich dessert is welcome
Ingredients
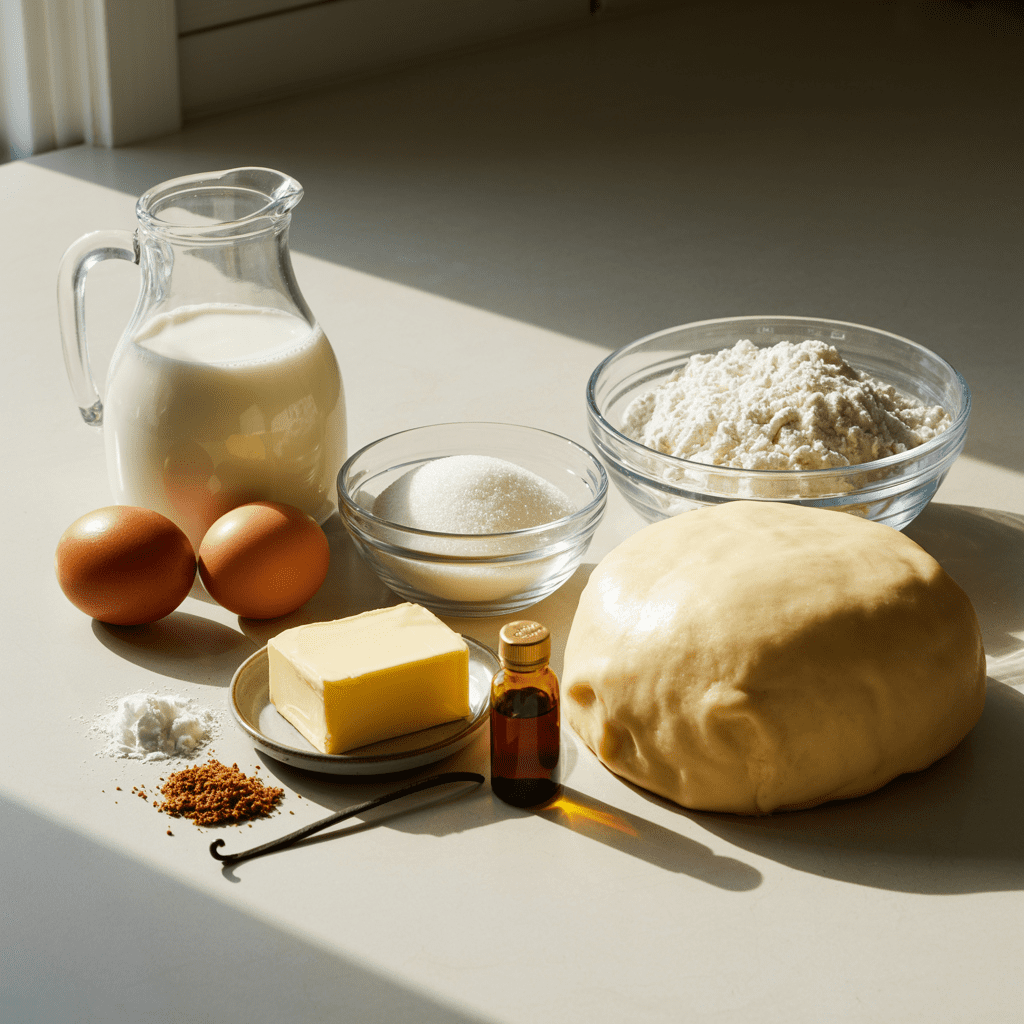
This recipe makes one nine inch egg custard pie that serves about eight people.
For the Pie Crust (Homemade Option)
You can use your favorite all butter pie crust recipe here. This version makes enough for one single crust nine inch pie.
- 1 and 1 quarter cups (150 g) all purpose flour
- 1 tablespoon (12 g) granulated sugar
- 1 half teaspoon fine salt
- 8 tablespoons (113 g) cold unsalted butter, cut into small cubes
- 3 to 5 tablespoons (45 to 75 ml) ice cold water, as needed
Store bought crust option:
If you use a refrigerated rolled crust or a frozen deep dish crust, follow the package instructions for blind baking. A good quality store bought crust makes this recipe faster and is perfectly acceptable for a busy day. The homemade crust will usually be more flavorful and flaky, but the filling is the real star.
For the Custard Filling
- 1 cup (200 g) granulated sugar
- 2 tablespoons (16 g) all purpose flour
- 1 half teaspoon fine salt
- 1 quarter teaspoon ground nutmeg, plus extra for garnish if desired
- 4 large eggs (about 200 g without shells), at room temperature
- 2 tablespoons (28 g) unsalted butter, melted and slightly cooled
- 2 cups (480 ml) whole milk, at room temperature
- 1 tablespoon (15 ml) pure vanilla extract
Why whole milk:
Whole milk makes a creamier custard. If you use low fat milk, the filling can set more softly and taste less rich. Many baking references suggest that custards work best with whole milk or a mix of milk and cream, because the extra fat helps give a silky texture.
Optional Toppings
- Lightly sweetened whipped cream
- A light dusting of freshly grated nutmeg or cinnamon
- Fresh berries on the side for a spring or summer dessert
Required Tools for Making the Recipe
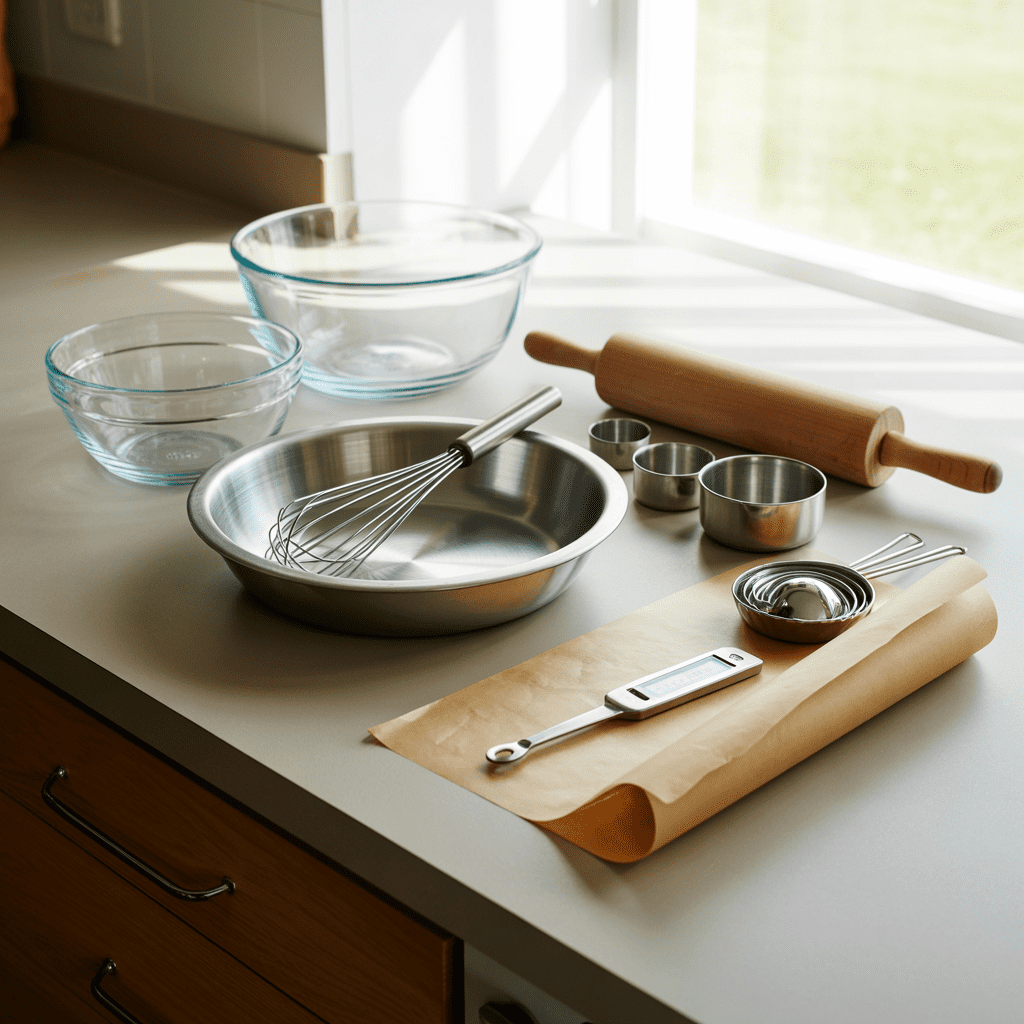
Most of what you need is standard home kitchen equipment:
- 1 standard nine inch pie dish, preferably glass or metal
- 1 medium to large mixing bowl for dry ingredients
- 1 second bowl or large measuring jug for whisking liquids
- Measuring cups and spoons
- Whisk
- Rolling pin (for homemade crust)
- Bench scraper or sharp knife for trimming dough
- Parchment paper or heavy duty foil for blind baking
- Pie weights, dried beans, or uncooked rice to weigh down the crust
- Baking sheet to hold the pie dish for easier handling and to catch spills
- Wire rack for cooling
- Instant read thermometer, optional but very helpful for checking custard doneness
An instant read thermometer takes away much of the guesswork. Food safety agencies recommend that egg mixtures like custards reach at least 160 degrees Fahrenheit in the center so they are safe to eat. Food Safety and Inspection Service
Method: Step by Step Preparation Guide
Step 01: Prepare and Chill the Crust
1.1 Mix the dry ingredients
In a medium bowl, whisk together the flour, sugar, and salt. You want the salt and sugar evenly scattered through the flour so the crust seasons evenly.
1.2 Cut in the butter
Add the cold butter cubes to the flour mixture. Use your fingertips, a pastry cutter, or a food processor to cut the butter into the flour until you have a mixture that looks mostly like coarse crumbs with a few larger pea sized bits of butter. Those little flat pieces of butter will melt in the oven and form flaky layers.
The mixture should feel cool and slightly sandy, with no large chunks of butter left. If it starts to feel greasy or the butter is softening, pause and place the bowl in the refrigerator for a few minutes.
1.3 Add water and bring the dough together
Sprinkle in 3 tablespoons of ice water and gently toss with a fork or your hand. Pinch a small handful of dough. If it holds together without crumbling, you have enough water. If it still falls apart, add water 1 tablespoon at a time until the dough holds.
Turn the mixture out onto the counter and gently press it together into a disk. Avoid kneading the dough like bread. A few visible streaks of butter are a good sign.
1.4 Chill the dough
Wrap the dough disk tightly in plastic wrap and refrigerate it for at least 1 hour. This rest time lets the flour hydrate and the gluten relax, which makes the dough easier to roll and helps keep the crust tender and flaky, a technique commonly recommended in professional pastry references.
Step 02: Roll Out and Fit the Crust

2.1 Roll the dough
Lightly flour your countertop and rolling pin. Place the chilled dough in the center and roll from the middle outward, turning the dough a quarter turn every few strokes. Aim for a circle about 12 inches wide and about 3 millimeters thick.
If the dough sticks, lightly flour the surface again. If it cracks at the edges, you can gently pinch it back together.
2.2 Transfer to the pie dish
Lightly grease the pie dish with a thin smear of butter. Loosely roll the dough around the rolling pin, then unroll it over the dish. Ease it into the corners without stretching. Stretching dough can cause it to shrink in the oven.
Trim the overhang to about 2 centimeters beyond the rim of the dish. Fold that overhang under itself to build up the edge, then crimp with your fingers or press with a fork for a simple pattern.
2.3 Chill again
Place the shaped crust in the refrigerator for at least 20 to 30 minutes while you preheat the oven. Chilling here helps the crust hold its shape and reduces shrinking.
Step 03: Blind Bake the Crust
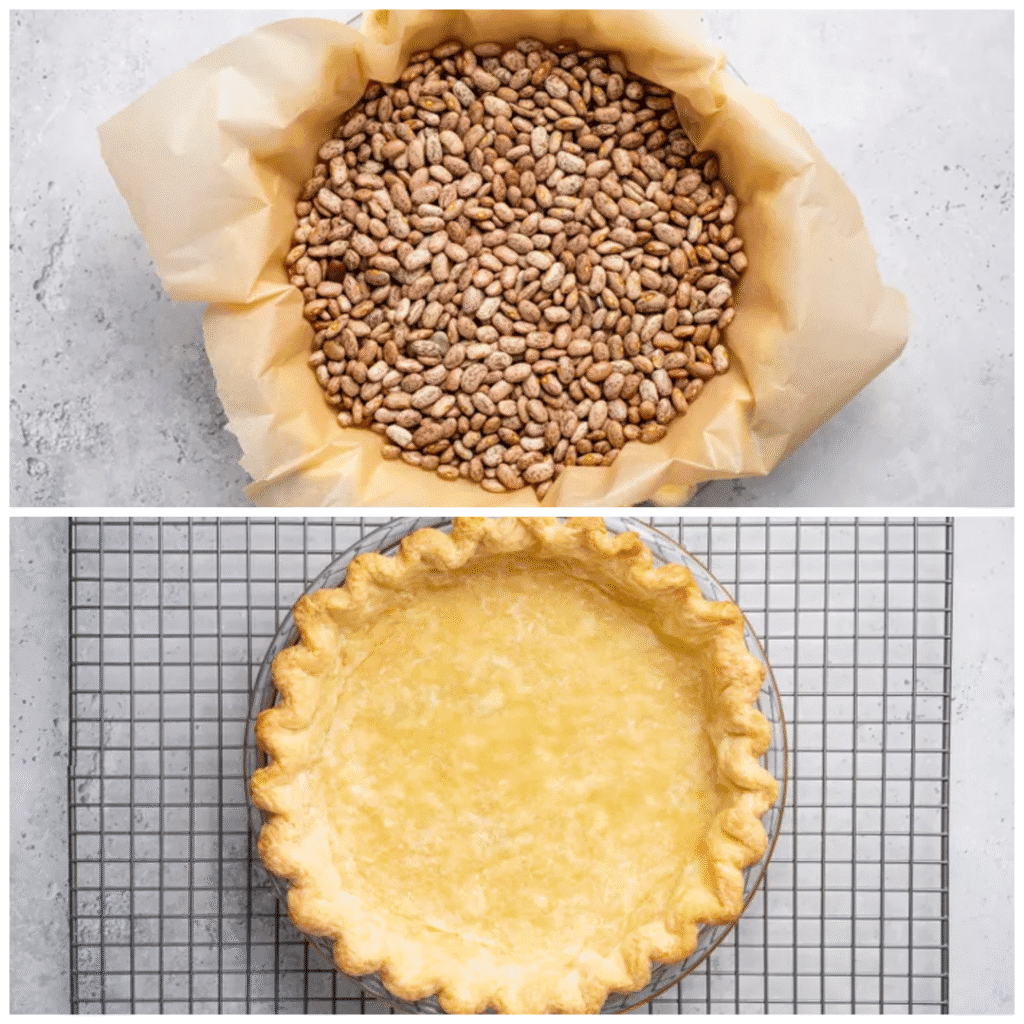
Blind baking means partially baking the crust before adding the liquid custard. This step is important because it helps keep the bottom crisp. If you bake custard in a raw crust, the filling can soak into the dough and leave it soft or even soggy.
3.1 Preheat and prepare
Preheat the oven to 375 degrees Fahrenheit. Place a rack in the center position.
Line the chilled crust with parchment or heavy duty foil, making sure it fits snugly into the corners and extends over the edges. Fill the lined crust with pie weights, dried beans, or rice until they come a bit more than halfway up the sides.
3.2 Bake the crust
Place the pie dish on a baking sheet for easy handling. Bake the crust for about 15 to 20 minutes, until the edges are just starting to look set and very lightly golden.
Carefully lift out the parchment and weights. Return the crust to the oven and bake for another 5 to 10 minutes until the bottom looks dry and just starting to color. If the edges brown too quickly, you can cover them with a pie shield or strips of foil.
Set the crust aside on a wire rack while you prepare the filling. Reduce the oven temperature to 325 degrees Fahrenheit for the custard baking step.
Step 04: Mix the Custard

Custard is simple, but it rewards gentle handling. Overbeating can add too much air, which may cause bubbles or a foamy top.
4.1 Combine the dry ingredients
In a large mixing bowl, whisk together the sugar, flour, salt, and ground nutmeg until no lumps of flour or spice remain. The small amount of flour helps stabilize the custard.
4.2 Whisk in the eggs
Add the eggs to the bowl and whisk until the mixture looks smooth and slightly thickened. Aim for even mixing without whipping in lots of air. I like to whisk in a figure eight pattern to keep things controlled.
4.3 Add butter, milk, and vanilla
Whisk in the melted, cooled butter. Then slowly pour in the milk while whisking, followed by the vanilla. The custard base should look pale yellow and very smooth, with no streaks of egg. If you see any bits of unmixed egg, you can pour the mixture through a fine mesh strainer into a jug before baking.
Step 05: Fill and Bake the Pie

5.1 Prepare for baking
Place the blind baked crust on a baking sheet if it is not already on one. This makes it easier to get in and out of the oven and catches any spills.
Give the custard one last quick stir, then pour it gently into the warm crust. You want to fill it almost to the top, leaving a little space so it does not overflow while baking.
5.2 Bake gently
Slide the baking sheet with the pie onto the center rack. Bake at 325 degrees Fahrenheit for about 40 to 55 minutes. Ovens vary, so begin checking around the 40 minute mark.
How to check doneness:
- The edges of the custard should look set and slightly puffed.
- The center should still have a gentle wobble when you nudge the pan, not a loose liquid slosh.
- An instant read thermometer inserted in the center should read at least 160 degrees Fahrenheit. Many pastry sources suggest a range around 170 to 175 degrees Fahrenheit for custard pies so they slice cleanly while staying creamy.
Remember that custard continues to cook a little as it cools, a phenomenon often called carryover cooking. Taking it out while the center still jiggles softly helps avoid overbaking.
If the crust edges are browning too quickly before the filling is done, cover the rim with a pie shield or strips of foil and continue baking.
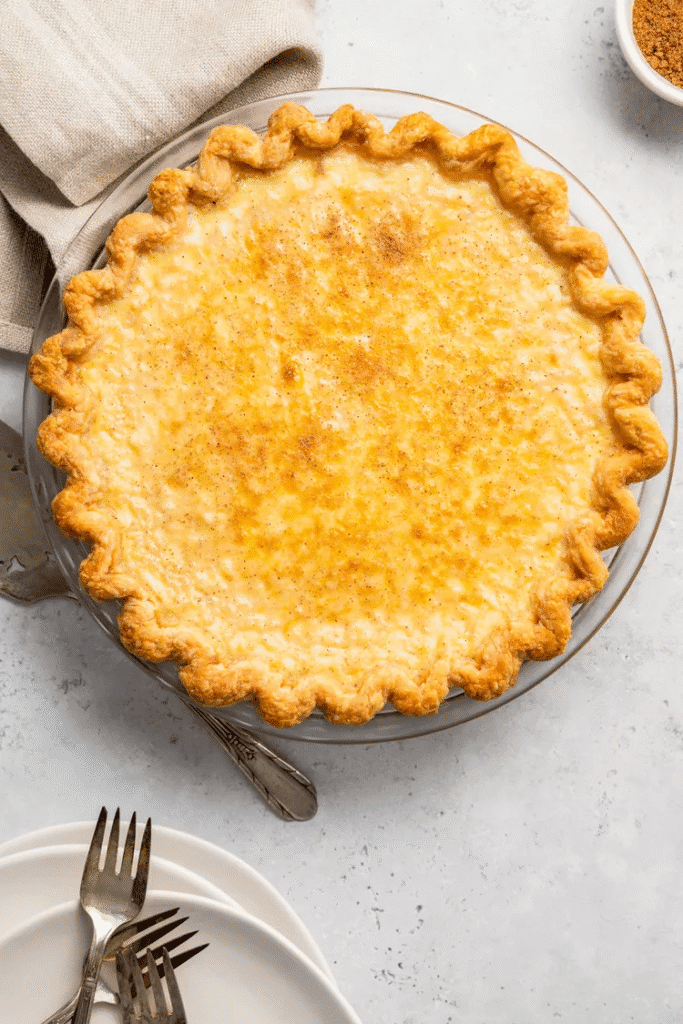
Step 06: Cool, Chill, and Serve

6.1 Cool to room temperature
Place the baked pie on a wire rack and let it cool to room temperature. This usually takes 1 to 2 hours. Cooling on a rack allows air to circulate around the dish, which helps prevent a soggy bottom and reduces the risk of cracks on top.
Food safety guidance from extension services and the USDA style recommendations say that egg rich pies should not sit at room temperature for more than about 2 hours. After that, they should be refrigerated to keep them safe.
6.2 Chill until set
Once the pie has cooled to room temperature, cover it loosely and refrigerate for at least 2 hours before slicing. The custard firms up as it chills and becomes easier to cut into neat slices.
When it is fully chilled, the surface will feel cool to the touch and will give only a very slight jiggle if you gently move the pan.
6.3 Slice and serve
For clean slices:
- Use a sharp, thin knife.
- Wipe the blade with a warm, damp cloth between cuts.
- Use a pie server or narrow spatula to lift each slice.
Serve the pie chilled or allow it to sit at room temperature for about 20 to 30 minutes if you prefer a softer texture. Many people enjoy it plain with just a sprinkle of nutmeg. For a holiday table, I like to add a small dollop of lightly sweetened whipped cream and maybe a few fresh berries on the side.
Simple Variations
- Spice change: Swap part of the nutmeg for a pinch of cinnamon or cardamom for a slightly different personality.
- Mini custard tarts: Bake the same custard in several small tart shells. The baking time will be shorter, so start checking much earlier.
- Quicker version with store bought crust: Blind bake a good quality refrigerated or frozen crust and fill it with the same custard for a weeknight dessert.
Key Advantages of Making Egg Custard Pie

- Uses pantry ingredients: Eggs, milk, sugar, flour, and vanilla are things many home cooks already have.
- Affordable but special: The ingredients are inexpensive, yet the finished pie looks elegant enough for guests.
- Make ahead friendly: The pie tastes even better after chilling overnight, which makes it perfect for holidays when oven space is tight.
- Gentle introduction to custard baking: The method teaches important custard skills without being fussy.
- Easy to customize: A small change in spice, crust style, or garnish can make the pie feel new while keeping the same base recipe.
Real life examples:
- Planning an Easter dessert where you want something light after a heavy meal.
- Bringing a dessert to a church potluck where you are not sure what others are bringing. This pie fits in with almost anything.
- Teaching a beginner baker how to handle pie dough and custard in one project.
Mistakes to Avoid
Even simple recipes have common trouble spots. Here is what to watch for and how to fix or prevent problems.
- Overbaking the custard:
- Problem: The surface cracks, the custard looks dry or curdled, and the texture is rubbery.
- Prevention: Bake at a moderate temperature, check for a gentle jiggle in the center, and use an instant read thermometer to verify the center has just reached the safe range instead of baking far past it.
- Skipping blind baking:
- Problem: The crust stays pale, soft, or soggy because the custard soaks into raw dough.
- Prevention: Always blind bake until the bottom looks dry and lightly golden before adding the filling.
- Using very low fat milk:
- Problem: The custard sets more loosely and tastes less creamy.
- Prevention: Use whole milk for the best texture. If you must use a lower fat milk, expect a slightly softer set and consider adding a tablespoon or two of cream if available.
- Baking at too high a temperature:
- Problem: The custard sets unevenly, overcooks at the edges, and may form bubbles or a tough top.
- Prevention: Bake custards at gentle heat, around the low three hundreds in Fahrenheit, as many pastry teachers recommend, and give them time to set slowly.
- Cutting before it has chilled enough:
- Problem: Slices collapse, the center oozes, and the pie looks messy even if the flavor is fine.
- Prevention: Allow full cooling at room temperature, then chill for several hours before slicing.
Expert Tips
These are the small details I reach for when I want the pie to look and taste its best.
- Plan ahead for stress free entertaining:
I like to make the pie the day before a holiday meal. Bake it in the afternoon, let it cool, then refrigerate it overnight. On the day of the gathering, you only need to slice and garnish. The flavor improves after a night in the fridge. - Dress it up for occasions:
For Christmas or Thanksgiving, add a light dusting of freshly grated nutmeg and serve with a swirl of cinnamon whipped cream. For spring, pair it with fresh strawberries or raspberries. - Small tweaks for flavor:
- Add a teaspoon of orange zest for a citrus note.
- Replace a quarter cup of the milk with light cream for an extra silky texture.
- Use a tiny pinch of salt on top of each slice right before serving to sharpen the sweetness.
- Potluck strategy:
When I bring egg custard pie to a potluck, I slice it at home, arrange the slices back in the dish slightly fanned, and place a small container of whipped cream beside it. It makes self service easier and keeps the dessert table tidy. - Beginner friendly success:
Many new bakers notice that this pie gives them confidence. It is forgiving, and as long as they blind bake the crust and avoid overbaking, the results are impressive. It is a great first custard recipe for someone who usually bakes cookies or brownies.
Nutrition Facts (Per Serving)
The following values are approximate and based on standard ingredient data from common nutrition databases for one eighth of the pie made with a butter crust, whole milk, and no toppings. Actual values will vary with ingredient brands and slice size.
- Calories: about 400 per serving
- Total fat: about 22 g
- Saturated fat: about 12 g
- Carbohydrates: about 44 g
- Total sugars: about 28 g
- Protein: about 7 g
- Sodium: about 240 mg
If you use a store bought crust, low fat milk, or different sugar amounts, the numbers will change. For exact values, use a nutrition calculator and enter the exact ingredients you use.
Frequently Asked Questions
Q1: Can I use a store bought crust instead of making one?
Yes. A good quality refrigerated or frozen crust works fine and makes this recipe much faster. Follow the package instructions for blind baking, then fill with the custard and bake as directed. The homemade crust is usually more flavorful, but the filling is the same.
Q2: How do I know when the custard is fully baked but not overdone?
Look for set edges and a gentle wobble in the center when you tap the side of the pan. The center should move like soft gelatin, not like liquid. If you use an instant read thermometer, aim for a center temperature that has reached at least 160 degrees Fahrenheit for safety, and ideally in the low one hundred seventies for a clean slice and creamy texture. Food Safety and Inspection Service
Q3: How long does egg custard pie keep in the refrigerator, and can it be frozen?
Based on guidance from cooperative extension and food safety resources, custard pies should be refrigerated within about 2 hours of baking and can be stored in the refrigerator for about 3 to 4 days. They do not freeze well, since freezing tends to damage the smooth custard texture.
Q4: Can I use low fat milk or plant based milk?
You can use low fat milk, but the custard will be less rich and may set a bit more softly. If possible, add a splash of cream to help with texture. Plant based milks are less predictable here because the proteins and fats behave differently in custards. Some bakers have success with richer, barista style oat or soy milks, but the flavor and texture will not match a traditional egg custard pie.
Q5: How can I prevent a soggy crust?
Blind bake the crust until the bottom looks dry and lightly golden before you add the custard. Keep the pie on a wire rack to cool so air can circulate under the dish. Chill the pie fully before slicing, and store leftovers covered in the refrigerator to keep the crust from picking up extra moisture.
Q6: Can I make the pie a day ahead for a holiday or event?
Absolutely. Egg custard pie is an excellent make ahead dessert. Bake it the day before, cool it to room temperature, then cover and refrigerate. The flavor and texture improve overnight, and you can focus on other dishes on the day of your event.
Conclusion
Egg custard pie is a classic for a reason. It is simple, gentle, and comforting, but it quietly teaches important baking skills like blind baking, custard mixing, and judging doneness by both temperature and visual cues. With basic pantry ingredients and a little patience for chilling time, you can put a smooth, silky custard pie with a crisp crust on the table that tastes like it has been in your family for years.
If you remember a few key points, your pie should come out beautifully: blind bake the crust so it stays crisp, bake the custard gently until the edges are set and the center still wobbles softly, check that it reaches a safe internal temperature, and give it plenty of time to cool and chill before slicing.
From weeknight suppers to holiday tables, this egg custard pie can easily become one of those reliable recipes you turn to again and again, ready to adapt with your own spices, toppings, and traditions.
Cozy Southern Egg Custard Pie with Flaky Blind Baked Crust