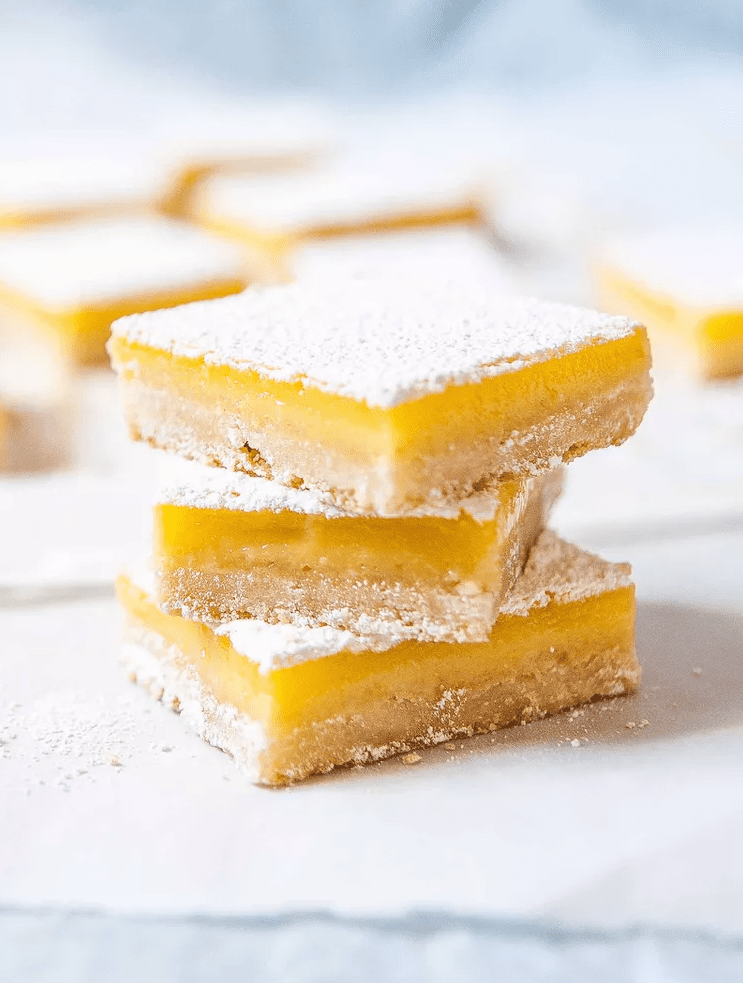
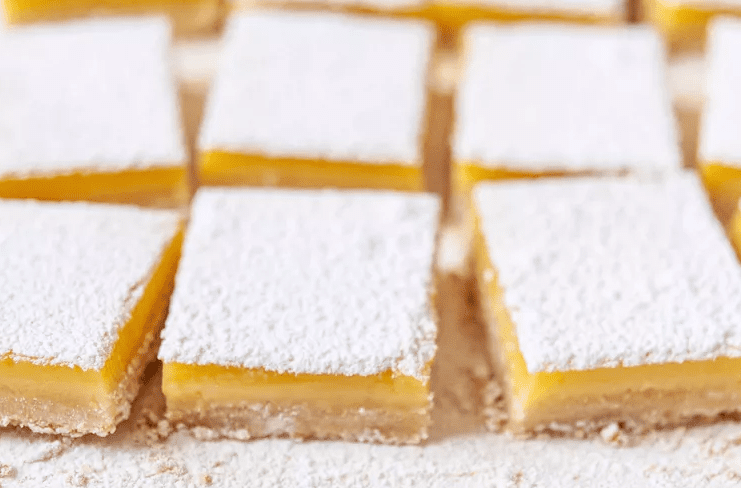
Classic lemon bars are one of those lemon desserts that disappear from the tray before you can blink. In their best form, they have a crisp, buttery lemon shortbread crust underneath a silky, tart lemon curd layer, all finished with a light snow of powdered sugar. In my kitchen I think of them as an easy lemon squares recipe that feels special enough for holidays but simple enough for a random Tuesday. This version focuses on clear visual cues, glass versus metal pan guidance, and real world storage and freezing tips so you can bake confident, clean slicing bars even if this is your very first batch.
Time and Serving
Prep time: about 20 minutes
Bake time: about 20 to 25 minutes for the crust, about 10 to 12 minutes for the lemon layer
Cooling time: about 1.5 hours, including time in the fridge for very neat slices
Total time: about 2.5 hours from starting to final serving
Pan size: one standard nine by thirteen inch baking pan
Approximate yield: about 16 to 24 bars, depending on how large you cut them
Insight of the Classic Lemon Bars
Classic lemon bars, sometimes called lemon squares, are a very simple American bar dessert made from two layers. A thin shortbread style base supports a baked lemon curd layer that is set enough to hold its shape but tender when you bite into it. Wikipedia
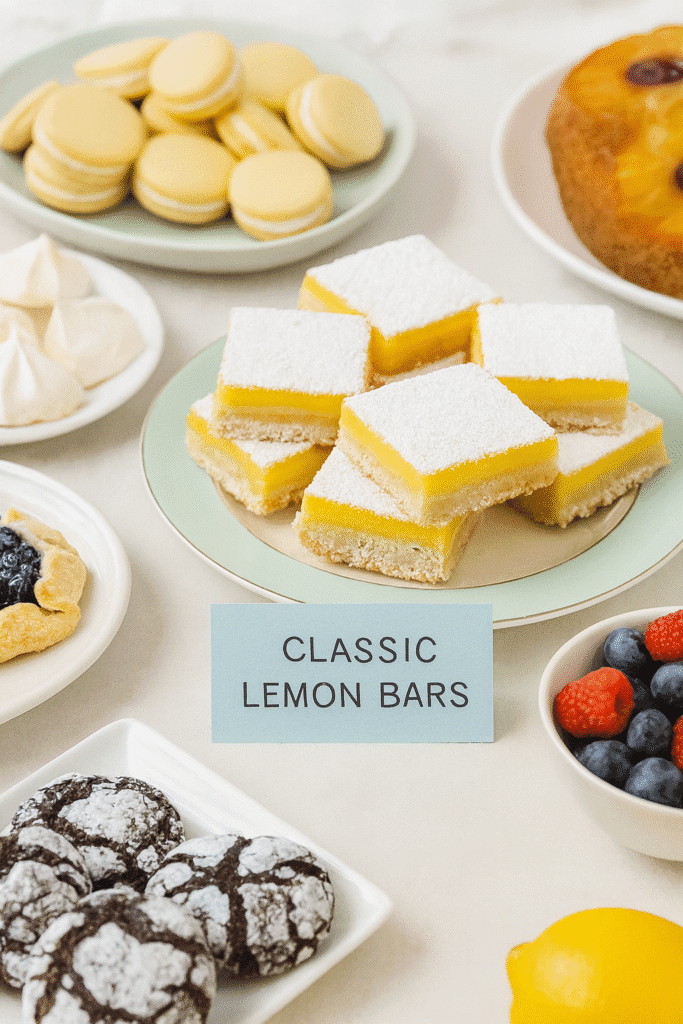
Bakers love to serve this kind of lemon dessert at spring brunches, baby showers, holiday cookie trays, school bake sales, and potlucks because the pan travels well, and the bars are easy to portion and share. The bright citrus flavor cuts through richer treats on a dessert table, so a tiny square can feel surprisingly refreshing after a big meal.
The ideal bar strikes a balance between tart and sweet. The lemon layer should taste clearly of fresh lemon without being sharp, while the buttery lemon shortbread crust adds just enough sweetness and crunch to keep every bite in balance. When you lift a piece from the pan, it should stand tall without slumping, but when you eat it, the lemon curd layer still feels custard like rather than rubbery or dry.
Ingredients
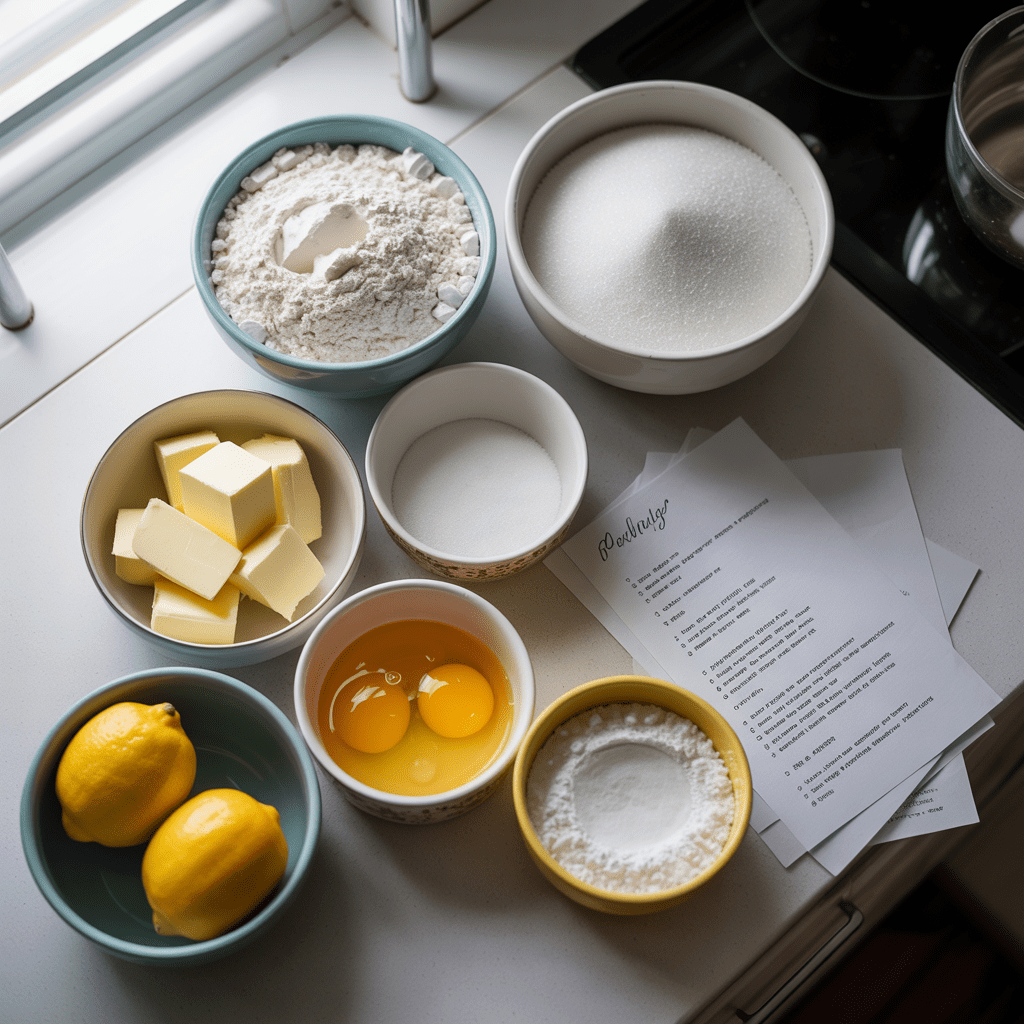
Below are realistic amounts for a nine by thirteen inch pan of classic lemon bars. They give a sturdy shortbread base and a generous lemon curd layer.
For the lemon shortbread crust
• Two and one quarter cups all purpose flour, about two hundred eighty four grams
• Two thirds cup granulated sugar, about one hundred fifty grams
• One teaspoon fine salt
• One cup unsalted butter, cold and cut into small cubes, about two hundred twenty five grams
For the lemon filling
• Four large eggs
• One additional egg yolk
• One cup granulated sugar, about two hundred grams
• One third cup all purpose flour, about forty grams
• Two thirds cup freshly squeezed lemon juice, from about three to four medium lemons
• One tablespoon finely grated lemon zest, optional but recommended for stronger lemon flavor
• One teaspoon vanilla extract, optional for a rounder flavor
For finishing
• About one quarter cup powdered sugar for dusting just before serving
Optional ingredients and why you might use them:
• A pinch of extra salt in the filling if you like a slightly more balanced sweetness
• A very small amount of extra lemon zest in the filling if your lemons taste mild
• A few fresh berries or whipped cream for serving if you want a plated dessert feel
The flour in both the crust and the lemon layer helps provide structure and keeps the bars sturdy enough to slice, a technique used in many well tested lemon bar recipes.
Required Tools for making the recipe
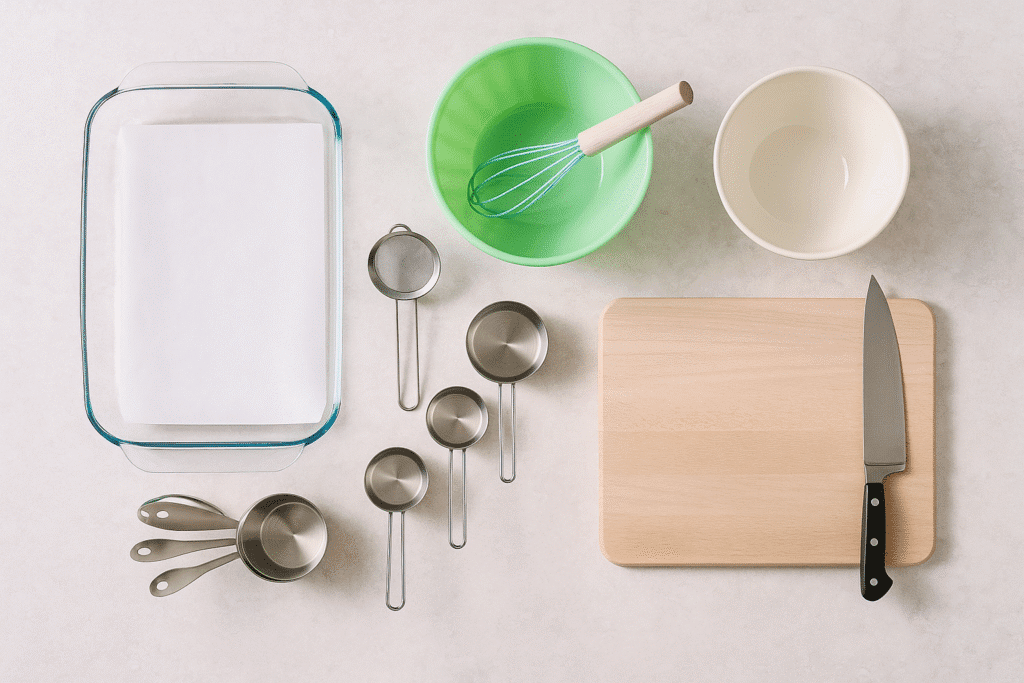
These tools make the process smoother and the results more reliable.
• Nine by thirteen inch baking pan. Many professional bakers prefer a light colored metal pan for brownies and bar desserts because metal conducts heat quickly and encourages even browning on the crust. Glass pans heat more slowly and often need slightly longer baking times, though they hold heat well once hot.
• Parchment paper. Lining the pan and creating a parchment sling that overhangs the long sides makes it much easier to lift out the entire slab for clean cutting.
• Mixing bowls. One large bowl for the crust and one medium bowl for the lemon filling.
• Whisk. A simple balloon whisk helps you blend the eggs, sugar, flour, and lemon juice smoothly so you do not end up with flour pockets or streaks of egg white.
• Measuring cups and spoons or a digital scale. Accurate measurements keep the crust from turning too dry and the lemon filling from turning too loose.
• Fine mesh sieve, optional. If you want an extra smooth lemon layer, you can pour the mixed filling through the sieve to catch any tiny bits of zest or unblended egg.
• Wire cooling rack. Cooling the pan on a rack allows air to circulate and helps the bars cool more evenly.
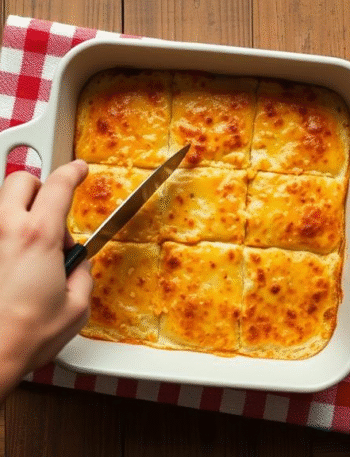
• Long sharp knife. A chef knife or a long slicing knife gives cleaner cuts than a short knife. Wiping the blade between cuts keeps the lemon curd layer from smearing.
• Optional food processor. You can pulse the crust ingredients together in a food processor instead of rubbing in the butter by hand. This is especially handy in warm kitchens where butter softens quickly.
Method: Step by Step Preparation Guide
Follow these detailed steps and focus on the visual cues. In my kitchen, this sequence produces consistently clean, bakery style classic lemon bars.
Step One: Prepare the pan and oven
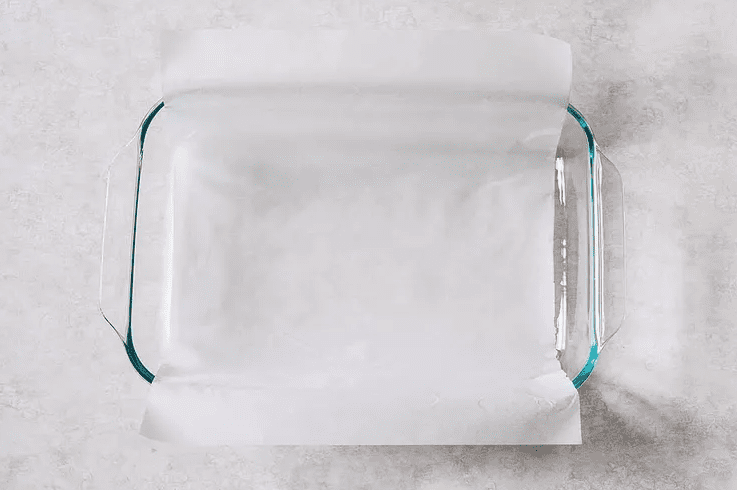
- Lightly butter your nine by thirteen inch pan.
- Cut a sheet of parchment paper wide enough to cover the bottom of the pan and extend up the two long sides with a few centimeters of overhang. Press it into the pan so the paper lies flat on the base and snug against the corners. This parchment sling will help you lift the lemon bars out later.
- Preheat the oven to three hundred fifty degrees Fahrenheit, about one hundred eighty degrees Celsius. Give the oven enough time to fully preheat. According to many baking experts, starting bar desserts in a properly heated oven is important for even browning and correct setting of the crust.
Step Two: Make the shortbread crust
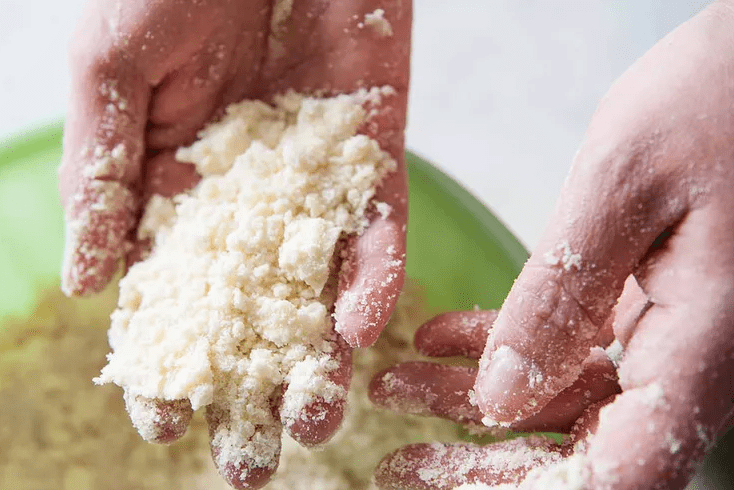
- In a large mixing bowl, whisk together the flour, granulated sugar, and salt for the crust until everything looks evenly combined.
- Add the cold butter cubes. Toss them in the flour mixture so each piece is lightly coated.
- Using your fingertips, a pastry blender, or the pulse function of a food processor, cut the butter into the dry ingredients. You are aiming for a damp, sandy mixture with some small pea sized bits of butter still visible. The mixture should hold together when you press a handful firmly, but it should not form a smooth dough. Keeping the butter cold and in small pieces helps the crust bake up crisp and tender.
Step Three: Press and blind bake the crust
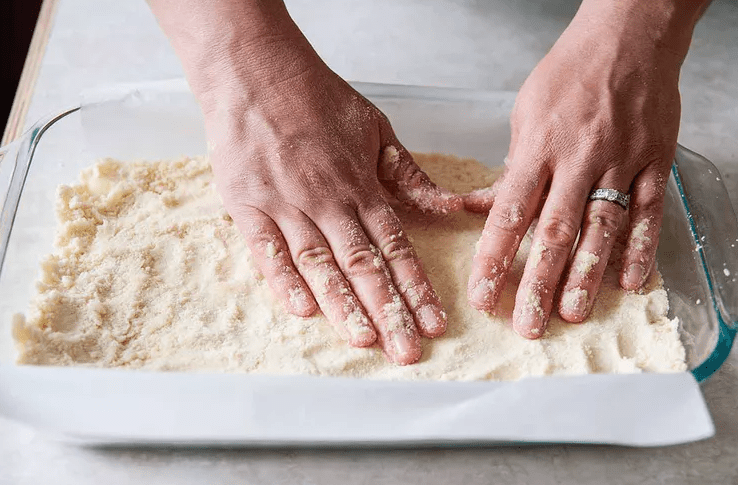
- Pour the crumbly crust mixture into the prepared pan. Use your hands to spread it evenly, then press it firmly into an even layer. You can use the flat bottom of a measuring cup to press the crust, paying special attention to the corners so the thickness is as uniform as possible. Press firmly enough so the crumbs hold together, but do not pound or smear so much that the butter completely melts into the flour.
- Place the pan in the preheated oven. Bake the crust for about twenty to twenty five minutes. You are looking for very specific visual cues rather than a single time. The crust should look dry on the surface and just beginning to turn light golden at the edges. The center should no longer look raw or damp.
- If you are using a glass pan, expect to be closer to the longer end of that range, since glass heats more slowly and often requires slightly longer bake times. If you use a light colored metal pan, the crust may reach this stage closer to twenty minutes.
- Avoid over baking here. A very dark crust can end up too hard once chilled, and a very pale under baked crust can turn soggy under the lemon curd layer.
Step Four: Mix the lemon filling while the crust bakes
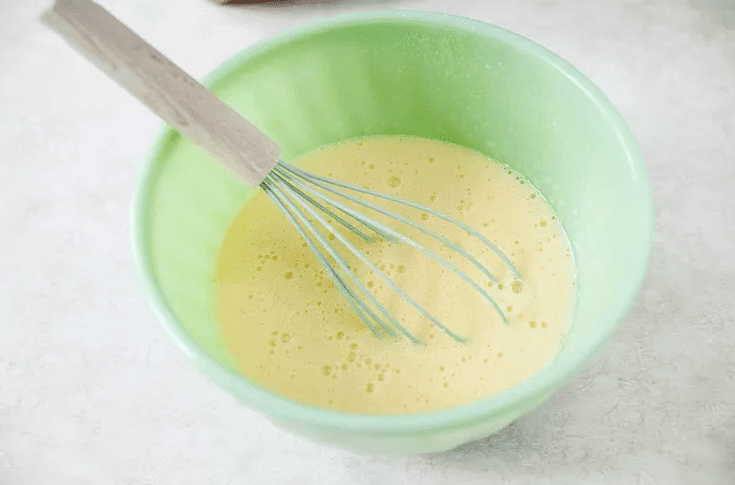
- While the crust is in the oven, prepare the lemon filling. In a medium bowl, whisk the eggs, the extra yolk, and the granulated sugar until the mixture looks well combined and slightly thickened.
- Sprinkle the flour over the egg mixture and whisk again until you no longer see dry spots or flour lumps. This step matters. Many troubleshooting notes for lemon bars point out that grainy or uneven texture often comes from unincorporated flour, so take a few extra seconds to whisk thoroughly.
- Whisk in the freshly squeezed lemon juice, lemon zest if using, and vanilla extract if using. The filling should look smooth and fairly thin, with small bubbles from whisking. If you want a completely silky finish, you can pour this mixture through a fine mesh sieve into a clean bowl to catch any tiny bits of zest or unblended egg.
Step Five: Combine crust and filling
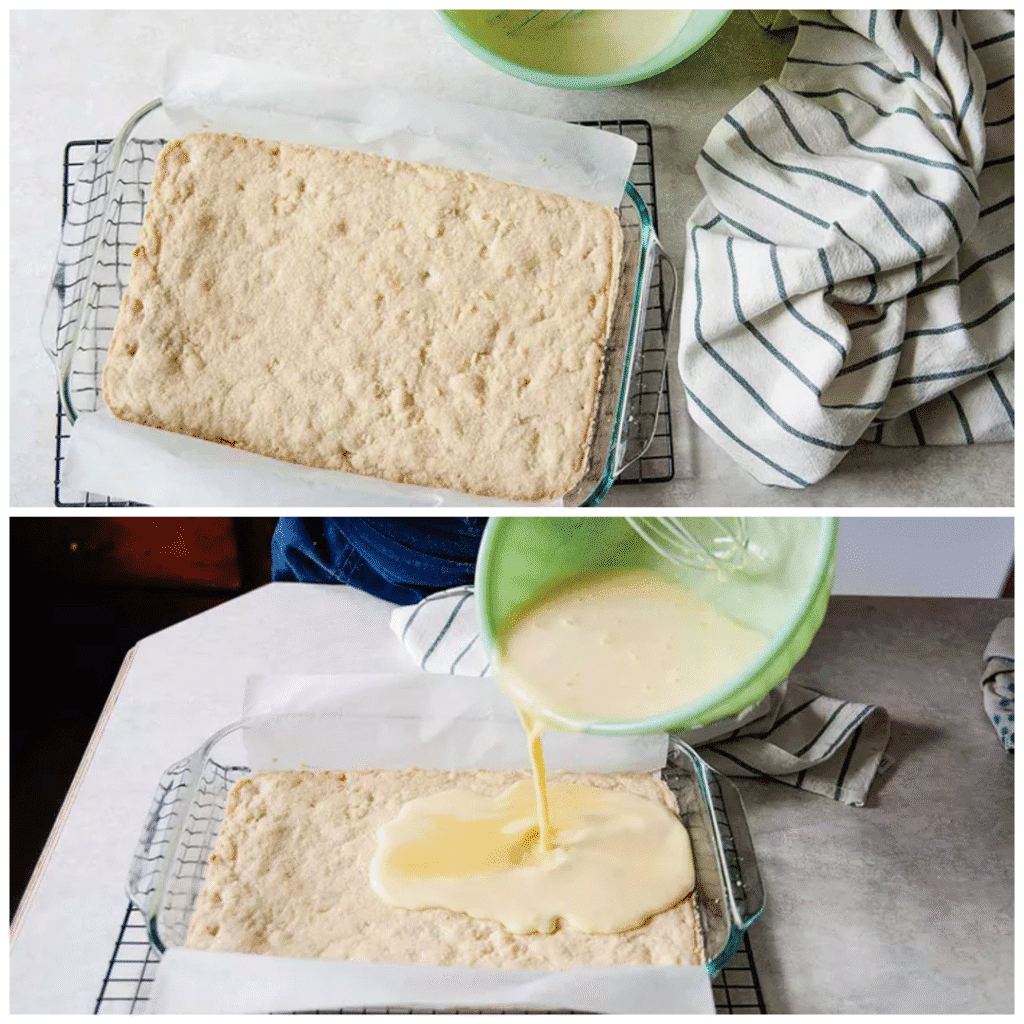
- When the crust has finished its initial bake and looks dry and lightly golden at the edges, remove the pan from the oven but leave the oven at the same temperature.
- Give the lemon filling a quick stir, then carefully pour it over the hot crust. Pouring the lemon mixture over a warm crust helps the layers bond so the lemon curd layer does not slide off once chilled. Several professional and home baking sources recommend this warm crust technique for bar desserts with custard style toppings.
Step Six: Bake the lemon layer
- Return the pan to the oven. Bake until the lemon layer is fully set. This usually takes about ten to twelve minutes, depending on your pan and oven.
- For a glass pan, plan for the longer end of that range or even a minute or two more, since glass pans generally heat more slowly and then hold heat longer. For a metal pan, expect the lemon layer to set closer to ten minutes.
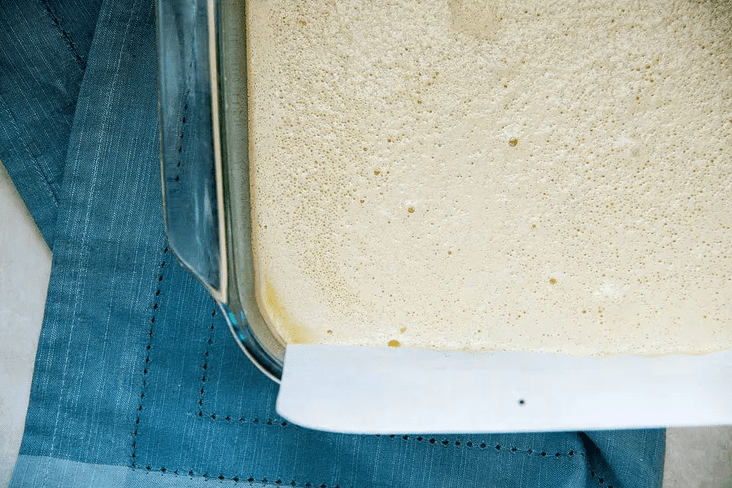
- Rather than watching the clock alone, focus on visual cues. Gently jiggle the pan. The center should appear set and should not wobble like a liquid, although the surface may still feel soft. Tiny bubbles on the surface are normal and come from air in the egg mixture rising during baking. The top should look matte, not glossy, and should not be deeply browned.
- Lemon bars can move from perfectly set to over baked and spongy quite quickly, so start checking a couple of minutes before you think they might be done.
Step Seven: Cool completely for clean slices
- Remove the pan from the oven and place it on a wire rack. Let the lemon bars cool at room temperature for about thirty to forty five minutes, uncovered.
- For very clean bakery style slices, transfer the slightly cooled pan to the refrigerator and chill for another thirty to forty five minutes, until the lemon layer is cool and firm to the touch. Many test kitchens recommend chilling lemon bars or similar custard desserts before cutting, because the filling continues to firm as it cools.
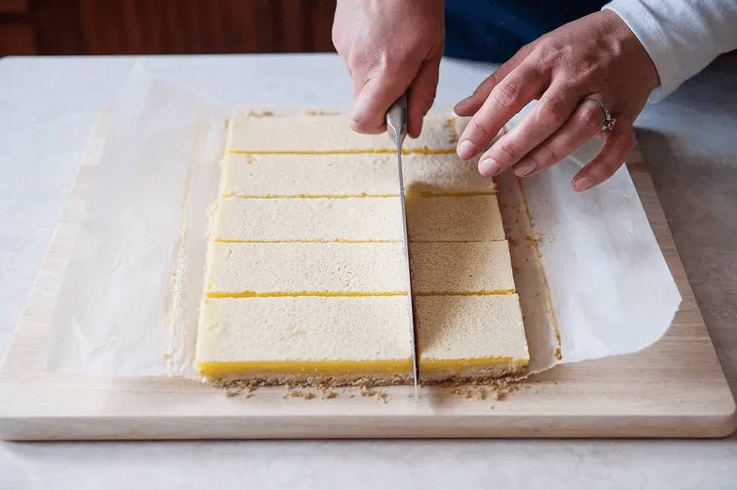
- Once chilled, run a thin knife around the unlined edges of the pan. Use the parchment sling to lift the entire slab onto a cutting board.
- Use a long sharp knife to cut the slab into bars. Press the knife straight down rather than sawing back and forth, then lift it straight up. Wipe the blade clean between cuts. This helps you get those shiny yellow squares with neat edges.
Step Eight: Finish and serve
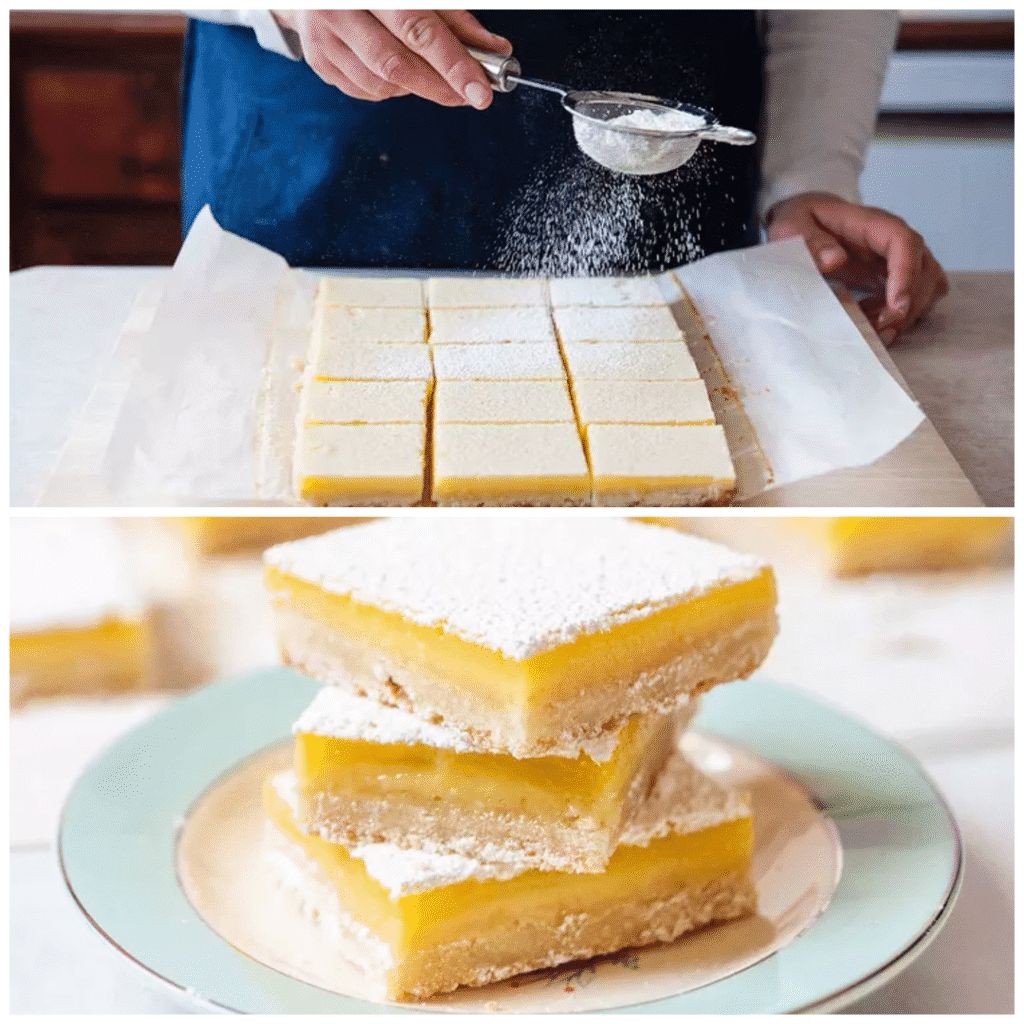
- Just before serving, dust the tops lightly with powdered sugar through a small sieve. If you dust too early, especially while the bars are still warm, the sugar can dissolve into the surface and look patchy or wet, a common frustration bakers mention.
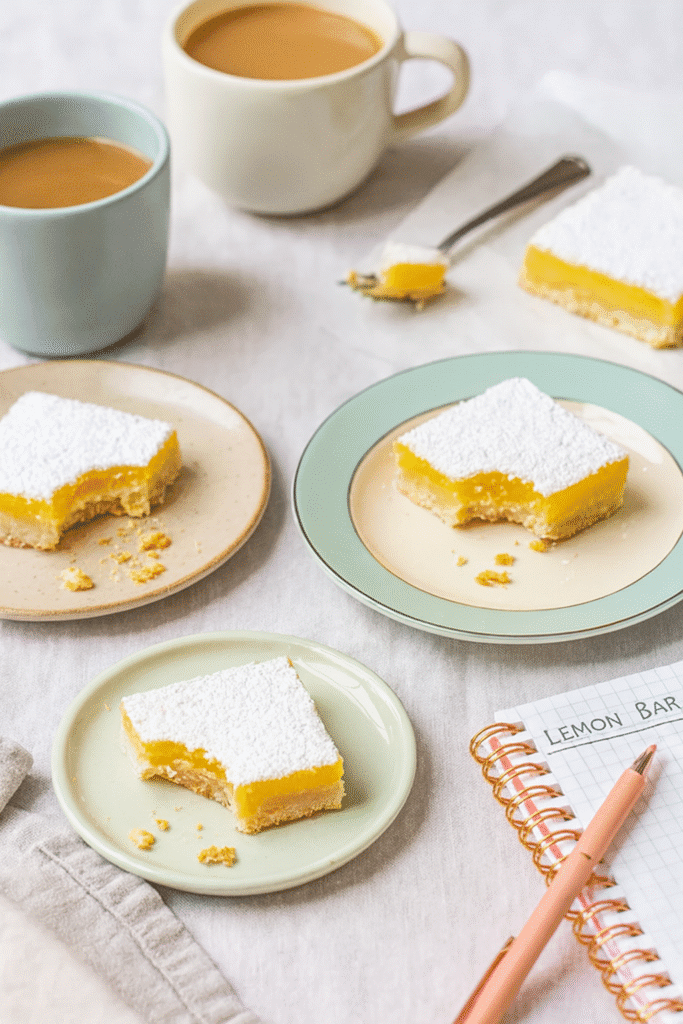
- Serve plain or with a few fresh berries on the side. These classic lemon bars are wonderful with coffee, tea, or a simple glass of cold milk.
Variation ideas:
• For a thicker lemon layer, you can increase the filling by about one quarter to one third and bake a few extra minutes, watching closely for doneness cues.
• For a slightly thinner layer, reduce the filling ingredients slightly but keep the baking time similar, checking early.
• You can bake the recipe in a slightly smaller pan, such as a twenty by twenty centimeter square, for taller bars, adjusting the bake time since a deeper filling takes longer to set.
Key Advantages of making Classic Lemon Bars
• Crowd friendly. A single pan of classic lemon bars yields many servings, and it is easy to cut smaller pieces for a grazing dessert table or larger squares for full servings.
• Make ahead dessert. You can bake the pan a day or two before a party, chill it in the refrigerator, and cut just before serving. Lemon bars actually slice more neatly after chilling.
• Simple ingredients. Flour, sugar, butter, eggs, and fresh lemons are all common pantry or grocery items. There is no need for special equipment, and the technique is easier than many pies or tarts.
• Versatile occasions. These easy lemon squares work for casual family treats, school bake sales, brunch buffets, or holiday dessert trays.
• Freezer friendly. Wrapped well and stored in an airtight container, lemon bars can be frozen for several weeks to a few months, which makes them great for future treats or for assembling assorted dessert boxes.
Mistakes to Avoid
Over baking the lemon layer
If the lemon curd layer bakes too long, it can become sponge like, dry around the edges, and may pull away from the crust. To prevent this, start checking a couple of minutes before the suggested time and rely on the no jiggle center cue rather than waiting for browning. If you discover you went a bit too far, serve the bars well chilled with whipped cream, which softens the impression of firmness.
Under baking the lemon layer
On the other side, if you pull the pan too early, the center may still be liquid under a very thin skin. As the bars cool, the filling will set further, but it cannot fully rescue a clearly under baked center. If you realize the middle still jiggles loosely when you tilt the pan, return it to the oven and check every few minutes until the surface looks set and only perhaps the very center has the slightest tremble.
Not whisking the filling enough
If flour is not fully dispersed into the egg and sugar mixture, baked lemon bars can develop small pasty lumps or a slightly grainy texture. This is a common troubleshooting note for lemon bar recipes that use flour as a thickener. Take time to whisk the flour until you see no dry spots before adding the lemon juice.
Skipping proper preheating or using an odd rack position
If the oven is still warming up when you put in the crust or you place the pan very close to the top or bottom heating elements, you may end up with uneven browning or a crust that sets poorly. For most home ovens, the middle rack with a fully preheated temperature gives the most reliable results for bar desserts.
Cutting the bars while they are still warm
Warm lemon bars are soft and tempting, but if you cut them too soon, the filling can ooze and the edges will look messy. At gatherings where presentation matters, chill the pan and cut once the filling is fully set.
Dusting with powdered sugar too early
Dusting while the surface is still warm or while the bars are stored in a covered container can cause the sugar to dissolve and form a thin film instead of a light snow. Always dust right before serving or just after cutting if you plan to serve within the hour.
Expert Tips
• Adjusting for lemon flavor and juiciness. Lemons vary. Some are very juicy and sharp, others milder. If your lemons taste very tart, you can slightly reduce the juice and add an extra teaspoon or two of sugar. If they are mild, use the full amount of zest and juice and consider adding a little extra zest to keep the lemon dessert bright.
• Scaling the recipe. For a half batch, use a smaller pan such as an eight inch square pan and halve every ingredient. Watch the crust and lemon layer closely, as the bake times may be a little shorter. For a double batch, use two nine by thirteen pans rather than one very large pan, so the layers stay the right thickness and bake evenly.
• Choosing between glass and metal. For the crispiest crust and fastest bake times, many professionals and test kitchens recommend a metal pan for brownies and bar desserts. Glass is slower to heat but holds heat well, so it can work if you prefer serving directly from a glass dish, you just need to give both the crust and the lemon layer a little more time.
• Real life planning example. If I am baking classic lemon bars for a school event, I usually bake the pan the day before, let it cool, cover the pan, and refrigerate it overnight. The next day I lift the slab out with the parchment sling, cut it into small squares, dust with sugar, and layer the pieces in a lidded container with parchment between layers. For food safety, they travel in an insulated bag, and I keep in mind the general recommendation that egg based desserts and leftovers should not sit at room temperature for more than about two hours.
• Keeping the crust crumbly but not hard. For a crust that feels tender but holds together, stop mixing as soon as the crumbs clump when pressed, and press the mixture firmly into the pan without pounding. Overworking the dough can make it tough, while leaving it too loose can make it fragile.
• Freezing strategy. To freeze lemon bars, cool completely, cut into bars, and arrange them in a single layer in an airtight container. Separate layers with parchment if you need to stack. Freeze for up to about two to three months for best quality, then thaw in the refrigerator or at room temperature for about thirty minutes. Always dust with powdered sugar after thawing, not before freezing.
Nutrition Facts (per serving)
For approximate nutrition, assume the pan yields eighteen classic lemon bars. Based on standard ingredient data and similar lemon bar recipes, one bar contains roughly:
• Calories: about 270
• Carbohydrates: about 37 grams
• Fat: about 12 grams
• Protein: about 4 grams
These values are estimates and will vary with the exact brands of ingredients you use and the size of your slices.
Frequently Asked Questions
Q1: How do I know when the lemon bars are fully baked and set
The most reliable sign is how the center behaves when you gently jiggle the pan. It should look set and no longer ripple like liquid, though the surface will still feel soft. Tiny bubbles on top are normal. The top should not be deeply browned. If you see a pronounced jiggle in the center, give the pan a few more minutes and check again.
Q2: Can I use bottled lemon juice instead of fresh
You can, but the flavor will usually be less bright and can sometimes taste flat compared with freshly squeezed juice. Many baking experts recommend fresh juice for lemon bars and other lemon desserts because the aroma and acidity are more vivid. If you must use bottled juice, choose a good quality brand and still include fresh zest if possible.
Q3: Why did my lemon bars crack, bubble a lot, or form a thin crust on top
A thin crust or many bubbles on the surface often come from air in the egg mixture rising during baking, especially if the filling was whisked very vigorously. This is mostly cosmetic. A dusting of powdered sugar hides it, and the bars still taste fine. Large cracks or a very dry surface can be a sign of over baking. Next time, try whisking just until smooth, and start checking the bars a little earlier.
Q4: How long can lemon bars sit at room temperature and when should they go into the fridge
Because the lemon curd layer contains eggs, food safety guidelines treat lemon bars like other perishable desserts. General guidance from food safety agencies suggests that egg based desserts and leftovers should not sit at room temperature longer than about two hours, or about one hour in very warm conditions. After that, store them in the refrigerator in a covered container, where they usually keep good quality for several days.
Q5: Can I freeze lemon bars and how do I thaw them so they still taste fresh
Yes. Cool the baked bars completely, cut into portions, and arrange in an airtight container with parchment between layers. Freeze for up to about two to three months. To serve, thaw in the refrigerator or on the counter for about thirty minutes, then dust with fresh powdered sugar. This method is consistent with guidance from several trusted recipe sources that note lemon bars freeze well when wrapped tightly.
Q6: How do I get perfectly neat slices like bakery lemon bars
Chill the pan until the filling is firm, then lift the slab out with the parchment sling. Use a long sharp knife, press straight down rather than sawing, and wipe the blade clean after each cut. Trimming a thin strip from the outer edges before slicing the main bars can also give every piece a polished look.
Conclusion
Classic lemon bars are one of those easy lemon squares that look fancy on a plate but come together from very simple pantry ingredients. With a sturdy lemon shortbread crust, a bright lemon curd layer, and clear guidance about pan choice, baking times, cooling, storage, and freezing, this version is designed to feel approachable even if you still think of yourself as a beginner baker.
I encourage you to bake the recipe once as written, then make a note in your kitchen notebook about your oven, your pan type, and the exact baking times that gave you a perfectly set center. Next time you can adjust the tartness, thickness, or size of the batch to suit your family. Before long, these classic lemon bars might become the make ahead dessert you are known for in your circle of friends.

Classic Lemon Bars That Slice Like a Bakery Dream