Lemon macarons are the kind of cookie that make people think you have a pastry diploma tucked in your back pocket. In reality, once you understand the method and pay attention to a few key details, these delicate French macarons are absolutely doable in a home kitchen. Here we will walk through every step of making lemon macarons from the crisp almond meringue shells to the tangy lemon buttercream filling, with plenty of real life tips so you can succeed even on your first or second attempt.
Time and Serving
These times are realistic for a careful beginner. Once you are familiar with the method you may move a little faster.
- Prep time: about 35 to 45 minutes
- Bake time: about 13 to 15 minutes per tray
- Rest time for macaron shells before baking: about 30 to 60 minutes, depending on room humidity
- Maturing time after filling: at least 12 hours in the fridge, up to 24 hours for best texture
- Total time including resting and maturing: about 13 to 15 hours
- Yield: about 16 sandwiched lemon macarons, roughly 8 servings
Insight of the Lemon Macarons
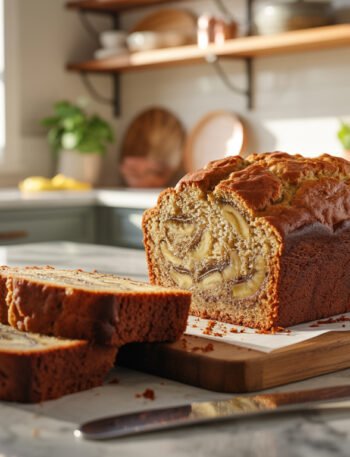
French macarons are small almond based meringue cookies. Two crisp yet chewy shells are sandwiched around a creamy filling such as ganache, jam, or buttercream. Professional pastry chefs rely on very precise gram measurements to keep the ratio of almond flour, sugar, and egg whites consistent, which is a big reason their macarons look so even and professional.
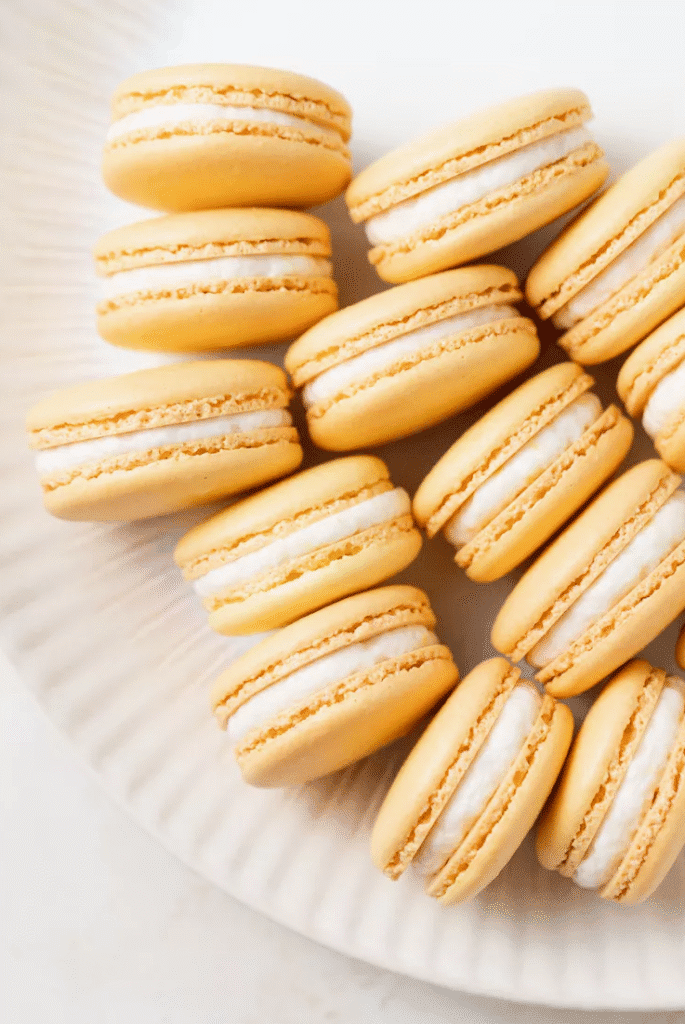
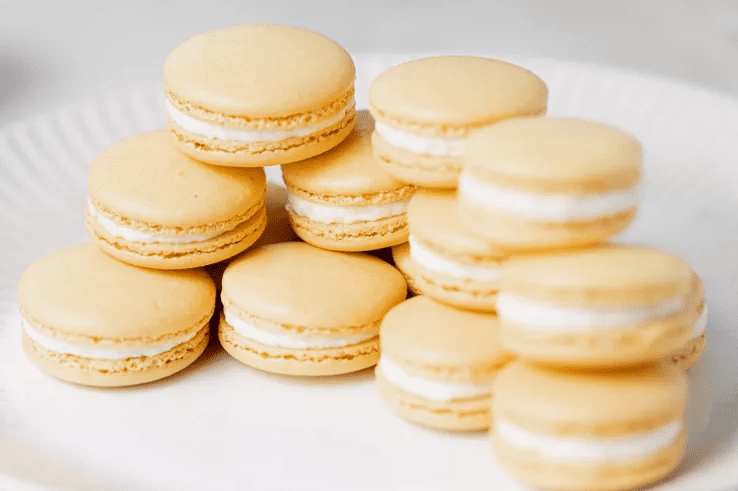
Lemon macarons use classic French macaron shells scented lightly with lemon and a bright lemon buttercream filling. The almond shells are sweet and delicate. The lemon filling brings a clean citrus flavor so the cookie tastes fresh rather than overly sugary. A soft pastel yellow color makes them especially pretty for spring holidays, afternoon tea, baby showers, or any elegant dessert platter.
Macaron shells are naturally gluten free cookies when they are made with blanched almond flour, powdered sugar, and egg whites with no wheat based ingredients. However, if you are baking for someone who needs gluten free food for medical reasons, always check that your almond flour and powdered sugar are processed in facilities that avoid cross contamination with wheat products.
The core method for French macarons follows the same rhythm every time. You whip egg whites and sugar into a glossy meringue. You sift and fold in a mixture of finely ground blanched almond flour and powdered sugar. You pipe the batter into rounds, rest the shells until a thin skin forms on top, then bake until light and risen with their signature macaron feet. Once cooled, you fill the shells with lemon buttercream and let the filled macarons mature in the fridge so the shells soften slightly and the flavor deepens.
Ingredients
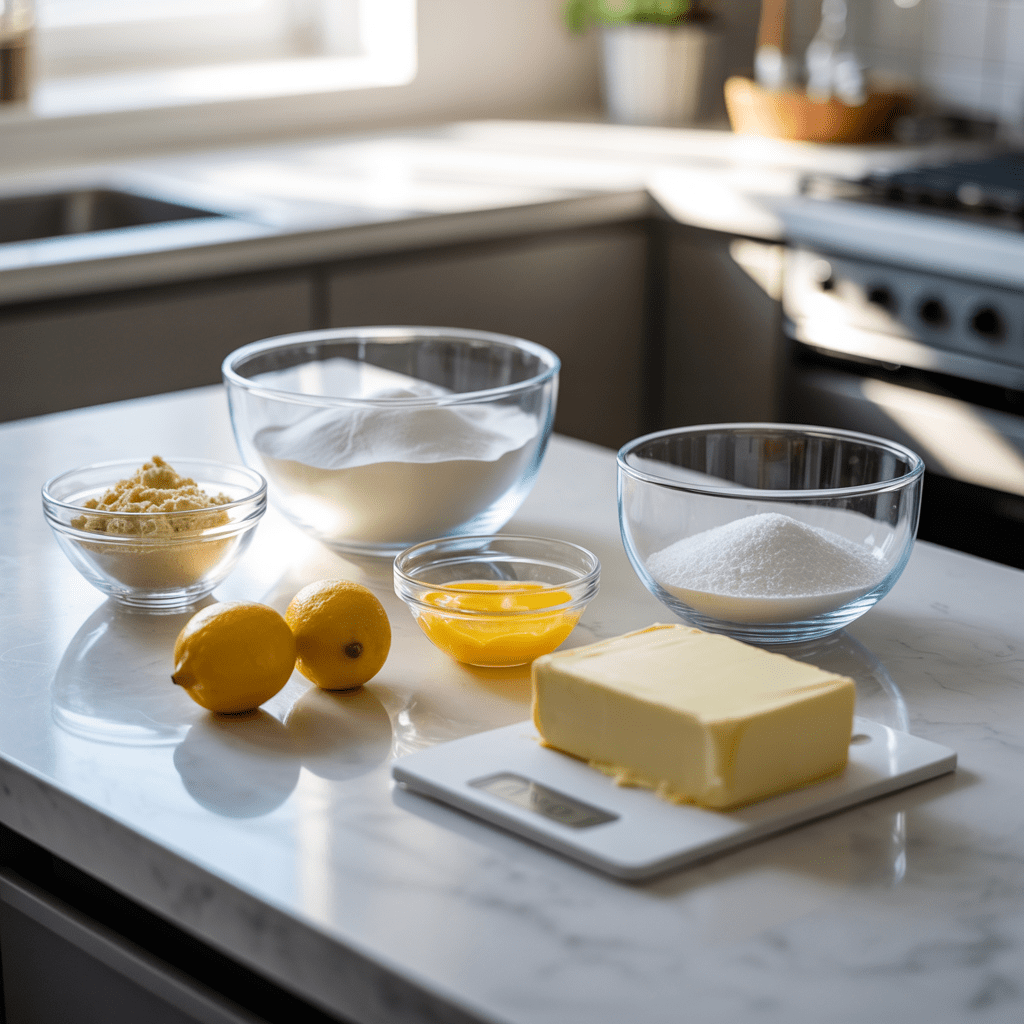
The amounts below make about 16 sandwiched lemon macarons. Gram measurements come first for accuracy, followed by approximate volume measurements.
Ingredients for Lemon Macaron Shells
- Blanched super fine almond flour: 100 grams
- about 1 packed cup
- Powdered sugar: 80 grams
- about 3 quarters cup
- Egg whites at room temperature: 80 grams
- from 2 to 3 large eggs
- Granulated sugar: 80 grams
- about 1 third cup plus 1 tablespoon
- Cream of tartar: one quarter teaspoon
- Fine sea salt: a small pinch, optional
- Lemon yellow gel food coloring: 1 to 2 small drops, optional
Ingredient notes for shells
- Use blanched almond flour or almond meal that is labeled super fine. Coarser almond meal will give speckled, lumpy shells.
- Egg whites at room temperature whip more reliably and reach more stable volume than cold egg whites.
- Gel food coloring is preferred because liquid coloring can thin the macaron batter and make the shells spread too far.
Ingredients for Lemon Buttercream Filling
- Unsalted butter, softened to room temperature: 115 grams
- about 8 tablespoons or 1 stick
- Powdered sugar: 160 grams
- about 1 and one half cups, lightly packed
- Fresh lemon zest: about 2 tablespoons
- from 2 medium lemons
- Fresh lemon juice: 1 to 2 tablespoons, added gradually to taste
- Milk or heavy cream: 1 to 2 teaspoons only if needed for texture
- Fine sea salt: a small pinch
- Pure lemon extract: one eighth to one quarter teaspoon, optional, for a stronger lemon flavor
Ingredient notes for filling
- Soft but still cool butter is easiest to whip smoothly.
- Use fresh lemon zest and juice for the brightest flavor. Bottled juice tends to taste flat or harsh in buttercream.
- Add lemon juice slowly so the buttercream stays thick enough to pipe.
Required Tools for Making the Recipe
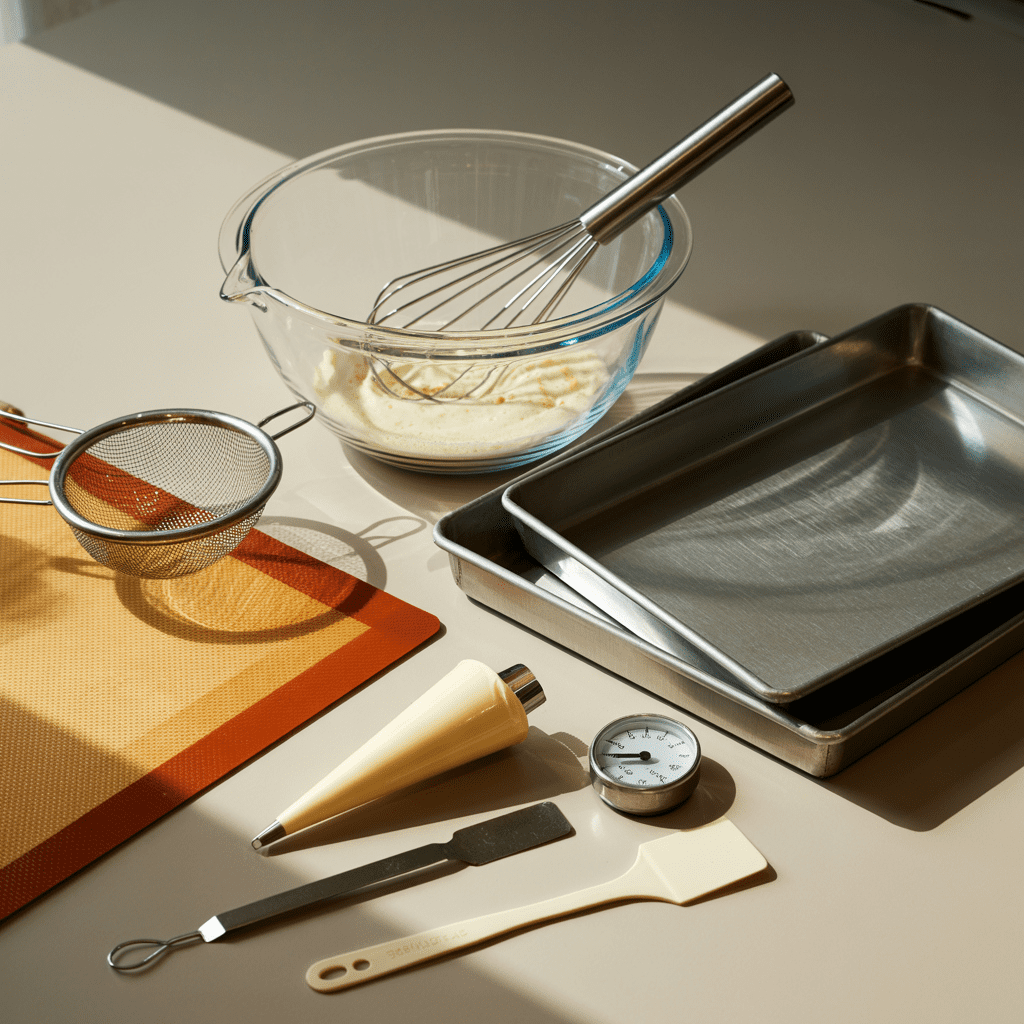
You do not need a professional pastry kitchen for French macarons, but the right tools make a big difference. Serious recipe developers and pastry schools almost always recommend a kitchen scale and clean, non greasy bowls when working with meringue.
- Kitchen scale
- Gram measurements give you consistent results. Small shifts in almond flour or egg white weight can change the texture of the shells.
- Stand mixer with whisk attachment or a sturdy electric hand mixer
- Either will whip the egg whites into meringue. A stand mixer keeps your hands free.
- Clean glass or metal mixing bowls
- Plastic can hold on to invisible grease, which deflates meringue.
- Distilled white vinegar or lemon juice and a paper towel
- For wiping the bowl before whipping egg whites so any grease is removed.
- Fine mesh sieve or sifter
- To sift almond flour and powdered sugar together and remove coarse bits.
- Rubber or silicone spatula
- For folding the almond mixture into the meringue and scraping batter from the bowl.
- Two sturdy baking sheets
- Lighter metal can brown shells unevenly. Many macaron bakers flip the sheets upside down so heat is more even along the surface.
- Silicone baking mats or parchment paper
- Provide a non stick surface for the shells.
- Piping bags and a small round piping tip
- A twelve to eighteen inch piping bag fitted with a plain round tip gives the cleanest circles.
- Cooling rack
- To cool the baked shells fully.
- Airtight container
- For storing and maturing the filled macarons in the fridge or freezer.
Gathering these tools before you start will help you feel prepared instead of scrambling mid recipe.
Method: Step by Step Preparation Guide
Step 01: Make the Lemon Buttercream or Lemon Filling
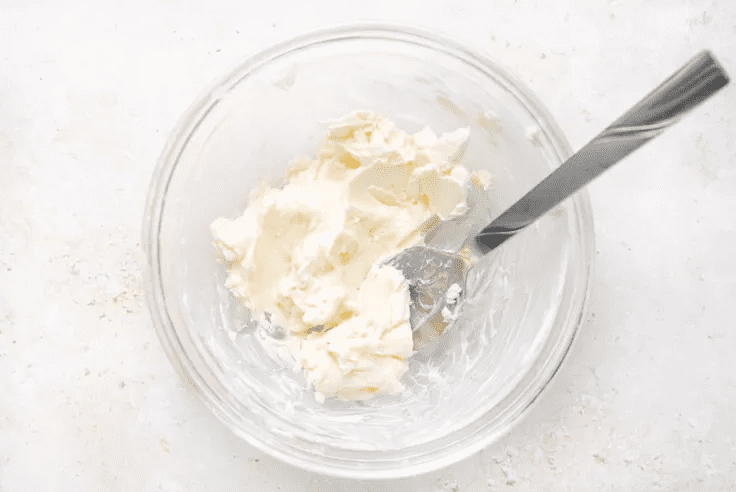
It is easiest to start with the filling. While the lemon buttercream rests, the flavors mingle and the texture improves.
- Whip the butter
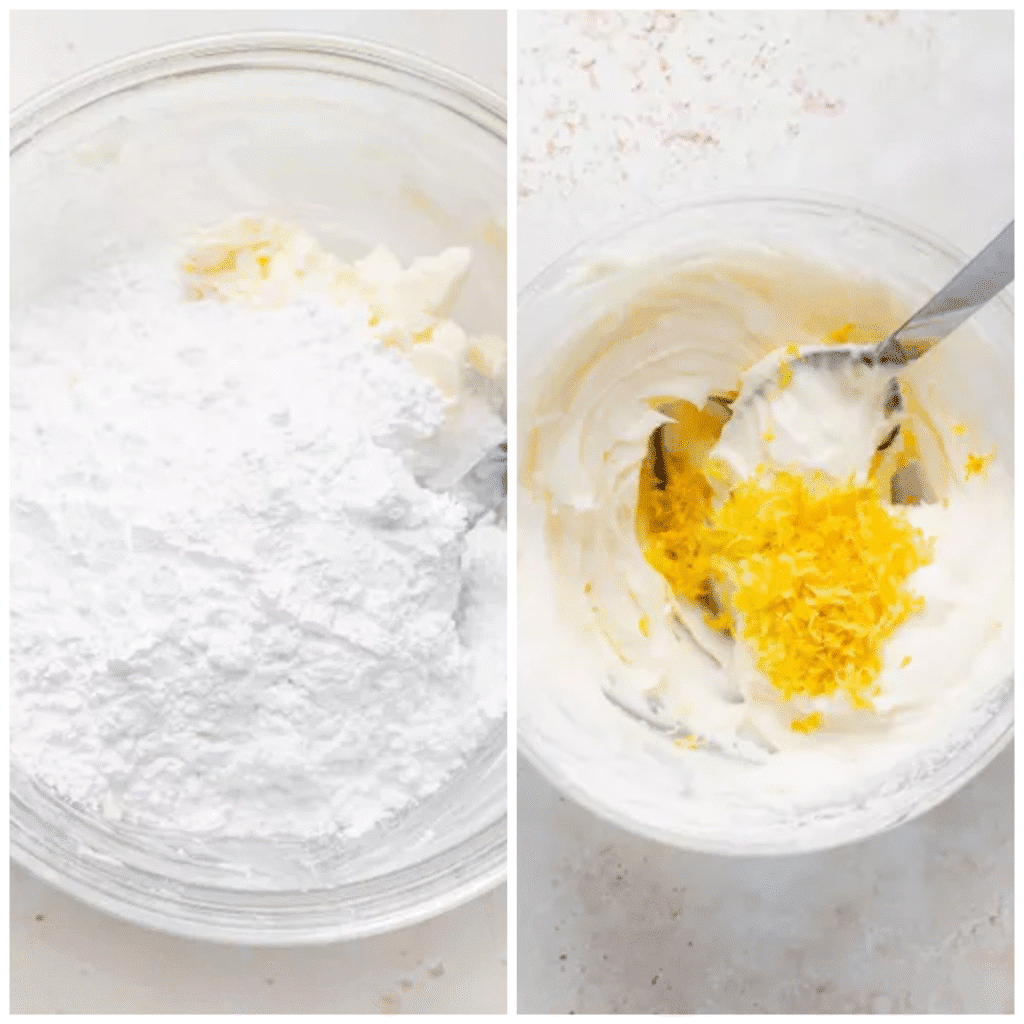
- Place the softened butter in a medium bowl or the bowl of a stand mixer fitted with the paddle attachment.
- Beat on medium speed for about 2 minutes until the butter looks smooth and slightly lighter in color with no visible lumps.
- Add powdered sugar gradually
- Add the powdered sugar in 3 to 4 additions, mixing on low speed after each addition until no dry sugar remains.
- Scrape around the bowl with a spatula to be sure nothing is stuck at the bottom.
- Once all the sugar is in, increase to medium speed and beat for 2 to 3 minutes until the buttercream looks light and fluffy.
- Flavor with lemon
- Add the lemon zest and a pinch of salt. Beat briefly to combine.
- Add 1 tablespoon of lemon juice and beat again. Taste. For a stronger lemon flavor, add up to 1 extra tablespoon of juice a teaspoon at a time or add a small splash of lemon extract.
- The buttercream should look thick and creamy and hold soft peaks.
- Adjust texture if needed
- If the buttercream looks too thick to pipe, add a teaspoon of milk or cream and beat again.
- If it looks loose or shiny and does not hold its shape, add 1 or 2 tablespoons of powdered sugar and beat again until it thickens.
Cover the bowl and keep the buttercream at cool room temperature while you make the shells, or refrigerate it if your kitchen is very warm.
Step 02: Prepare the Dry Ingredients for the Shells
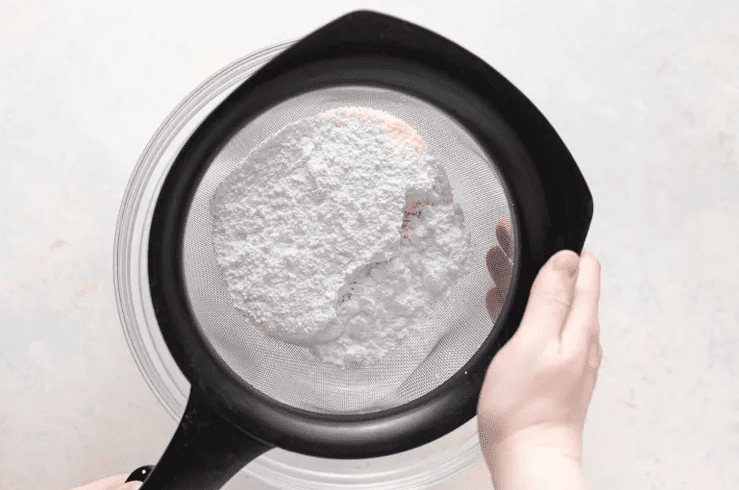
- Place the almond flour and powdered sugar in a fine mesh sieve set over a large bowl.
- Sift the mixture, pressing gently with a spoon if needed.
- Discard any coarse bits of almond left in the sieve.
Sifting is essential for smooth macaron shells. Any larger almond pieces will create bumps and may cause the tops to crack. Professional recipes almost always sift at least once and sometimes twice.
Step 03: Make the Meringue
A stable meringue is the backbone of French macarons.
- Degrease the bowl
- Dampen a paper towel with a small splash of vinegar or lemon juice.
- Wipe the inside of your clean glass or metal mixing bowl and the whisk attachment. Let it dry briefly.
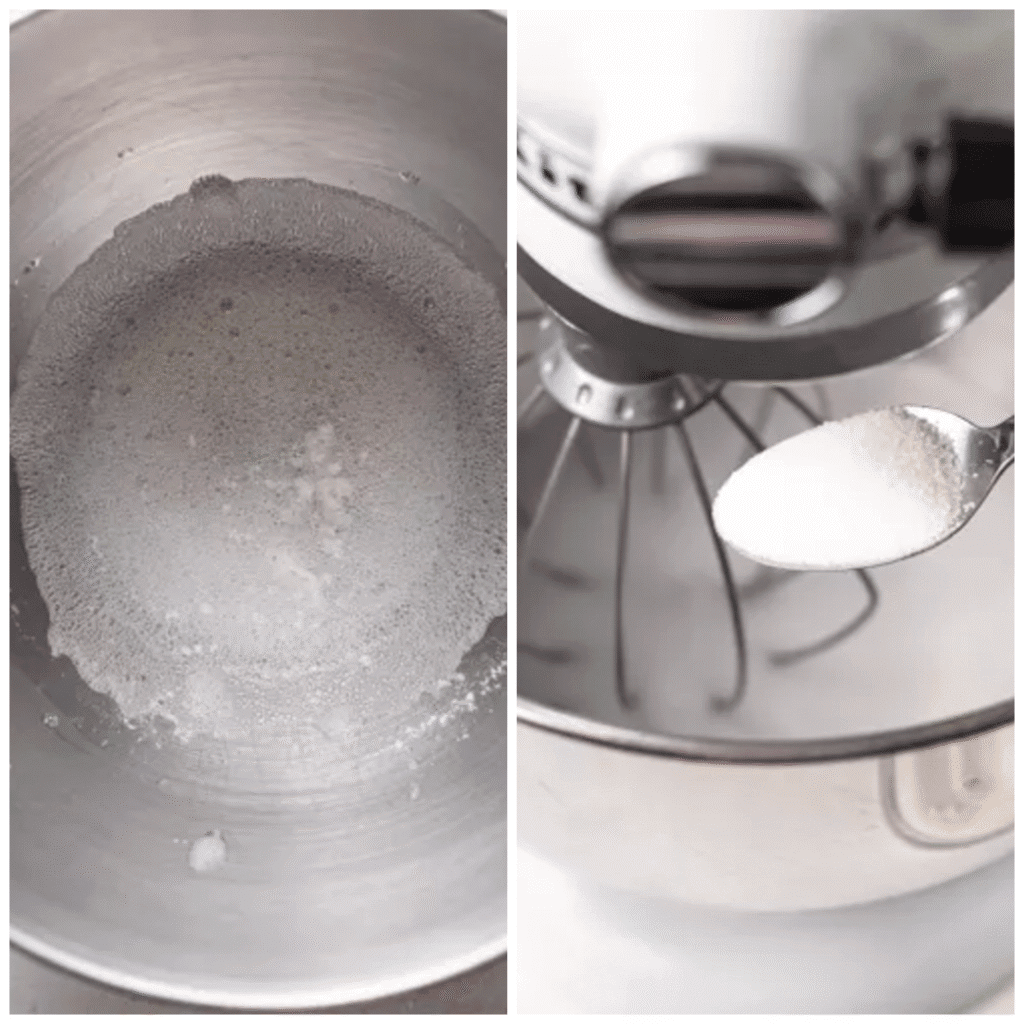
- Whip egg whites to a foam
- Place the room temperature egg whites in the prepared bowl.
- Begin whipping on medium low speed until the whites look foamy and no longer clear. This usually takes about 1 to 2 minutes.
- Stabilize with cream of tartar and sugar
- Sprinkle in the cream of tartar and a pinch of salt. Continue whipping for about 1 minute.
- With the mixer running, add the granulated sugar slowly, about 1 tablespoon at a time, letting it dissolve before adding more.
- Whip to glossy stiff peaks
- Once all the sugar is in, increase the mixer to medium high speed.
- Whip until the meringue looks thick, bright white, and glossy.
- Check for stiff peaks by lifting the whisk straight up. The peak should stand tall with just a tiny bend at the very tip and should not slide off the whisk.
If the peaks droop heavily, keep whipping and check again every 30 seconds. If the meringue starts to look chunky or grainy, it has gone too far and the batch will be more likely to crack or bake hollow, so it is worth starting over.
- Add food coloring
- Add 1 to 2 drops of lemon yellow gel food coloring and whip briefly until the color looks even.

Step 04: Fold in the Dry Ingredients and Do the Macaronage

Macaronage is the controlled folding step that turns stiff meringue into smooth flowing batter.
- First folds
- Add about one third of the almond flour and powdered sugar mixture to the meringue.
- Use a rubber spatula to fold by scraping around the bowl and cutting through the middle, turning the bowl as you go. Mix just until no dry pockets remain.
- Repeat with the remaining dry ingredients in two more additions.
- Refine the batter
- Once everything is combined, switch to a slightly more assertive motion.
- Use the spatula to scoop some batter up the side of the bowl and press it back down. This gently knocks out some extra air.
- Continue this motion several times, then lift the spatula and let some batter fall back into the bowl.
- Figure eight test
- Lift a generous ribbon of batter and draw a figure eight shape over the surface.
- The ribbon should flow smoothly, look like thick lava or honey, and the lines of the figure eight should slowly fade back into the batter within about 10 to 20 seconds.
If the batter breaks off the spatula in clumps and the figure eight lines never settle, it is under mixed. Fold a few more times and test again. If the batter flows in a very thin stream and the figure eight disappears immediately, it is over mixed and the shells will spread and bake flat.
Step 05: Pipe the Macaron Shells

- Prepare the trays
- Line two flat baking sheets with silicone mats or parchment paper. If you use parchment, a tiny dot of batter in each corner can help hold the paper in place.
- Fill the piping bag
- Fit a piping bag with a small round tip. Place the bag in a tall glass, fold the top edge over the rim, and fill it with batter.
- Twist the top closed so the batter does not escape.
- Pipe even rounds
- Hold the piping bag straight above the tray, about one centimeter above the surface.
- Squeeze gently and let the batter spread outward into a circle about 3 to 4 centimeters across.
- Stop squeezing, then give a tiny flick to the side to finish each circle. Repeat, leaving a bit of space between shells.
- Tap out air bubbles
- Firmly tap the baking sheet on the counter several times. You will see tiny bubbles rise to the surface.
- Pop any stubborn visible bubbles with the tip of a toothpick for smoother tops.
Keep the size and spacing as even as possible so the shells bake at the same rate and you can pair similar ones later.
Step 06: Rest the Shells
Resting allows a thin dry skin to form on top of each piped shell. This skin helps direct steam downward as the shells bake, creating the trademark macaron feet.
- Leave the trays at room temperature, away from direct sun, drafts, and steam.
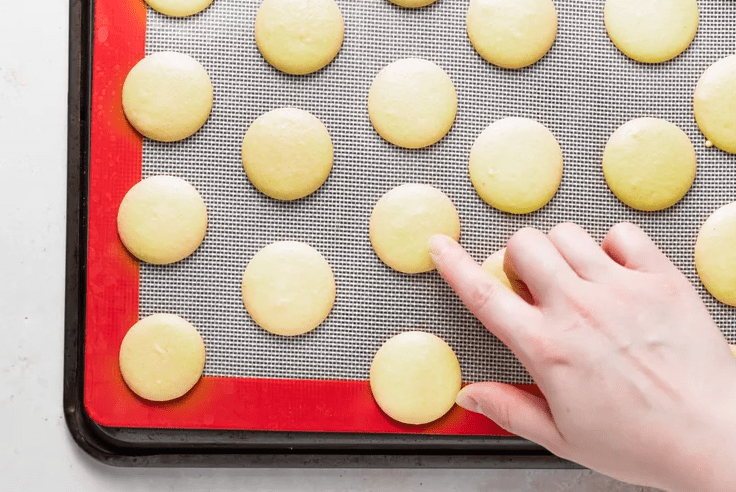
- After about 30 minutes, gently touch the top of one shell with a clean fingertip.
- When the shells are ready they should look slightly matte and feel dry on top. Your finger should not pick up any batter or leave a visible dent.
In a dry climate, this may happen in 20 to 30 minutes. In humid weather it can take close to an hour. If the shells still look shiny or sticky, give them a little more time.
Step 07: Bake the Shells
Oven temperature is one of the most sensitive variables in macaron baking. Many reliable recipes bake French macarons around 300 degrees Fahrenheit for about 12 to 18 minutes, sometimes at slightly higher or lower temperatures depending on the oven.
- Preheat the oven
- Set an oven rack in the middle position.
- Preheat the oven to 300 degrees Fahrenheit, about 150 degrees Celsius.
- If possible, use an oven thermometer to confirm the real temperature, since many home ovens run hotter or cooler than their setting.
- Bake one tray at a time
- Bake the first tray for about 13 minutes.
- Open the oven and very gently touch the top of one shell.
- If the top slides away from its feet at the base, the macarons need another 1 to 2 minutes. When done, the tops should feel set and should not wobble away from the feet.
- Cool completely
- Place the hot tray on a cooling rack and let the shells cool fully before attempting to remove them.
- Once cool, peel the silicone mat or parchment away from the shells rather than trying to pry the shells up with a spatula. Properly baked shells should release cleanly.
Repeat with the second tray.
Step 08: Fill and Mature the Macarons
- Match the shells
- Gently turn all of the shells upside down.
- Pair them by size so each macaron has a neat top and bottom.
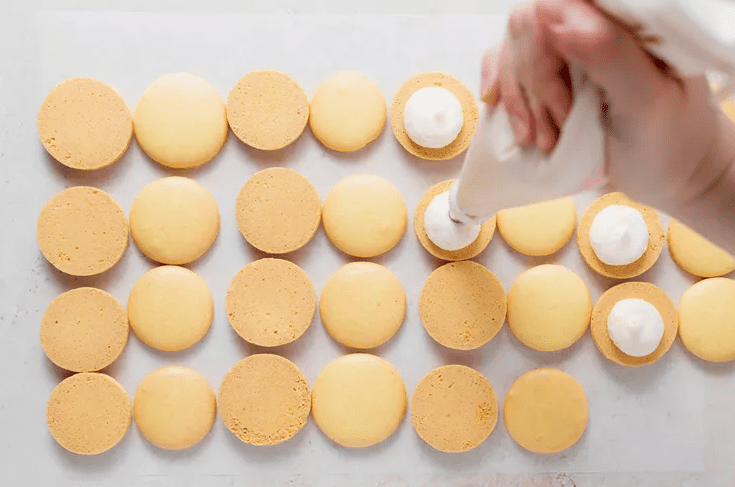
- Pipe the lemon buttercream
- Give the buttercream a quick stir. If you chilled it, let it soften for a few minutes, then briefly re whip.
- Spoon the buttercream into a piping bag fitted with a small round tip.
- Pipe a small mound in the center of half of the shells, leaving a narrow border around the edge.
- Sandwich the macarons
- Place a second shell on top of the filling and gently press just until the buttercream almost reaches the edge.
- Repeat with all remaining shells.
- Mature the macarons
- Arrange the filled macarons in a single layer in an airtight container.
- Cover and refrigerate for at least 12 hours and up to about 24 hours.
During this maturing time, moisture from the lemon buttercream slowly seeps into the almond shells, softening the interior and creating the classic contrast of a delicate crisp outside and chewy inside that authentic French macarons are known for.
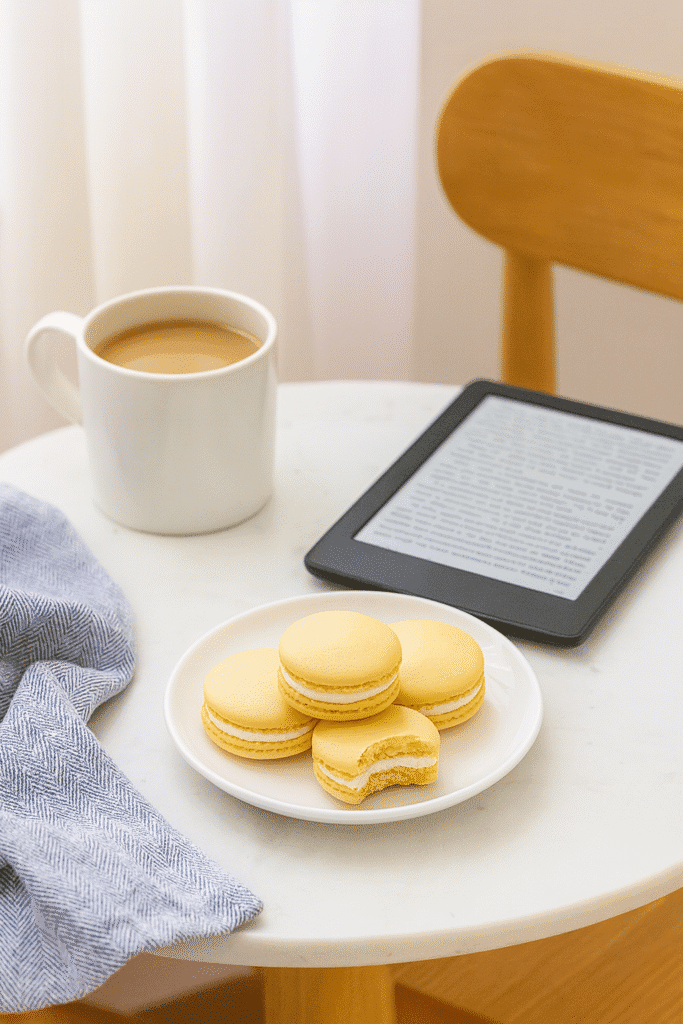
Before serving, let the macarons sit at room temperature for about 20 to 30 minutes for the best flavor and texture.

Optional variation
- Add a tiny teaspoon of lemon curd in the center of each macaron and surround it with buttercream.
- Lightly sprinkle a few tiny streaks of lemon zest on top of the shells before baking, or paint a very thin stripe of edible gold after baking for decoration.
Key Advantages of Making Lemon Macarons
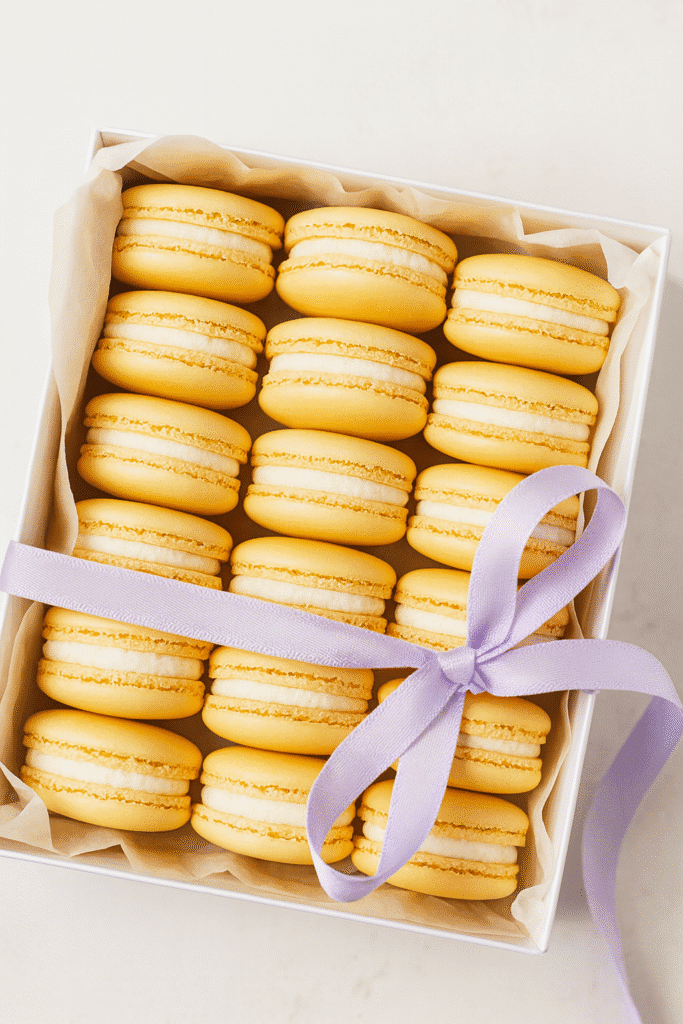
- Elegant cookies that look gift worthy for holidays, weddings, showers, and afternoon tea trays
- Bright lemon flavor that balances the natural sweetness of French macarons
- Almond based shells that are naturally gluten free when you use gluten free ingredients and avoid cross contamination
- A flexible flavor base, since lemon pairs beautifully with raspberry, blueberry, coconut, and many other fillings
- A perfect make ahead dessert because maturing actually improves the texture and they store well in the fridge or freezer for future gatherings
Mistakes to Avoid
Real macaron problems usually come from a few common causes. Here is what to watch for and how to prevent issues.
- Not weighing ingredients
- Macaron batter is very sensitive to the ratio of almond flour, powdered sugar, and egg whites. Using cups instead of grams can easily throw this off. A kitchen scale removes that guesswork.
- Under whipped or over whipped meringue
- If the meringue is too soft, the shells may spread, bake without feet, or crack. If the meringue is over whipped and grainy, it loses flexibility and can also cause hollows or cracked tops. Aim for glossy stiff peaks that just bend at the tips.
- Over mixing or under mixing during macaronage
- Under mixed batter stays very thick and holds sharp peaks when piped. These shells may have little points on top and can crack. Over mixed batter flows like water and the shells spread out and bake flat. Stop folding once the batter passes the figure eight test.
- Skipping or shortening the resting time
- If the shells go into the oven while the surfaces are still sticky, steam will burst through the top and cause cracks instead of forming neat macaron feet. Always wait until the tops feel dry and matte, even if this takes close to an hour on a humid day.
- Piping at an angle
- Holding the piping bag at an angle makes lopsided shells that lean to one side and bake unevenly. Keep the tip straight above the tray for neat circles.
- Oven temperature inaccuracies
- Ovens that run hot can brown the shells and crack the tops. Ovens that run cool may never fully set the centers. An inexpensive oven thermometer is one of the best tools for consistent macarons.
Expert Tips and Real Life Examples
Here are some practical tips drawn from how pastry chefs and experienced home bakers handle French macarons in real kitchens.
- Use an oven thermometer and know your oven
- If your first tray comes out pale with no feet, your oven may be cooler than the setting. If they brown quickly or crack, your oven may be hotter. Adjust by 10 to 15 degrees for the next tray.
- Adjust resting time for humidity
- On a dry winter day, your shells might be ready in 20 to 30 minutes. On a muggy summer afternoon, they might need 50 to 60 minutes. Focus on how the surface feels rather than the exact minutes on the clock.
- Start with a single test tray
- If you are new to macarons, pipe one tray and leave the remaining batter in the piping bag or bowl. Bake the first tray and check how your oven behaves. If needed, you can tweak bake time or temperature before baking the next tray.
- Keep notes for next time
- Write down how long your shells rested, how many minutes they baked, and anything you noticed about your oven or batter. The second batch of macarons is almost always better because you are working with real information from your own kitchen.
- Try flavor twists once you master lemon
- The lemon macaron shells here also pair nicely with raspberry buttercream, berry jam with cream cheese frosting, or coffee flavored fillings for a mocha citrus combination.
- You can keep the shells lemon flavored and change only the filling so you get variety without adjusting the macaron batter itself.
A simple real life scenario
- If your first tray comes out with cracked tops and barely formed feet, try reducing the oven temperature by about 10 degrees, extending the rest time on the second tray until the shells feel more dry, and double checking that your meringue reaches stiff but not dry peaks. This combination often fixes cracks on the next attempt.
Nutrition Facts (per serving)
Nutrition will vary depending on the exact size of your macarons and how much filling you use. Based on typical nutrition data for authentic French macarons, a medium macaron of about 13 grams often falls in the range of 50 to 80 calories. Nutrition Value
For this recipe, an approximate estimate per macaron is:
- Calories: about 90
- Total fat: about 5 grams
- Carbohydrates: about 9 grams
- Sugar: about 8 grams
- Protein: about 2 grams
These values are approximate and should be used as a general guide only, not as medical or dietary advice.
Frequently Asked Questions
Q1: Can I make lemon macarons without a stand mixer?
Yes. A stand mixer makes the process easier, but a strong electric hand mixer works as well. The key is patience. Whip the egg whites long enough to reach glossy stiff peaks and move the mixer around the bowl so everything whips evenly. You may need a few extra minutes of whipping compared to a stand mixer.
Q2: Can I use regular liquid food coloring instead of gel for lemon macarons?
Liquid food coloring can thin the macaron batter, which may cause the shells to spread and bake flat. For the most reliable results, use gel or paste coloring and only a small amount. If you must use liquid coloring, add just a few drops to the meringue stage and be prepared for slightly softer batter.
Q3: How long do lemon macarons last in the fridge or freezer?
Once filled and matured, lemon macarons keep well in an airtight container in the fridge for about 5 to 7 days. For longer storage, freeze them in a single layer until firm, then layer them in a container with parchment between layers. For best quality, enjoy frozen macarons within 1 to 2 months, even though some professional bakers report acceptable quality for several months when carefully wrapped.
Q4: Are lemon macarons gluten free and what should I watch for?
Traditional macaron shells made with almond flour, powdered sugar, and egg whites contain no gluten. The lemon buttercream filling here is also naturally gluten free when made with gluten free ingredients. The main concerns are cross contamination in the factory where the almond flour and powdered sugar are processed and any extra flavorings or decorations that might contain gluten. Always read labels and use certified gluten free products if you are baking for someone with celiac disease or gluten sensitivity.
Q5: What can I use instead of cream of tartar?
Cream of tartar helps stabilize the egg whites so the meringue holds its volume. If you do not have it, you can use a few drops of lemon juice or white vinegar instead. They provide acid that supports the egg proteins, although the meringue may be slightly less stable than with cream of tartar.
Q6: How do I prevent hollow macaron shells?
Hollow shells are usually caused by a combination of factors such as over whipped meringue, too much air left in the batter, or an oven that is too hot. Aim for glossy stiff peaks that are not dry, perform macaronage until the batter flows in a slow ribbon, firmly tap the trays to remove air bubbles, and consider slightly lowering the oven temperature or extending the bake by a minute or two so the interior has time to fully set.
Conclusion
Lemon macarons bring together the best parts of French macarons and lemon desserts in one elegant bite. When you understand what the batter should look like during macaronage, how stiff the meringue should be, and how the shells should feel before baking, the process becomes far less mysterious. Weighing ingredients, watching visual cues instead of relying only on the timer, and letting the filled macarons mature overnight are the real keys to success.
If you feel nervous, start with a single test tray and treat the first batch as a friendly lesson with your own oven. Take a few notes, adjust if needed, and before long you will have a box of bright lemon macarons that look like they came from a pastry shop. Once you are comfortable with the basic lemon version, you can play with new fillings and decorations while keeping the same reliable almond shell recipe.

Bright Lemon Macarons For Confident Home Bakers