If you love bakery style lemon scones that are flaky on the outside, tender inside, and full of citrus flavor, this version is written for you. These lemon scones use plenty of fresh lemon zest and an easy lemon glaze for a bright finish. The mixing method happens in one large bowl, and every step is broken down so that even a nervous beginner can follow along. With a little attention to cold butter and gentle mixing, you can pull these together for a relaxed weekend breakfast, a sweet brunch recipe, or a simple afternoon baking project.
Time and Serving
Time
- Prep time: 20 minutes
- Chill time: 15 to 20 minutes
- Bake time: 18 to 22 minutes
- Cool and glaze time: 15 minutes
Total time: About 70 to 75 minutes from start to serving, most of it hands off
Yield
- About 8 generous lemon scones
- Serving size: 1 scone
Times and yields are based on a standard home oven and a single tray of scones.
Insight into Lemon Scones

Lemon scones are lightly sweet, rich, biscuit style pastries that get their flavor from fresh lemon zest in the dough and a simple lemon glaze on top. They are not as fluffy as muffins and not as plain as basic biscuits. Instead, they sit in that lovely middle ground with a tender crumb, crisp edges, and a clear citrus aroma.
Compared with plain scones, lemon scones have:
- A more noticeable fragrance from lemon zest in the dough
- A sweet tart finish from lemon glaze
- A brighter flavor that feels right in any season
Compared with lemon loaf or lemon muffins, these lemon scones are:
- Less sweet, which makes them perfect with coffee or tea
- More crumbly and flaky, thanks to cold butter that stays in small pieces in the dough
- A little richer, which helps them feel special for brunch or a slow breakfast
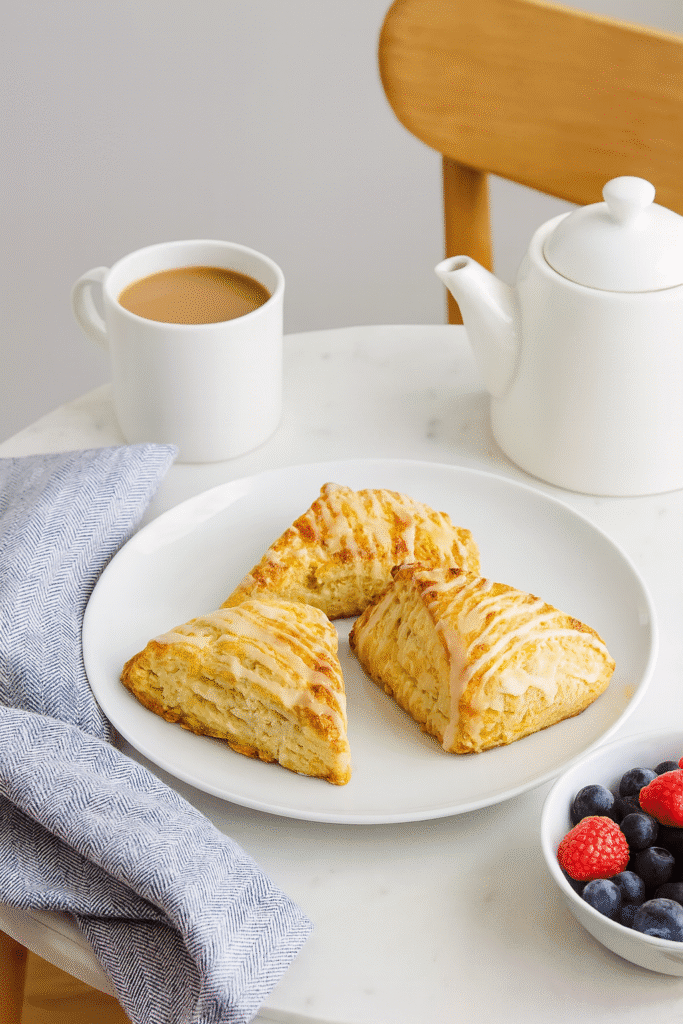
They work well on a brunch table with fruit, eggs, and coffee. They also feel right at an afternoon tea, or even as a treat you bake for yourself and enjoy warm at the kitchen table. The gentle lemon flavor plus the light sweetness makes them flexible for many occasions.
Ingredients
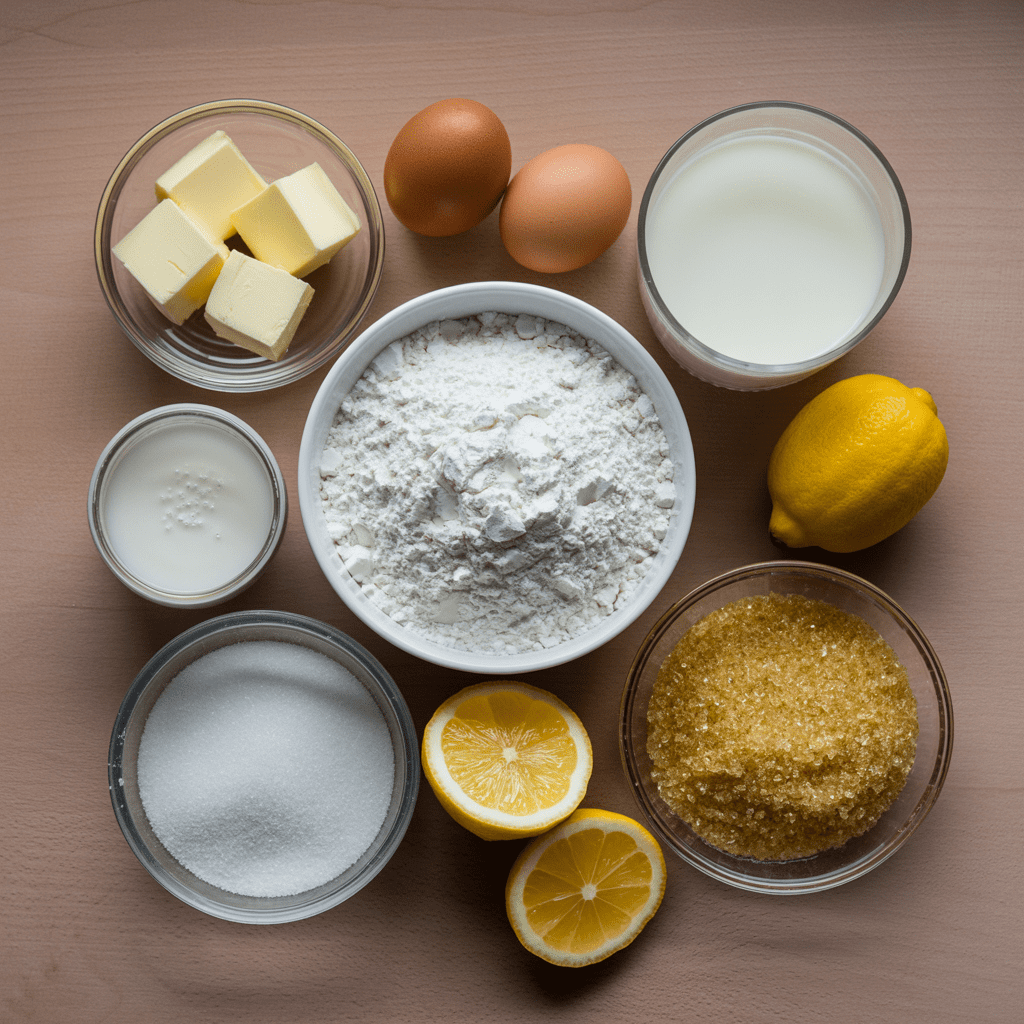
Ingredients for Lemon Scones
- Finely grated zest of 3 medium lemons
- 1 half cup granulated sugar
- about 100 grams
- 3 cups all purpose flour
- about 360 grams
- 1 tablespoon baking powder
- 1 quarter teaspoon baking soda
- 1 half teaspoon fine salt
- 1 cup cold unsalted butter, cut in small cubes
- about 227 grams
- 1 large egg, cold
- Two thirds cup cold buttermilk, plus extra for brushing the tops
- about 160 milliliters
Quality notes:
- Choose bright lemons with smooth, fragrant skin for the best lemon zest
- Keep the butter very cold until you are ready to cut it into the flour
- Use chilled buttermilk and egg so the dough stays cool, which supports flaky scones
Ingredients for Lemon Glaze
- 1 half cup powdered sugar
- about 60 grams
- 2 to 3 tablespoons fresh lemon juice
- about 30 to 45 milliliters, enough to reach a drizzle ready consistency
Optional Mix Ins
Use one option per batch so the dough does not become too heavy or wet.
- Lemon blueberry scones
- 1 to 1 and a half cups blueberries, fresh or frozen
- Lemon poppy seed scones
- 2 to 3 tablespoons poppy seeds
- Lemon almond scones
- 2 to 3 tablespoons sliced toasted almonds for sprinkling on the glaze
When using berries, frozen berries often hold their shape better in the dough and are suggested by many professional bakers for scone recipes because they bleed less and keep the dough colder.
Required Tools for Making the Recipe
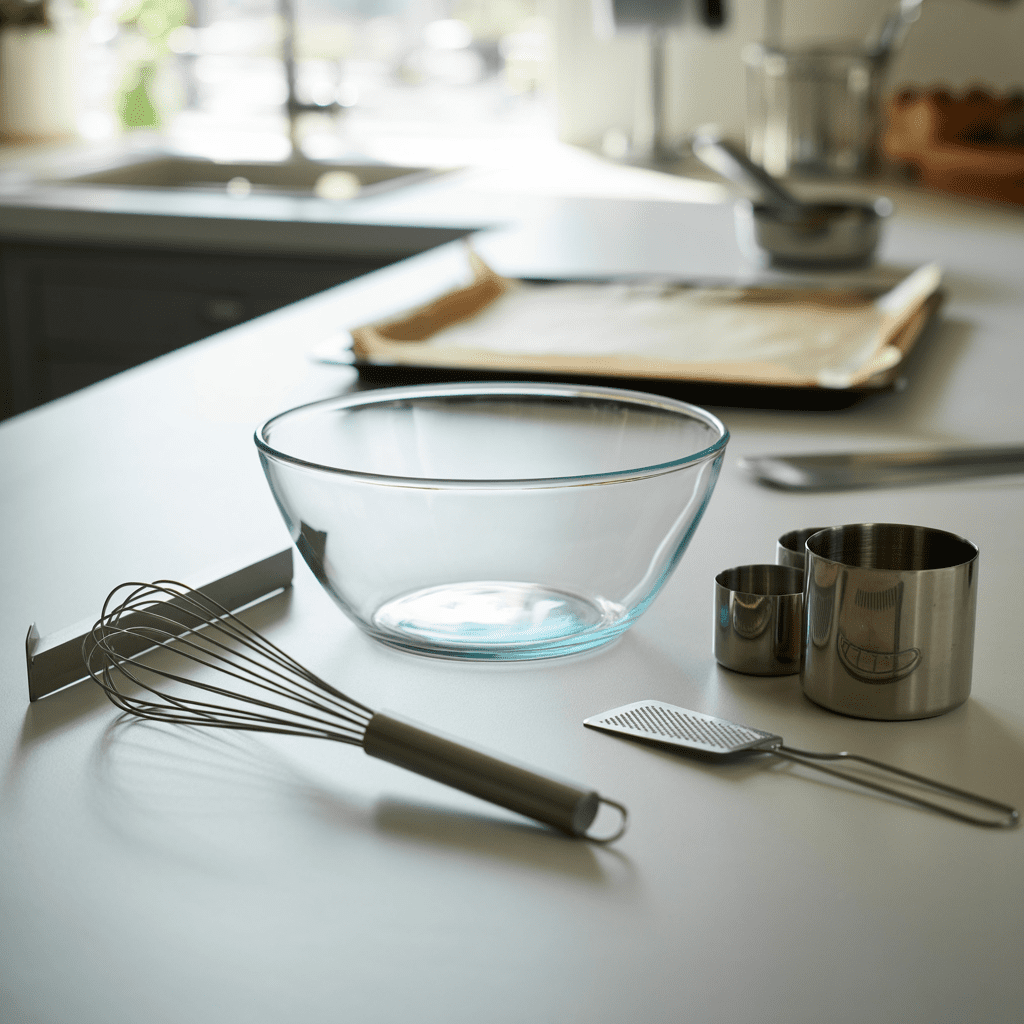
You do not need special bakery equipment for these lemon scones. A basic home kitchen is enough.
- Large mixing bowl
- Fine grater or microplane for lemon zest
- Measuring cups and measuring spoons, or a kitchen scale for grams
- Whisk
- Rubber spatula
- Pastry cutter or your fingertips for working in the butter
- Baking sheet
- Parchment paper
- Bench scraper or sharp knife for cutting wedges
- Pastry brush for brushing buttermilk on top
- Small bowl and spoon or small whisk for the lemon glaze
- Cooling rack if you have one
Method: Step by Step Preparation Guide
Step 01: Preheat the Oven and Prepare the Pan
- Set your oven to 425 degrees Fahrenheit, which is about 220 degrees Celsius. This relatively high temperature helps the scones rise quickly and set their flaky layers.
- Line a baking sheet with parchment paper. This helps prevent sticking and promotes even browning on the bottoms. Set the tray aside.
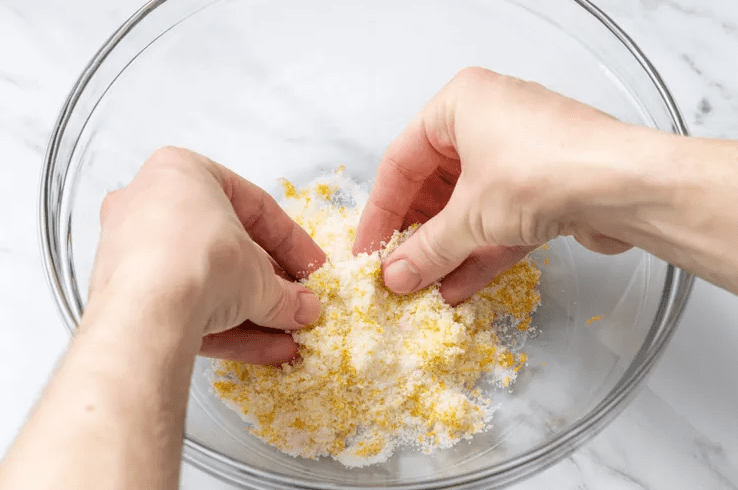
Step 02: Infuse the Sugar with Lemon Zest
- Place the sugar in a large mixing bowl.
- Add the finely grated zest of 3 lemons.
- With clean fingertips, rub the zest into the sugar. Take a minute or two to pinch and rub until the sugar feels slightly damp and smells very strongly of lemon.
This step helps release the natural citrus oils from the zest, which is a technique often recommended in baking classes for stronger lemon flavor. The sugar carries that aroma through the dough so your lemon scones taste and smell bright and fresh.
Step 03: Combine the Dry Ingredients
- Add the flour, baking powder, baking soda, and salt to the lemon sugar.
- Use a whisk to mix everything thoroughly. You want the baking powder and baking soda evenly distributed so the scones rise consistently.
Even mixing of leavening agents is a general baking best practice. It helps avoid uneven pockets of baking powder that can cause tunnels or bitter bites.
Step 04: Cut in the Cold Butter
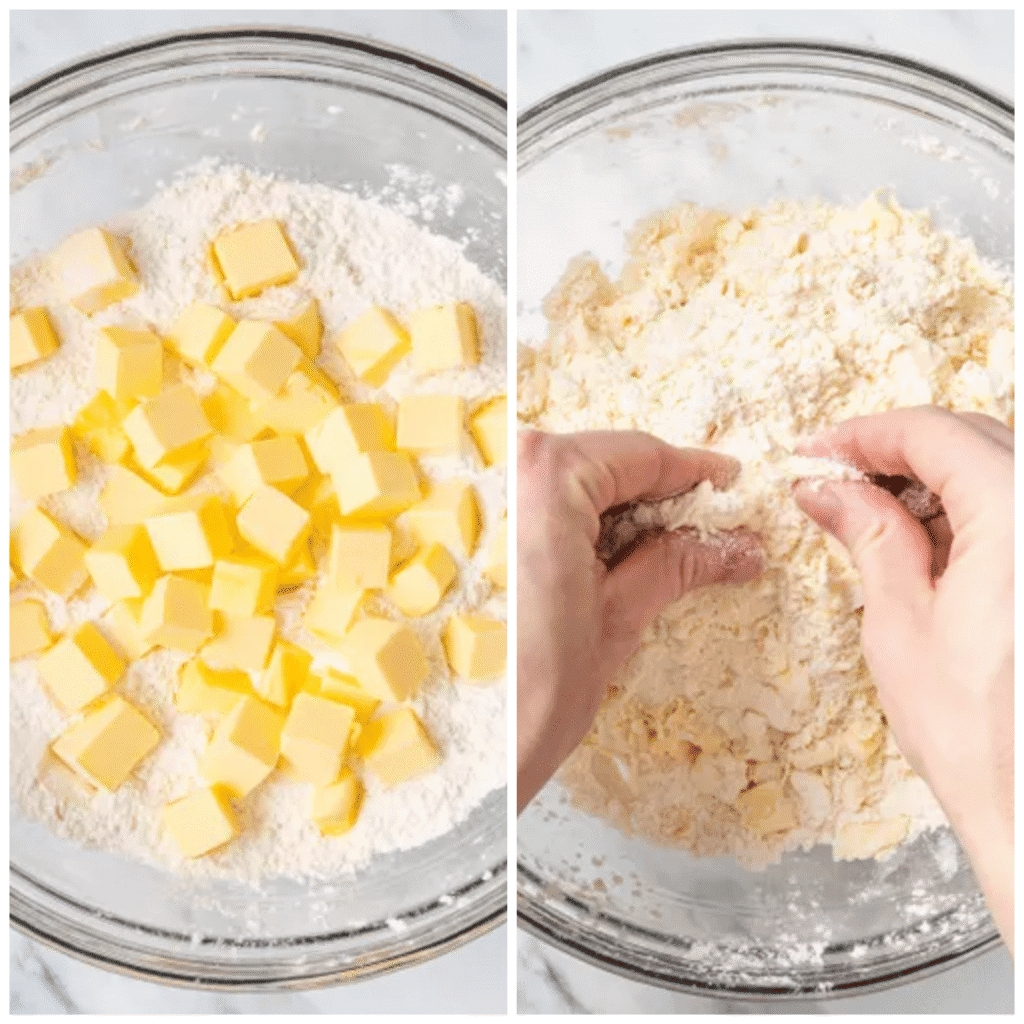
- Add the cold butter cubes to the bowl. Toss them gently with the flour mixture so each cube is lightly coated in flour.
- Use a pastry cutter to cut the butter into the flour. Press down and rock the cutter through the mixture until you have small pieces of butter throughout. If you do not have a pastry cutter, use just your fingertips to work the butter into the flour.
- Stop when the mixture looks like coarse crumbs, with many small pieces of butter about the size of peas. Some slightly larger flat bits are fine.
Those small visible pieces of butter are essential for flaky scones. In the hot oven, the water in the butter turns to steam and creates small pockets that lift the dough and form tender layers. Professional baking resources repeat this guideline for scones and biscuits, and keeping the butter cold supports this effect.
Step 05: Mix the Wet Ingredients
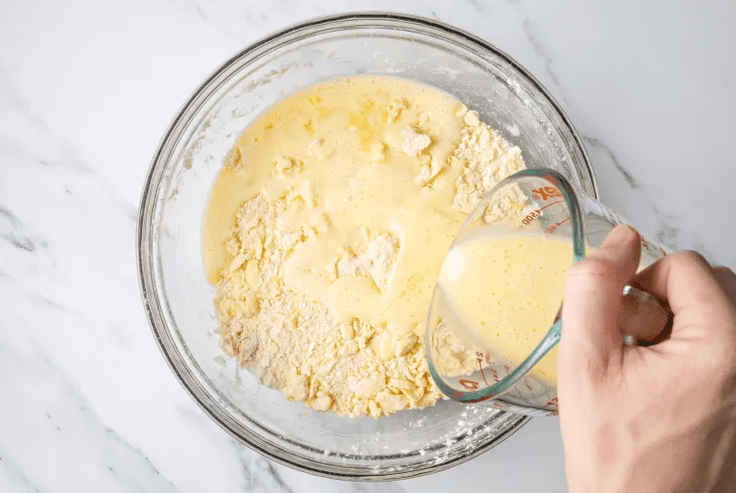
- In a separate small bowl or liquid measuring cup, whisk the cold egg and cold buttermilk until smooth.
- Make a little well in the center of the flour mixture and pour in the buttermilk mixture.
Buttermilk adds gentle acidity to the dough. That acid reacts with baking soda to help create lift, and it also tenderizes the gluten in the flour, which supports a softer crumb. This is consistent with standard baking science used in many biscuit and scone recipes.
Step 06: Bring the Dough Together Gently

- Use a rubber spatula to fold the liquids into the flour mixture. Start in the center and scoop outward, turning the bowl as you go.
- Continue folding just until the dough looks moistened and starts to hold together. You should still see some crumbly bits and possibly a few small dry spots.
The dough should feel a little shaggy and not fully smooth. If you overmix at this stage, the gluten in the flour develops too much, which can lead to tough or dense scones. Many experienced bakers recommend stopping while the dough still looks slightly messy for that reason.
Texture cue: When you squeeze a bit of dough in your hand, it should hold together without cracking apart immediately, but it should not feel sticky or very wet.
If the dough seems very dry and will not hold when pressed, you can sprinkle in a teaspoon or two of extra buttermilk and gently fold again.
Step 07: Shape and Cut the Dough
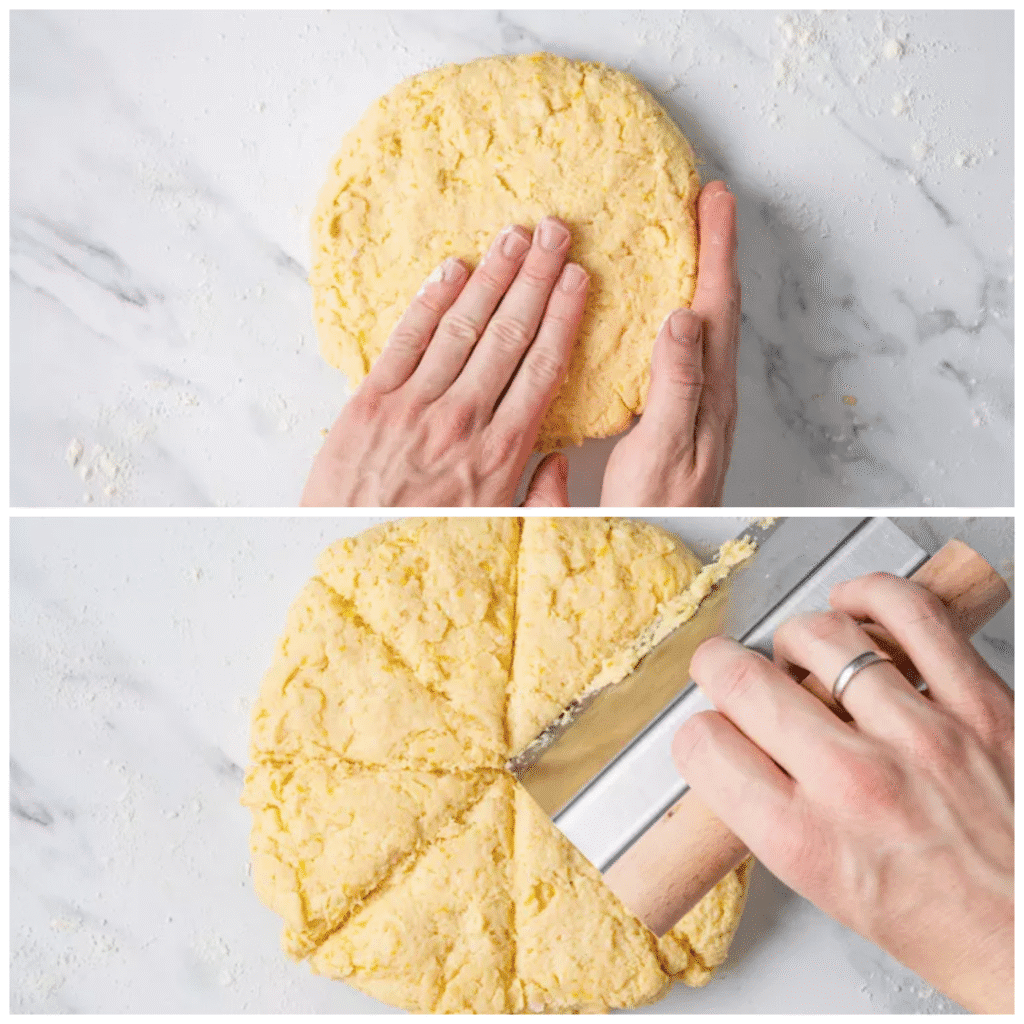
- Lightly flour a clean work surface.
- Turn the dough out onto the surface. Use your hands to gently press any loose crumbs into the main mass.
- Gently knead the dough three or four times by folding it over itself and pressing lightly. This is only to bring the dough together, not to build strong gluten.
- Pat the dough into a round disk that is about 8 inches in diameter and about one and one half inches thick. Try to keep the thickness even so the scones bake at the same speed.
- With a bench scraper or sharp knife, cut the disk into 8 wedges like a pizza.
Work quickly so the dough stays cool. Warm dough means melted butter, which reduces flakiness.
Step 08: Arrange, Brush, and Chill
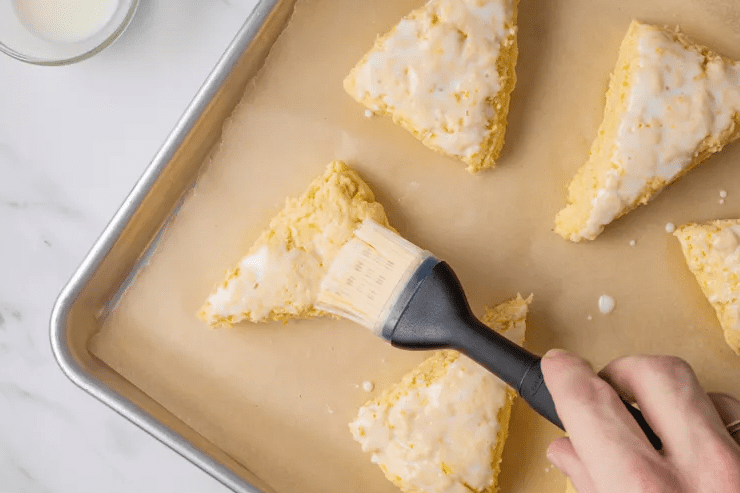
- Place the wedges on the prepared baking sheet, leaving space around each one so air can circulate.
- Brush the tops lightly with a little extra buttermilk using a pastry brush. This encourages a golden color on top.
- Slide the baking sheet into the freezer for 15 to 20 minutes. This brief chill firms the butter and relaxes the dough, which helps the scones keep their shape and improves their flaky texture during baking.
Chilling shaped scones before baking matches the guidance of many professional bakers who aim for clean edges and distinct layers.
Step 09: Bake the Lemon Scones
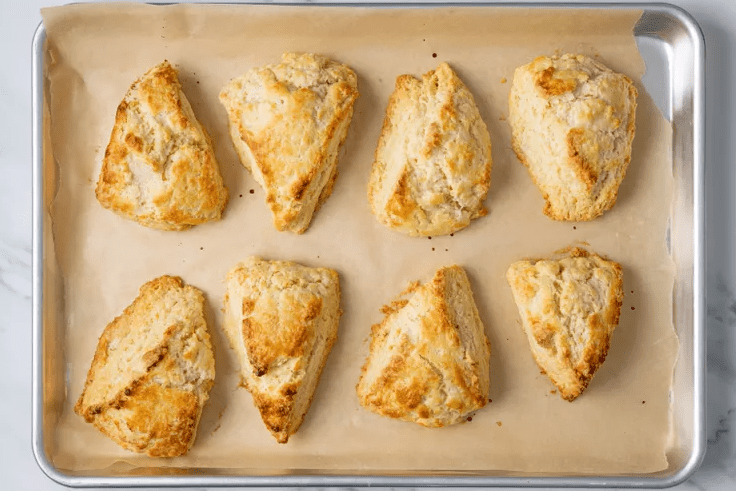
- After the chill time, transfer the tray to the center rack of the preheated oven.
- Bake for about 18 to 22 minutes.
- Start checking at 18 minutes. The scones are done when
- The tops are lightly golden
- The edges look set and slightly browned
- The bottoms are a deeper golden color
- The kitchen smells strongly of lemon and butter
If you gently tap the top of a scone, it should feel set and not doughy. Oven performance varies, so rely on both time and visual cues.
- Place the tray on a cooling rack and let the scones cool for at least 10 to 15 minutes before glazing.
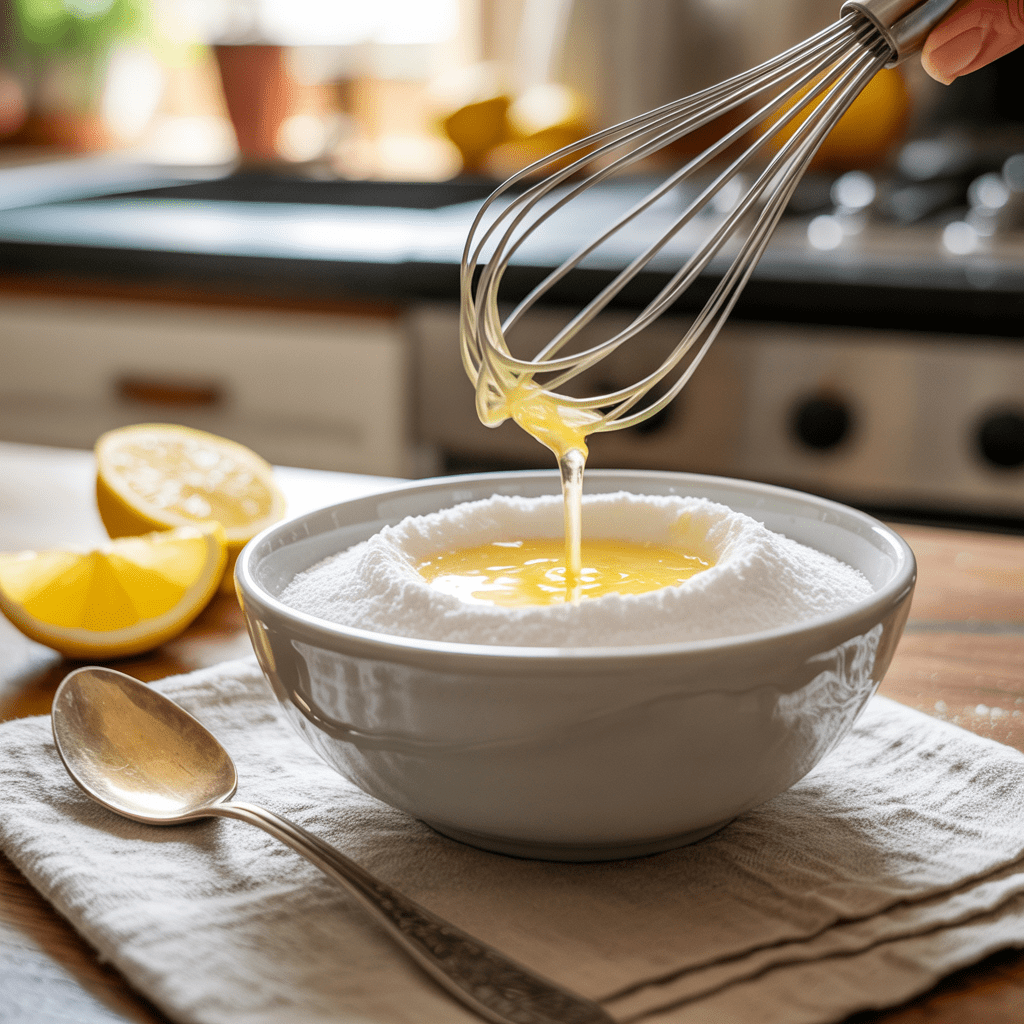
Step 10: Make the Lemon Glaze
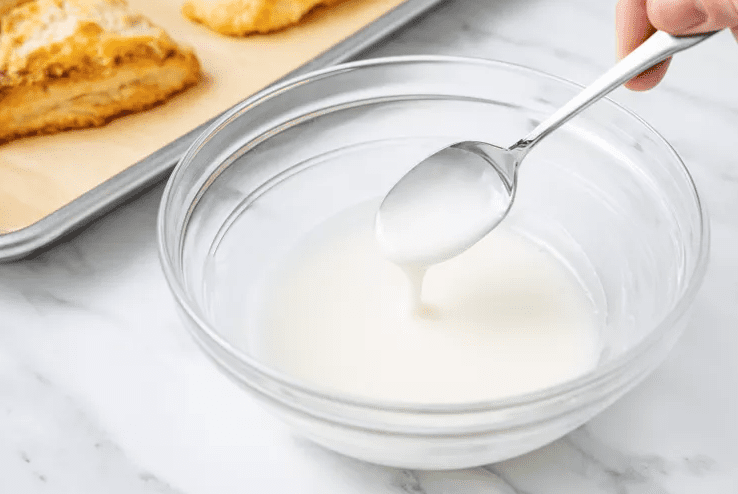
- In a small bowl, add the powdered sugar.
- Start with 2 tablespoons of lemon juice and whisk until smooth.
- If the glaze is too thick to drizzle, add a few more drops of lemon juice. If it becomes too thin, add a little more powdered sugar.
You are aiming for a texture that falls off the spoon in a slow ribbon. This lets it cling to the scones without running completely off.
Step 11: Glaze and Serve
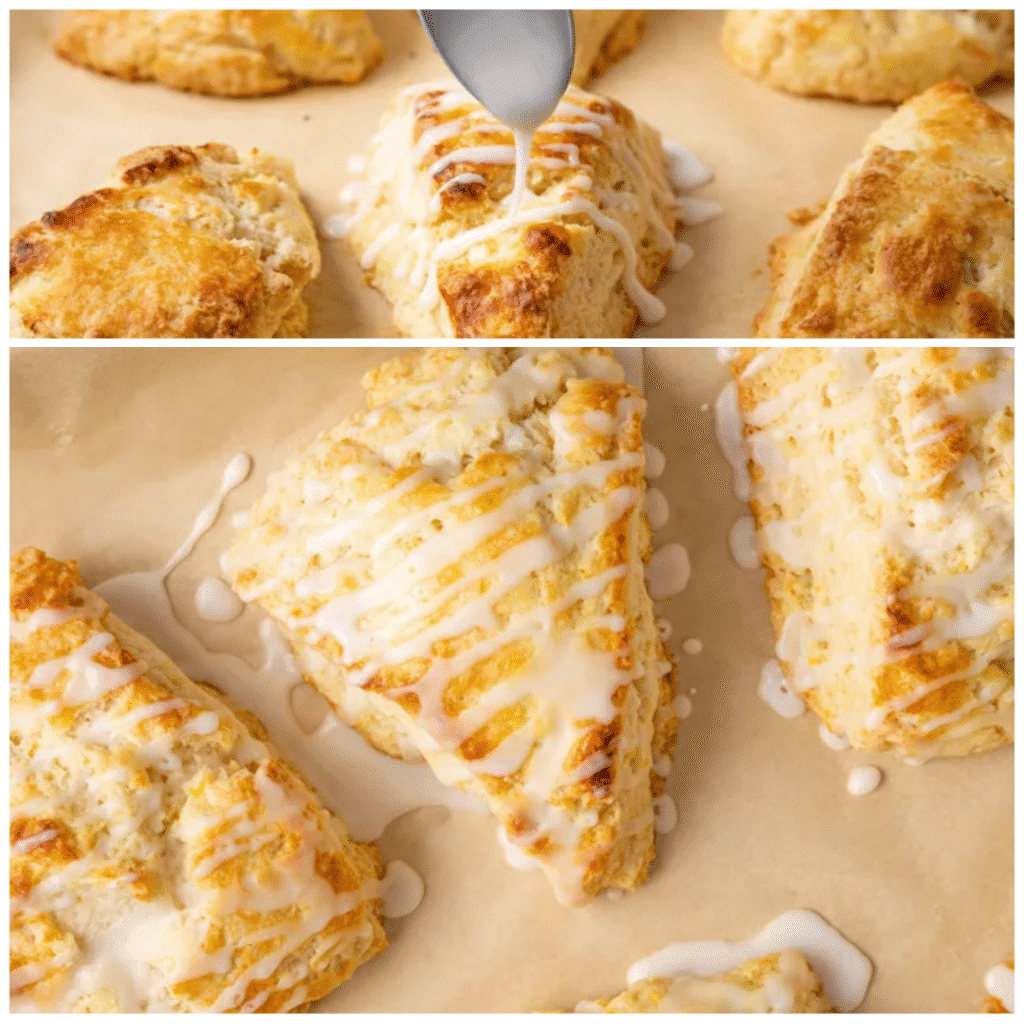
- When the scones are warm but no longer very hot, spoon or drizzle the lemon glaze over the tops. You can let some glaze drip down the sides for a rustic look.
- Allow the glaze to set for about 10 minutes. It will firm up into a thin, slightly shiny coating.
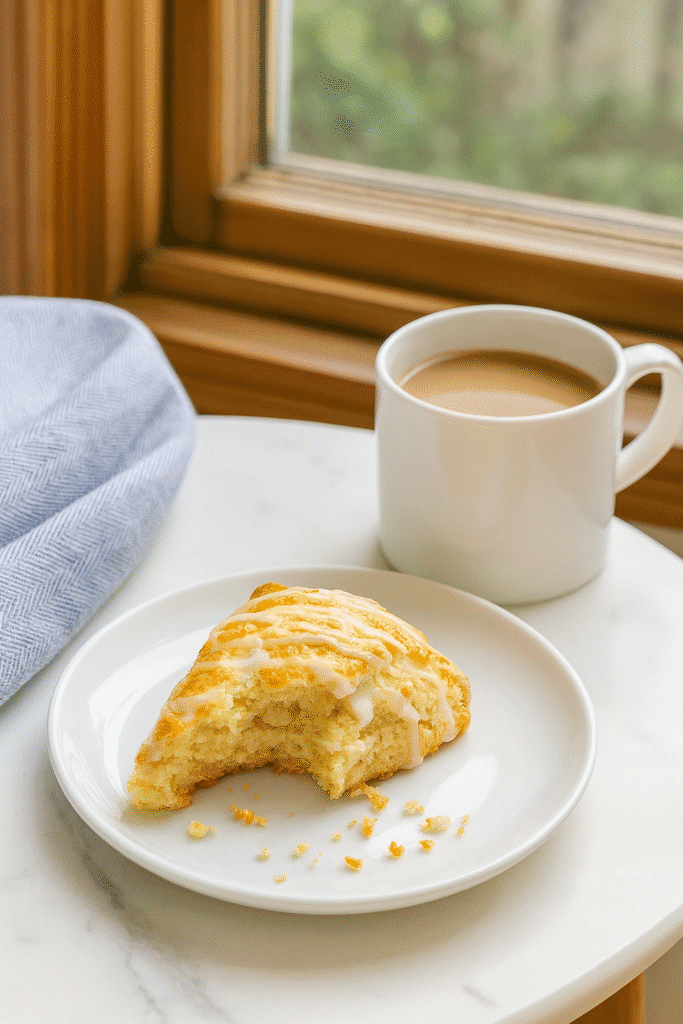
- Serve the lemon scones slightly warm or at room temperature.
Simple Variations and Flavor Twists
- Lemon blueberry scones
Fold 1 to 1 and a half cups of blueberries into the dough right after you add the buttermilk mixture. Frozen berries tend to bleed less and stay intact, which many bakers prefer. Add them while still frozen. - Lemon poppy seed scones
Add 2 to 3 tablespoons of poppy seeds to the dry ingredients before adding the butter. You can also sprinkle a pinch of poppy seeds over the glaze before it sets. - Lemon almond crunch
Sprinkle sliced toasted almonds over the freshly glazed scones. The nuts stick to the glaze and add texture and flavor. - Glaze thickness adjustments
For a light, subtle finish, thin the glaze with more lemon juice and drizzle lightly. For a thicker icing style finish, use less juice and spread a thicker layer over the fully cooled scones.
Key Advantages of Making Lemon Scones
- Bright lemon flavor
Fresh lemon zest in the dough and lemon juice in the glaze create a clear citrus flavor that feels fresh but not overpowering. - Flaky and tender texture
Very cold butter and gentle mixing help produce layers inside, while buttermilk adds tenderness and moisture. The result is a crisp outside and soft interior. - One bowl mixing method
The main dough comes together in one large bowl, which keeps cleanup simple and makes this recipe feel manageable for a busy morning. - Versatile for any occasion
These lemon scones fit right into breakfast baking, a sweet brunch recipe line up, or afternoon tea. They sit well next to fresh fruit, eggs, or a simple latte. - Freezer friendly scones
You can freeze the baked scones or the unbaked wedges, which lets you bake just a few at a time or prepare ahead for guests.
Each of these advantages connects directly to real life kitchen moments. You get a treat that feels special without needing bakery level equipment or a full day in the kitchen.
Mistakes to Avoid
- Using warm or soft butter
If the butter is soft, it blends too fully into the flour instead of staying in small pieces. This leads to a more cake like texture and less flakiness. Keep the butter cold, and chill the shaped scones before baking. - Overmixing the dough
Stirring too long after adding the buttermilk strengthens the gluten in the flour. This can make scones tough or chewy. Stop mixing as soon as the dough comes together and still looks a little uneven. - Skipping the chilling step
Placing unchilled dough directly into the oven encourages the butter to melt before the scones set. The scones may spread, lose their shape, and bake up flatter. Even a short rest in the freezer improves the texture. - Adding too much flour when shaping
Heavy flour on the work surface gets pressed into the dough and dries it out. Use only a light dusting and brush off extra flour from the surface of the dough if needed. - Overbaking
Keeping scones in the oven too long makes them dry and hard once cooled. Check early and use color and feel as guides. It is better for scones to be just baked through rather than deeply browned all over.
When a bake does not go perfectly, use the visual cue you noticed as a lesson. For example, if your scones spread, note whether the butter was very cold and whether the dough had enough chill time before baking.
Expert Tips and Real Life Examples
- Why frozen berries can be helpful
When making lemon blueberry scones, frozen berries hold their shape better and keep the dough colder while you mix. This matches advice from many professional baking sources that recommend frozen fruit for scone doughs to reduce bleeding and keep the texture flaky. - Storing extra lemons and zest
If you buy extra lemons, you can zest them first, then freeze the zest in a small sealed container for later baking. The juice can be frozen in small portions in an ice cube tray and moved to a freezer bag once solid. This lines up with common kitchen storage practices and helps reduce waste. - Adjusting lemon intensity
For stronger lemon flavor, add an extra teaspoon of lemon zest to the dough or use slightly less powdered sugar in the glaze so the lemon juice stands out. For a milder flavor, use a bit more powdered sugar and a touch less zest. - A real life serving moment
In my own kitchen, I like to bake these lemon scones on a weekend morning when the light is soft and the house is quiet. I mix the dough while coffee brews, chill the wedges while the oven heats, and glaze them right before serving. The kitchen fills with the smell of warm butter and lemon, and I serve the scones with simple scrambled eggs and berries. It feels like a small bakery brunch without leaving home. - Batch testing in a home oven
Home ovens are not always perfectly accurate. During testing, I noticed that the back of the tray browned faster than the front. If your oven has hot spots, you can rotate the tray halfway through baking so the scones color evenly.
These tips reflect the kind of small adjustments and observations that bakers make after a few batches. They make each new pan of lemon scones more consistent.
Nutrition Facts (Per Serving)
The exact nutrition values will vary with your ingredients, the thickness of your glaze, and any mix ins. The following is a rough estimate for one lemon scone with glaze when the batch makes 8 scones.
- Calories: about 430
- Total fat: about 24 grams
- Saturated fat: about 15 grams
- Carbohydrates: about 50 grams
- Sugar: about 18 grams
- Protein: about 6 grams
- Sodium: about 380 milligrams
These values are based on standard ingredient data and should be considered an estimate, not a precise calculation. Any changes to butter amount, sugar level, or add ins will change the nutrition profile.
Frequently Asked Questions
Q1: Can I use regular milk instead of buttermilk?
Yes, you can use regular milk, but the texture and flavor will be slightly different. Buttermilk adds acidity that tenderizes the dough and reacts with baking soda. If you use regular milk, the scones may be a little less tender. If possible, stir a teaspoon of lemon juice into the milk and let it sit for a few minutes to gently mimic the acidity of buttermilk. This homemade version is a common baking substitution that follows general recipe testing practice.
Q2: Can I make the dough ahead and bake the scones later?
You can. Shape the dough into wedges, place them on a lined baking sheet, and chill tightly covered in the refrigerator for up to one day. For longer storage, freeze the unbaked wedges on a tray until solid, then move them to a freezer bag. Bake from frozen, adding a few extra minutes to the bake time. This approach is similar to how many bakeries prepare scones ahead for early morning baking.
Q3: Can I freeze lemon scones before or after baking?
Both methods work.
- Freeze before baking: Shape the scones, freeze on a tray, then store them in a freezer bag for up to two months. Bake from frozen, watching the color and texture for doneness.
- Freeze after baking: Cool the scones completely, then freeze in a sealed container or freezer bag for up to two months. Thaw at room temperature and refresh for a few minutes in a warm oven if you like a crisp edge.
These time frames line up with general freezer storage guidelines for baked goods.
Q4: How do I keep my scones from turning out dry?
Dry scones usually come from too much flour, overbaking, or too little fat. To avoid dryness
- Measure flour by gently spooning it into the measuring cup and leveling it, or use a kitchen scale
- Stop mixing when the dough just comes together
- Check for doneness early and remove the scones once they are set and golden, not deeply browned
You can also add a spoonful of cream or a little extra buttermilk if your dough consistently feels too dry.
Q5: Can I reduce the sugar or make them less sweet?
You can slightly reduce the sugar in the dough without causing a technical problem. For example, you can use one third cup instead of one half cup. Keep in mind that sugar affects not only sweetness but also browning and moisture. The scones may be a little less tender and may brown a bit less. You can also make a thinner glaze or skip the glaze and serve the scones with a light dusting of powdered sugar.
Q6: How long do lemon scones stay fresh and how should I store them?
At room temperature, lemon scones stay pleasant for about one to two days if stored in an airtight container. For best texture, cool them completely before closing the container so steam does not make the crust soggy. For longer storage, freeze in a sealed container or freezer bag for up to two months. These guidelines are in line with typical recommendations for homemade baked goods and basic food safety advice.
Conclusion
Lemon scones bring together bright citrus flavor, flaky layers, and a simple one bowl method that suits both beginner and intermediate home bakers. By using very cold butter, gentle mixing, and a short chill before baking, you support a tender crumb and impressive rise. Fresh lemon zest and a quick lemon glaze keep the flavor clear and vibrant, while easy variations like lemon blueberry scones or lemon poppy seed scones let you adjust the recipe to your taste.
As you bake your first batch, pay attention to how the dough feels when it just comes together, how the scones look when they are fully baked, and how the glaze texture affects the final finish. Those little details build your confidence and turn this recipe into one you can repeat and customize. When you find your favorite version, feel free to save the recipe, share it with a baking friend, and enjoy the comfort of homemade lemon scones whenever the craving appears.

Bright Lemon Scones with Simple Lemon Glaze