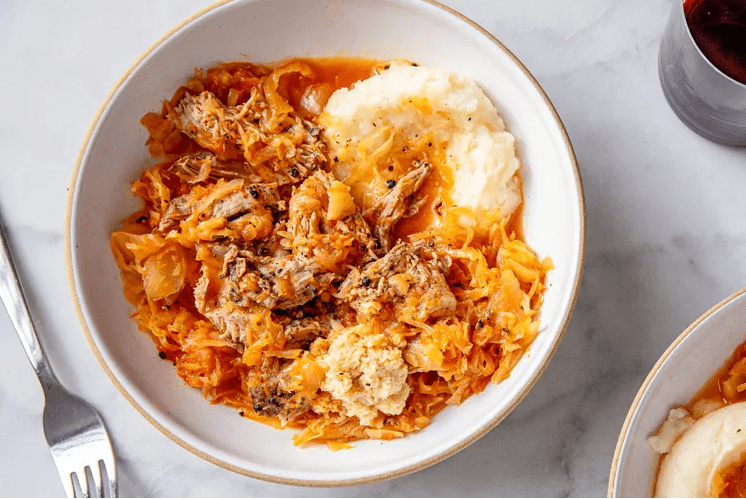
Korean curry rice is one of those “throw everything in a pot and relax” dinners: tender beef, soft potatoes and carrots, sweet little onions, and a silky curry sauce made from Japanese-style curry roux blocks like S&B Golden Curry, all ladled over a bowl of hot rice. It’s the kind of comfort food you’ll see in Korean and Japanese home kitchens on weeknights, not just in restaurants.
In this guide, I’ll walk you through exactly how to make Korean curry rice with beef, how it fits into everyday home cooking, and how to tweak it for your family (mild for kids, spicier for adults, plus chicken or vegetarian options). We’ll cover ingredients, detailed step-by-step cooking, smart substitutions, storage and reheating, and real-life tips so you can nail it on the first try.
Time and Serving
- Prep Time: 20 minutes
- Cook Time: 55 to 65 minutes (including simmering)
- Total Time: 75 to 85 minutes
- Servings: 4 generous portions
The timing is based on searing the beef, simmering until tender, then cooking the vegetables and dissolving the curry roux blocks, similar to other Korean and Japanese beef curry recipes that braise the meat before adding vegetables.
Insight into Korean Curry Rice
Korean curry rice (카레라이스, often just “kare”) is a simple one-pot curry stew served over rice. It almost always starts with boxed curry roux – pressed blocks of fat, flour, curry powder, and seasonings that melt into a thick, glossy sauce. Brands like S&B Golden Curry, Ottogi, and Vermont Curry are widely used.
Here’s how it fits in compared to other curries:
- Versus Indian curries: Indian curries are usually built from spices bloomed in oil (turmeric, cumin, coriander, etc.) and often include yogurt, coconut milk, or tomatoes. Korean curry rice uses a pre-made curry roux block that already contains the spices and thickener, so the flavor is milder and the texture is more like a thick gravy.
- Versus classic Japanese curry rice (kare raisu): Korean curry rice is essentially the Korean take on Japanese curry. The base is the same style of Japanese curry roux, but Korean versions are often slightly spicier and almost always served with kimchi or Korean pickles on the side.
Common ingredients include:
- Beef and chicken (or sometimes just vegetables)
- Potatoes, carrots, and onions (or pearl onions)
- Japanese curry roux blocks (S&B Golden Curry, Ottogi, etc.)
- Water or broth (beef, chicken, or vegetable)
- Steamed white rice for serving
Why people love it:
- It’s a cozy one-pot comfort food dinner.
- The spice level is adjustable – just choose mild, medium, or hot blocks.
- It’s very forgiving and beginner-friendly.
- Leftovers reheat beautifully, making it perfect as a make-ahead curry or meal prep option.
In my own kitchen, this is the dish I pull out on cold, rainy days. The moment the curry blocks melt in, the whole house smells warm and savory, like a hug from the stove.
Ingredients
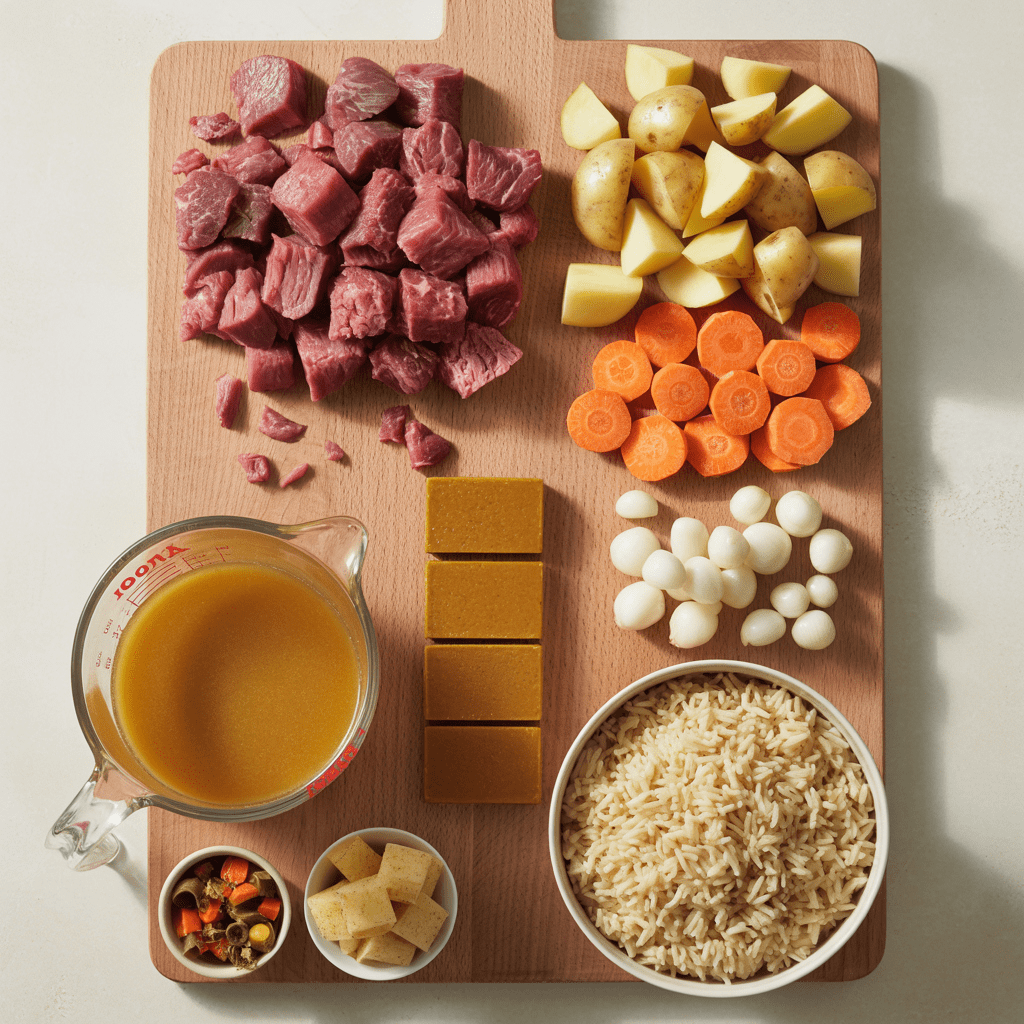
This recipe makes about 4 hearty servings of beef curry with potatoes and carrots to serve over rice.
Protein
- 1 lb (450 g) beef chuck roast or stew meat, trimmed and cut into 1-inch (2.5 cm) cubes
- 1 teaspoon kosher salt, plus more to taste
- 1/2 teaspoon freshly ground black pepper
Chuck is classic here because it becomes tender when simmered; Korean and Japanese curry recipes commonly use beef chuck or other braising cuts.
Substitutions & options:
- Use boneless skinless chicken thighs in the same amount; simmer time may be slightly shorter for chicken.
- For a vegetarian curry, omit the meat and add:
- 8 oz (225 g) firm tofu, cubed (pan-sear first if you like)
- Extra vegetables (mushrooms, zucchini, peas, etc.)
- Use vegetable broth instead of beef broth.
Vegetables
- 1 large russet potato (10 to 12 oz / 300 to 340 g), peeled and cut into 1-inch chunks
- 2 medium carrots (6 to 7 oz / 180 to 200 g), peeled and sliced into 1/2-inch coins or chunks
- 1 cup (about 5 oz / 140 g) frozen pearl onions – no need to thaw
- OR 1 medium yellow onion, diced (about 1 or 1/2 cups), sautéed with the beef
Potatoes, carrots, and onions (or pearl onions) are the classic trio for Korean and Japanese curry rice.
Optional extra vegetables (add 1 or 2 cups total if you like):
- Frozen peas or corn
- Sliced mushrooms
- Diced bell pepper
- Broccoli florets or zucchini, added later so they don’t overcook
Curry Base
- 2 tablespoons neutral oil (vegetable, canola, or grapeseed)
- 4 cups (960 ml) beef broth (or 2 – 3 cups broth + 1 – 2 cups water, depending how thick you like it)
- 1 (3.5 oz / 92–100 g) package Japanese curry roux blocks, such as S&B Golden Curry (mild, medium hot, or hot)
S&B’s own directions use roughly 540 ml water for a 92 g pack for 5 servings; here we’re using a similar amount of roux with slightly more liquid and rich beef broth for a looser, stew-like curry that thickens nicely as it simmers.
Optional flavor boosters:
- 1 to 2 teaspoons soy sauce (for deeper umami)
- 1 teaspoon sugar, honey, grated apple, or mirin (optional, to round out bitterness if your curry block is very spicy or intense)
Rice and Garnishes
- 3 to 4 cups cooked short- or medium-grain white rice, from about 1 to 1 1/4 cups uncooked
- Optional garnishes:
- Sliced green onions (scallions)
- Toasted sesame seeds
- Kimchi or yellow pickled radish (danmuji) on the side
- A fried egg on top for a “curry rice rice bowl” situation
Required Tools
You don’t need anything fancy – just solid basics:
- Large heavy-bottomed pot or Dutch oven with lid
- Cutting board and sharp chef’s knife
- Measuring cups and spoons
- Wooden spoon or heatproof spatula
- Ladle for serving
- Rice cooker or medium pot with lid for cooking rice
Nice-to-have extras:
- Small skimmer or spoon to remove foam or excess fat while simmering
- Freezer-safe containers (preferably shallow, with lids) for storing leftover curry rice
- A silicone spatula for scraping the pot clean (you’ll want every drop of curry)
Step-by-Step Preparation Guide
1. Prep the Ingredients
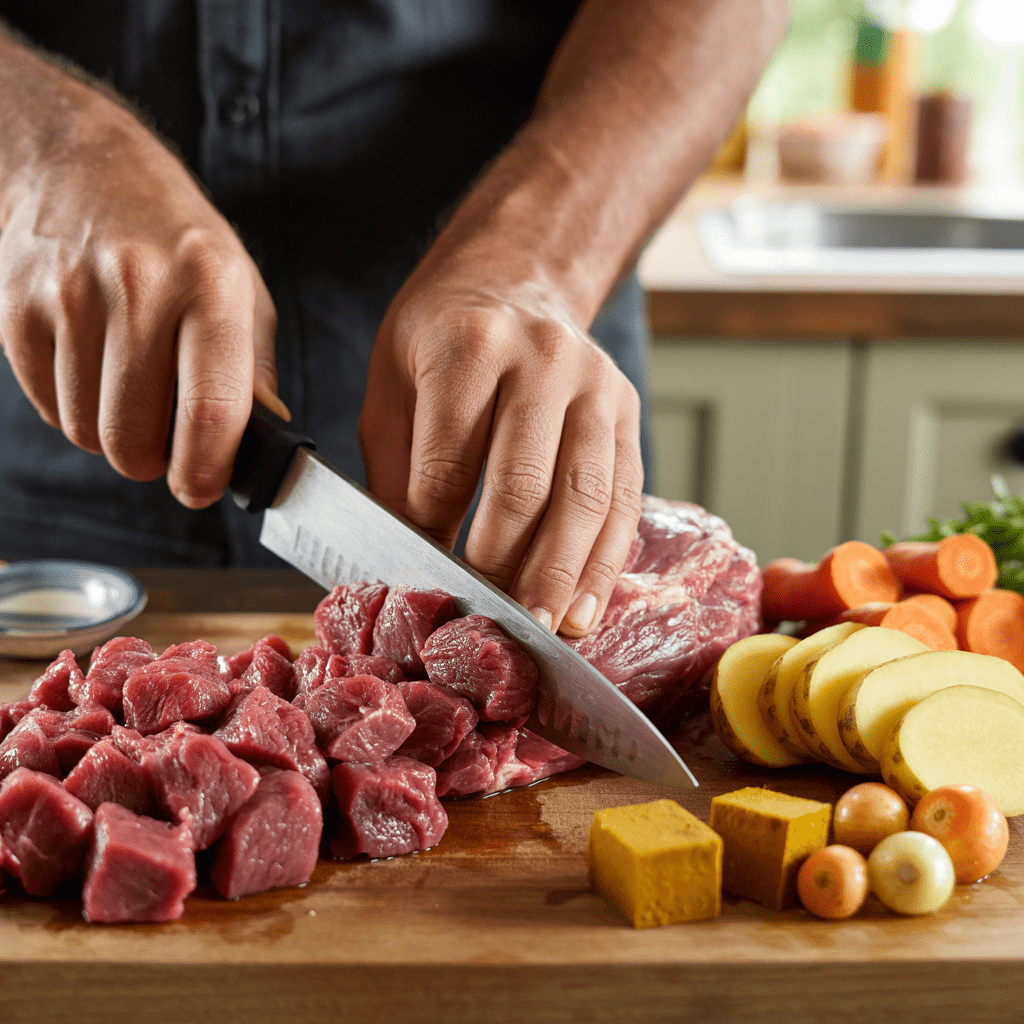
a) Trim and cut the beef.
- Pat the beef dry with paper towels. Trim away large chunks of fat or connective tissue.
- Cut into roughly 1-inch cubes. This size cooks evenly and becomes tender without falling apart.
b) Season the beef.
- Toss the cubes with 1 teaspoon salt and 1/2 teaspoon black pepper.
- Let them sit at room temperature for about 10 to 15 minutes while you prep the vegetables – this helps with even browning.
c) Prep the vegetables.
- Peel the potato and cut into 1-inch chunks.
- Peel the carrots and slice into 1/2-inch coins or chunky pieces.
- If using frozen pearl onions, measure out 1 cup – no need to thaw. If using a fresh onion, dice it now.
d) Break up the curry blocks.
- Open the package of curry roux and break the blocks into smaller squares or rectangles.
- This makes them easier to dissolve later, so you don’t end up fishing out giant lumps at the bottom.
e) Start the rice.
- Rinse the rice in cool water until the water runs mostly clear, then cook in a rice cooker or on the stovetop according to package directions. Short- and medium-grain white rice typically takes about 15 to 20 minutes to cook.
Real life note: I like to start the rice just after I get the beef simmering so everything finishes around the same time.
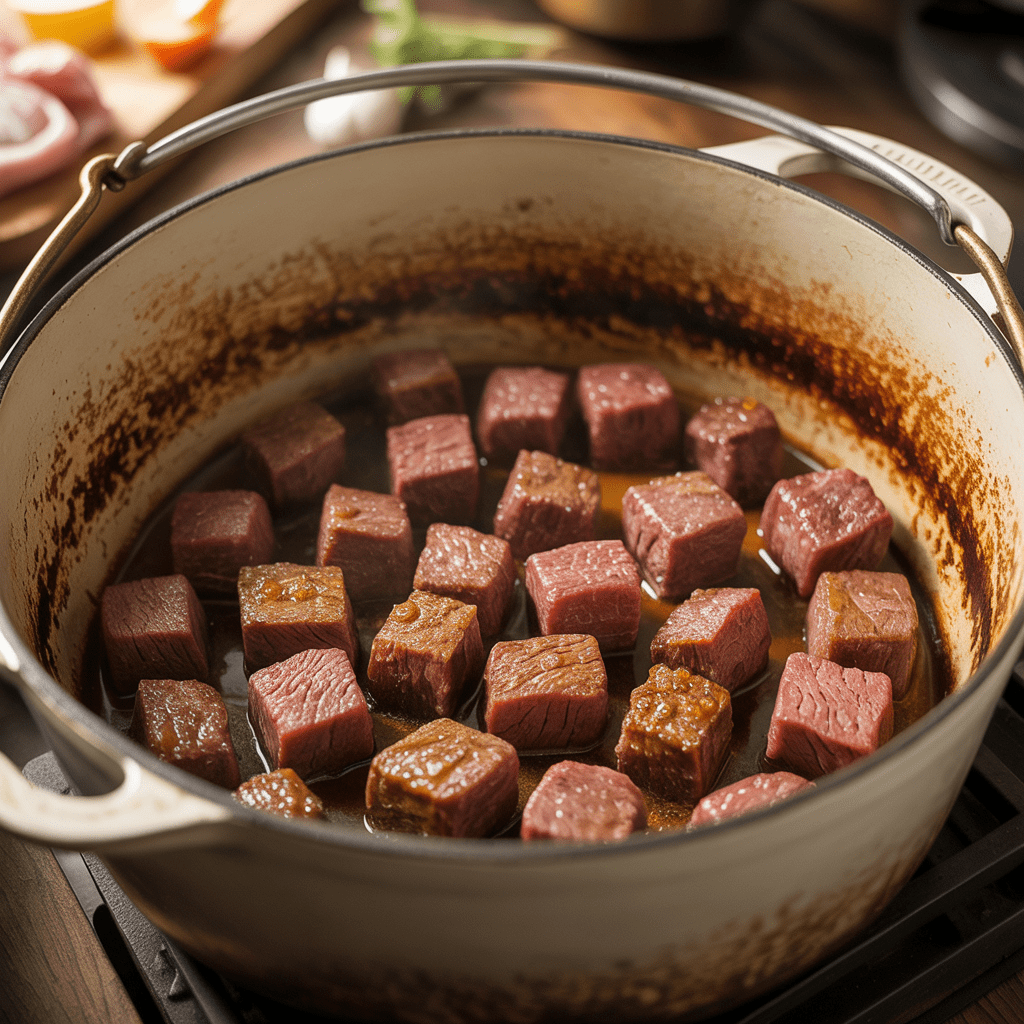
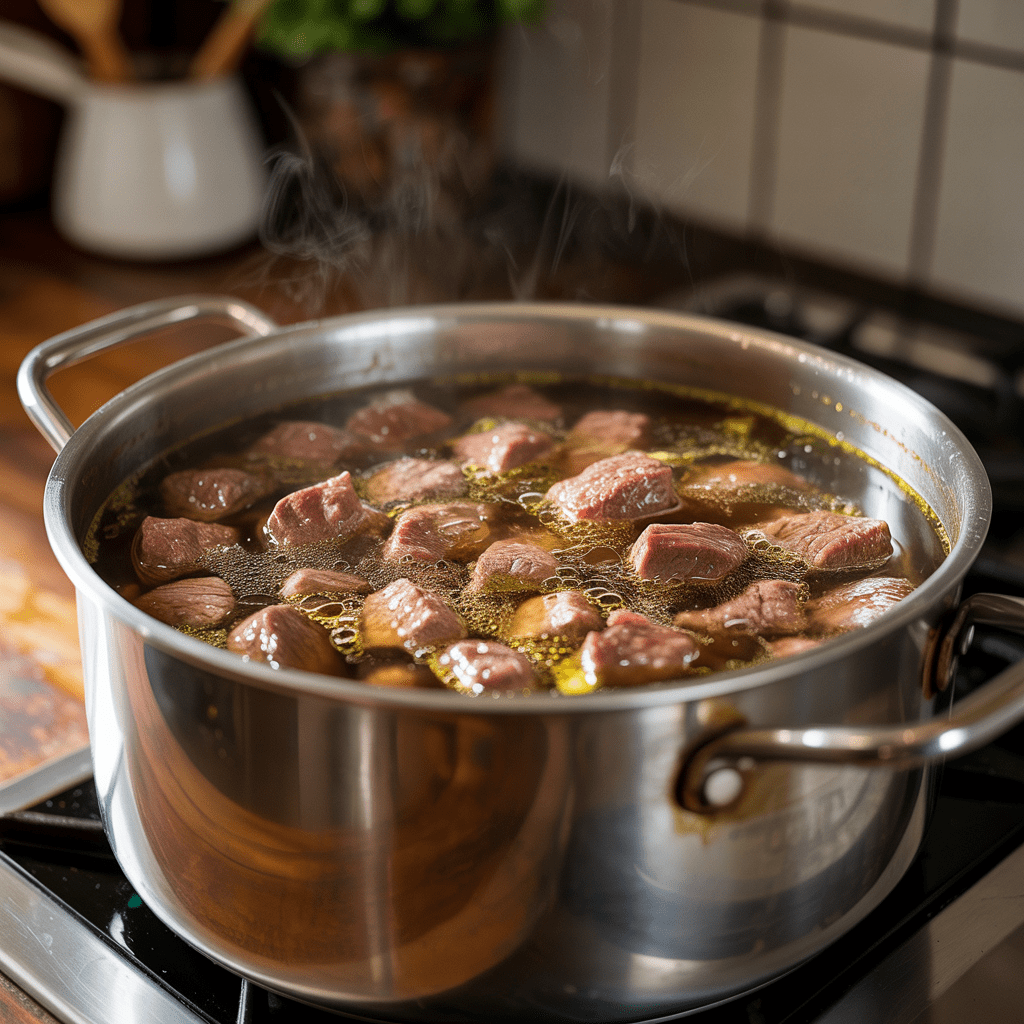
2. Sear the Beef for Deep Flavor
a) Heat the pot.
- Place a large heavy-bottomed pot or Dutch oven over medium-high heat.
- Add 2 tablespoons neutral oil and let it heat until it shimmers.
b) Brown the beef in batches.
- Add half the beef in a single layer – don’t crowd the pot. If you throw it all in at once, it will steam instead of sear.
- Let it cook without stirring for 2 to 3 minutes, until the bottom is nicely browned.
- Flip the pieces and brown the other sides, another 2 to 3 minutes.
- Transfer to a plate and repeat with the remaining beef.
Browning builds fond (those tasty brown bits on the bottom), which will later dissolve into the broth and make your curry sauce taste richer and more “long-simmered” than it actually is.
c) Sauté onion if using fresh.
- If you’re using a diced fresh onion instead of frozen pearl onions, reduce heat to medium.
- Add the onion to the pot (with a touch more oil if needed) and cook 3 to 5 minutes until translucent and lightly golden, scraping up some of the browned bits as you stir.
3. Build the Curry Base and Simmer the Beef
a) Deglaze with broth.
- Pour in about 1 cup of the beef broth.
- Use a wooden spoon to scrape up all the browned bits from the bottom. Those bits = free flavor.
b) Add the rest of the broth and beef.
- Return all the browned beef (and any juices on the plate) to the pot.
- Add the remaining broth for a total of about 4 cups.
c) Bring to a simmer.
- Increase heat to high and bring the pot just to a boil.
- As soon as it boils, reduce to low or medium-low to maintain a gentle simmer.
d) Simmer until almost tender.
- Cover the pot with the lid slightly ajar.
- Simmer for 25 to 35 minutes, stirring once or twice, until the beef is starting to become tender when pierced with a fork but not falling apart yet.
- Skim off any foam or excess fat if you like.
Most Korean curry rice recipes simmer the meat first like this so tougher cuts of beef chuck become tender before you add the vegetables.
4. Add the Vegetables at the Right Time

a) Add potatoes, carrots, and onions.
- Add the potato chunks, carrot pieces, and frozen pearl onions directly to the simmering broth.
- Stir, then bring back to a gentle simmer.
b) Simmer uncovered until vegetables are tender.
- Cook uncovered for about 12 to 18 minutes, stirring occasionally.
- The curry is ready for roux when:
- The potatoes are easily pierced with a fork but still hold their shape.
- The carrots are tender but not mushy.
- The broth is slightly reduced and tastes rich.
If you’re adding quick-cooking vegetables like peas or bell peppers, add them in the last 5 minutes so they stay bright and not overcooked.
5. Incorporate the Curry Roux Blocks
a) Reduce the heat before adding roux.
- Once the vegetables are tender, lower the heat to low or even switch it off for a minute.
- This is important: adding roux blocks to a rolling boil can cause the sauce to scorch or split and makes it more likely to clump.
b) Stir in the curry roux.
- Add the broken curry blocks a few pieces at a time, stirring constantly until each portion melts before adding more.
- Keep stirring for 3 to 5 minutes until all the roux is dissolved and no grainy bits remain.
You’ll see the sauce transform from a brothy soup into that familiar thick, glossy curry. This stage always smells incredible – that rich, slightly sweet curry aroma is the sign you’re nearly done.
c) Simmer to thicken.
- Once the roux is fully dissolved, keep the curry over low heat and simmer gently another 5 to 10 minutes, stirring frequently to prevent sticking.
- The sauce should coat the back of a spoon. If you drag a spoon across the bottom, you should briefly see the pan before the sauce rushes back in.
6. Adjust Consistency and Seasoning
a) If the curry is too thick:
- Gradually add warm water or broth, a few tablespoons at a time, stirring until it loosens to your preferred consistency.
b) If the curry is too thin:
- Let it simmer uncovered over low heat, stirring often, until it reduces and thickens.
- You can also add an extra small piece of curry block if you reserved one, but do this sparingly – roux blocks are salty and concentrated.
c) Season to taste.
- Taste the curry. Add a splash of soy sauce for extra depth, a pinch of sugar or honey if it tastes slightly bitter, and additional salt and pepper as needed.
d) Adjust spice level.
- If you started with mild curry roux for kids, but want more heat for adults, you can:
- Stir in a little gochugaru (Korean red pepper flakes),
- Or a small spoonful of hot curry roux from another package.
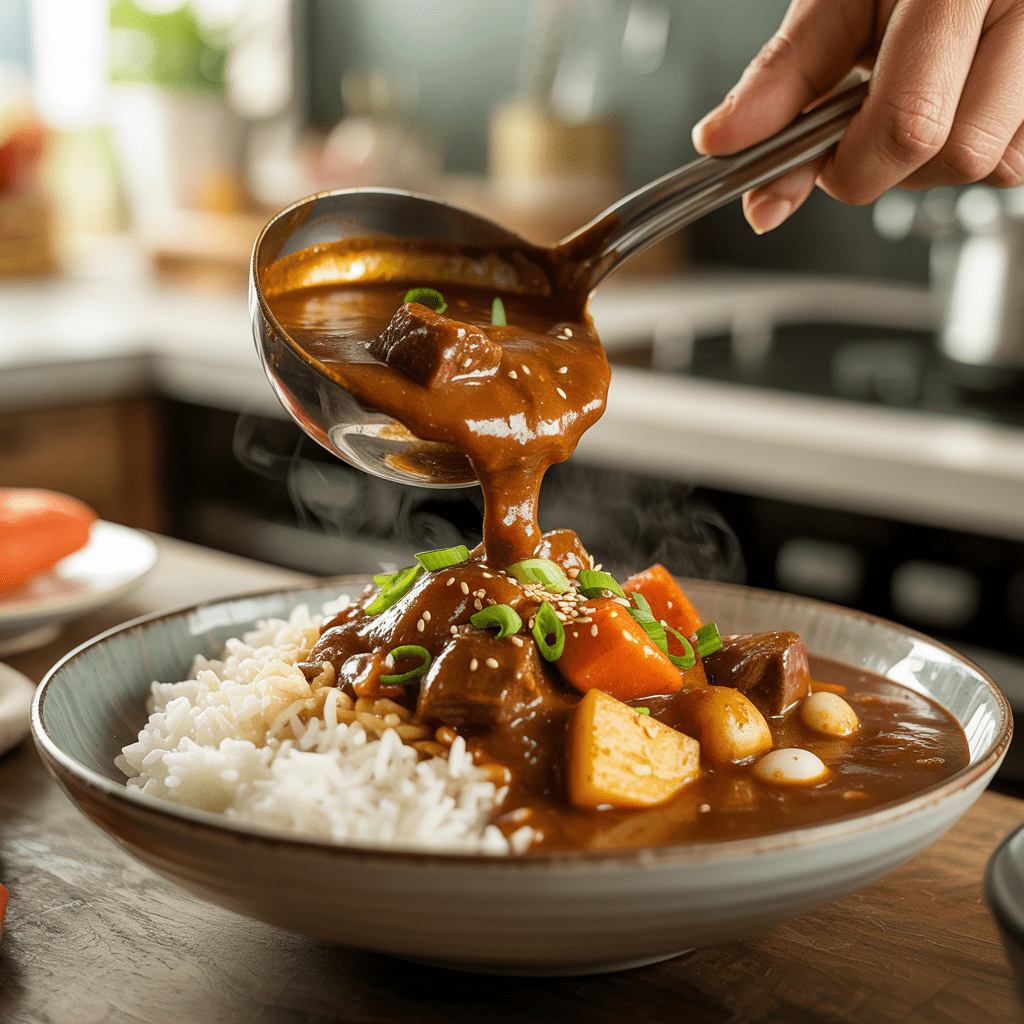
7. Serve Over Rice
a) Fluff the rice.
- Right before serving, fluff the cooked rice with a fork or rice paddle.
b) Plate up.
- Spoon a mound of rice into each bowl or plate.
- Ladle the curry over one side of the rice so the person eating can decide how much rice to mix in.
c) Garnish and enjoy.
- Top with sliced green onions, sesame seeds, or a fried egg if you’re feeling extra cozy.
- Serve with kimchi or crunchy pickles on the side for contrast – exactly how many Korean home cooks serve curry rice.
Real life moment: On busy weeknights, I often serve this with nothing more than rice and a jar of store-bought kimchi. When there are kids at the table, I use mild curry and keep gochugaru on the side so the spice-lovers can amp things up in their own bowls.
Variations & Customizations
- Protein swaps:
- Boneless chicken thighs, or even ground beef (reduce simmer time).
- Vegetarian curry:
- Use vegetable broth, omit meat, and bulk up with mushrooms, tofu, or extra potatoes and carrots.
- Extra veggies:
- Peas, corn, bell pepper, zucchini, broccoli, or spinach added at the end.
- Roux blends:
- Combining mild and medium-hot curry blocks is a common trick to get a “family-friendly but not boring” spice level.
Key Advantages of Making Korean Curry Rice at Home
- Comfort in a bowl: Thick, velvety curry over hot rice is the definition of comfort food dinner.
- Beginner-friendly: The curry blocks handle the seasoning and thickening for you – ideal if you’re new to curries.
- Flexible and forgiving: Swap beef for chicken, add whatever vegetables you have, and adjust the spice level easily.
- Budget-conscious: Beef chuck, potatoes, carrots, and onions are relatively affordable ingredients that stretch into multiple servings.
- Leftover-friendly: The flavor actually deepens after a day in the refrigerator, making this a great make-ahead curry or “leftover curry rice” for lunches.
Mistakes to Avoid
- Overcrowding the pot when searing beef
- Crowding leads to steaming instead of browning, which means less flavor. Sear in batches.
- Adding vegetables too early
- If you cook potatoes and carrots for the full beef simmer time, they’ll turn mushy and disintegrate. Wait until the beef is nearly tender before adding vegetables.
- Boiling hard after adding curry roux
- High heat can cause the roux to scorch at the bottom or turn grainy. Always lower the heat to gently dissolve the roux.
- Not stirring once the sauce thickens
- Thick curry loves to stick. Stir frequently, scraping the bottom.
- Letting leftovers sit out too long
- Cooked stews and curries should be cooled and refrigerated within 2 hours and used within 3 to 4 days, or frozen for 2 to 3 months for best quality, according to food safety guidance.
Expert Tips
- Choosing curry blocks:
- If you’re cooking for kids or spice-sensitive eaters, start with mild S&B Golden Curry or a similar brand. Next time, mix half mild and half medium-hot.
- Cut veggies in similar sizes:
- Aim for 1-inch potatoes and similar-sized carrots so everything becomes tender at the same time.
- Frozen pearl onions are a tiny miracle:
- Using frozen pearl onions (a trick many home cooks swear by) saves peeling time and adds sweetness and aroma without extra chopping.
- Batch-cook for busy weeks:
- Double the recipe and freeze in single-portion containers. Cool quickly, refrigerate within 2 hours, then transfer to the freezer within 3 to 4 days. Stews and curries generally maintain good quality for about 2 to 3 months in the freezer.
- Serving ideas:
- Serve with kimchi, pickled cucumbers, or danmuji for acidity and crunch, or top each bowl with a sunny-side-up egg for a super-comforting rice bowl.
One of my favorite “lazy Sunday” routines is to make a big pot of this curry, portion it into containers with a scoop of rice, and stash them in the fridge and freezer. On hectic evenings, a comforting bowl of curry over rice is just a reheat away.
Nutrition Facts (Per Serving – Approximate)
These figures are estimates for one of four servings, based on:
- ~4 oz (112 g) raw beef chuck per person
- 1 cup cooked white rice
- 1/4 of a 92 – 100 g curry roux block package
- Potatoes, carrots, onions, and 2 tablespoons oil split across 4 servings
Approximate per serving:
- Calories: ~650 to 700 kcal
- Protein: ~25 to 30 g (mostly from beef and a little from roux)
- Carbohydrates: ~80 to 90 g (rice, potatoes, carrots, roux)
- Fat: ~20 to 25 g (beef fat, oil, curry roux)
- Sodium: Highly dependent on broth and curry brand; curry roux alone can provide around 800 mg sodium per 18 g serving, so this dish is moderately high in sodium.
Treat these numbers as a rough guide, not a precise medical calculation. If you need exact nutrition, plug your specific ingredients and brands into a nutrition calculator.
Frequently Asked Questions
1. Can I use chicken instead of beef?
Yes. Korean curry rice is commonly made with chicken or beef. Use the same weight (about 1 lb / 450 g) of boneless skinless chicken thighs. Chicken will typically become tender faster, so check around 15 to 20 minutes of simmering instead of 25 to 35 minutes.
2. How spicy is Korean curry rice, and how can I adjust the heat?
Spice level depends entirely on the curry roux you buy. Brands like S&B Golden Curry usually offer mild, medium hot, and hot options. Start with mild if you’re unsure, then next time mix half mild and half medium-hot, or add a pinch of gochugaru or chili flakes at the end for more heat.
3. Can I make this without boxed curry roux?
You can make a homemade curry roux using butter or oil, flour, and curry powder, but Korean curry rice is traditionally built on store-bought Japanese curry roux blocks, which give a specific flavor and texture that’s hard to replicate exactly. If you go the homemade route, your sauce may be thinner or differently spiced – but still delicious.
4. How long does Korean curry rice keep in the fridge, and can I freeze it?
According to general food safety guidance, cooked soups and stews with meat are best eaten within 3 to 4 days if refrigerated promptly, and can be frozen for about 2 to 3 months for best quality. Make sure to cool the curry quickly, portion it into shallow containers, and refrigerate within 2 hours of cooking.
5. What kind of rice is best with Korean curry rice?
Short or medium-grain white rice (like Korean or Japanese rice) is traditional because it’s slightly sticky and soaks up the curry nicely. Long-grain rice also works if that’s what you have, but the texture will be a bit looser.
6. How can I make this more vegetable-heavy or lighter?
Use less meat (8 oz / 225 g instead of 1 lb), add more vegetables (mushrooms, zucchini, peas, spinach), and consider serving with extra steamed veggies or a crunchy salad. You can also swap some white rice for brown rice if you prefer more fiber.
Conclusion
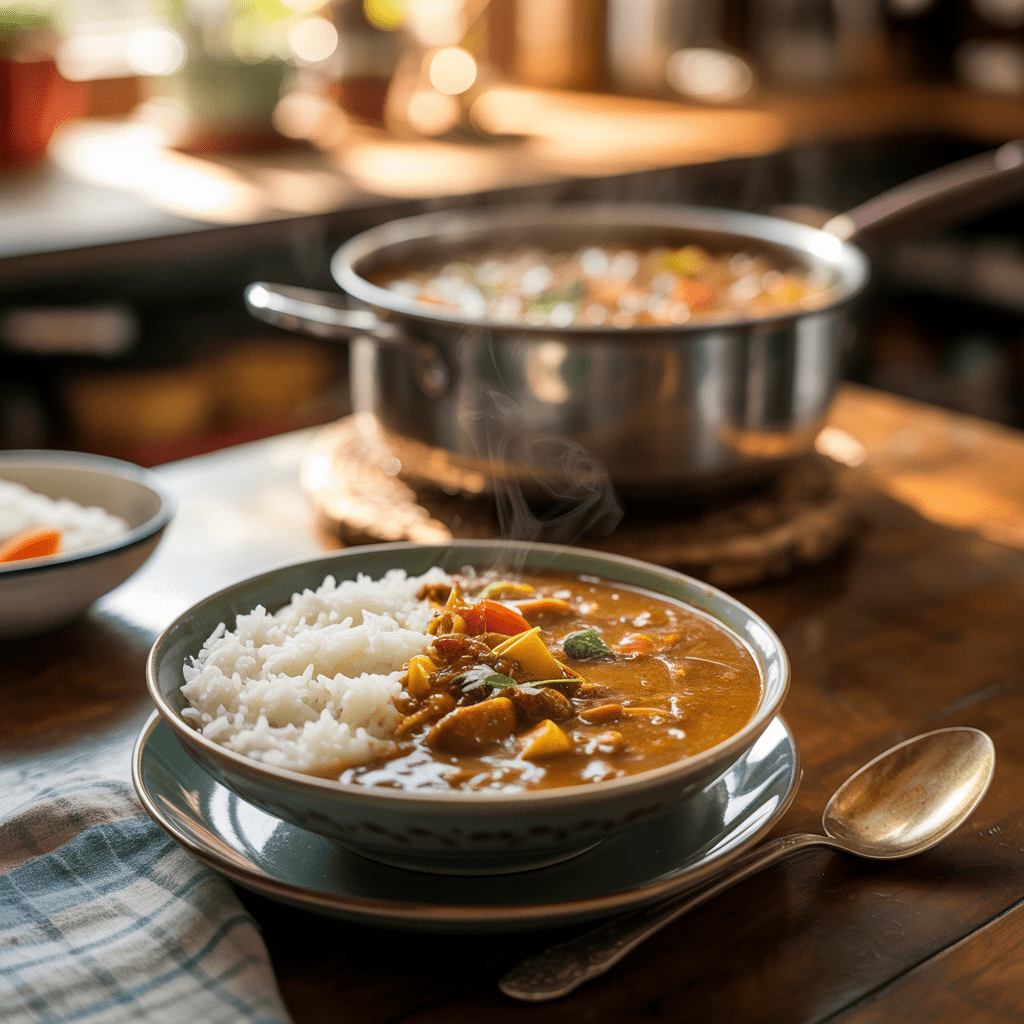
Korean curry rice is everything you want in a weeknight comfort food dinner: tender beef, soft potatoes and carrots, sweet onions, and a velvety curry sauce spooned over fluffy rice. It’s built on Japanese-style curry roux blocks, but adapted to Korean home cooking with kimchi and pickles on the side and spice levels tailored to the family.
By browning the beef, simmering it gently until tender, adding the vegetables at the right time, and dissolving the curry blocks over low heat, you get a glossy, deeply flavored curry that tastes like it simmered all afternoon. Add in the flexibility – different proteins, extra vegetables, make-ahead and freezer-friendly and you’ve got a reliable, cozy, and beginner-friendly curry that can slip easily into your regular dinner rotation.
Next time you’re craving something warm and satisfying, grab a box of curry roux, a pound of beef and some potatoes, and make a pot of Korean curry rice. Adjust it to your taste, use the storage tips to enjoy leftover curry rice for days, and make it your own comfort food classic.
Korean Curry Rice: Cozy Beef Curry Over Rice