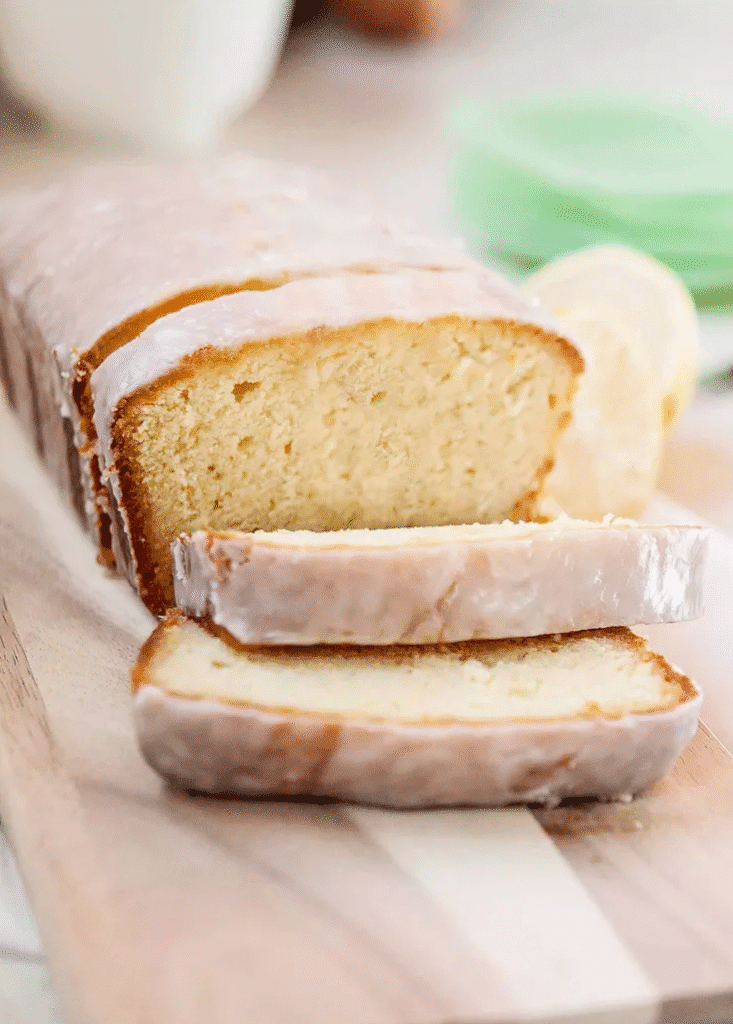
Lemon pound cake is what I reach for when I want something simple that still feels a bit special. It has the dense, velvety crumb of classic pound cake, but with bright lemon flavor in every bite and a soft glaze that makes each slice look bakery ready.
This version layers lemon zest, lemon juice, a lemon syrup soak, and a lemony glaze, so lemon lovers get both aroma and a true citrus tang, not just a hint. The method uses familiar steps like creaming butter and sugar, plus a few small tricks from test kitchen style sources and professional baking guides, and I will walk you through each one with clear visual cues. If you are a beginner or you have had dry, heavy pound cakes in the past, this guide is written so you can confidently get a moist, lemon forward loaf on your very first or second attempt.
Time and Serving
- Prep time: about 25 minutes
- Bake time: about 80 to 95 minutes, depending on your oven
- Cooling time: about 2 hours before glazing and slicing
- Total time: about 3 hours including cooling
- Yield: one standard loaf, about 10 to 12 slices
Insight of the Lemon Pound Cake

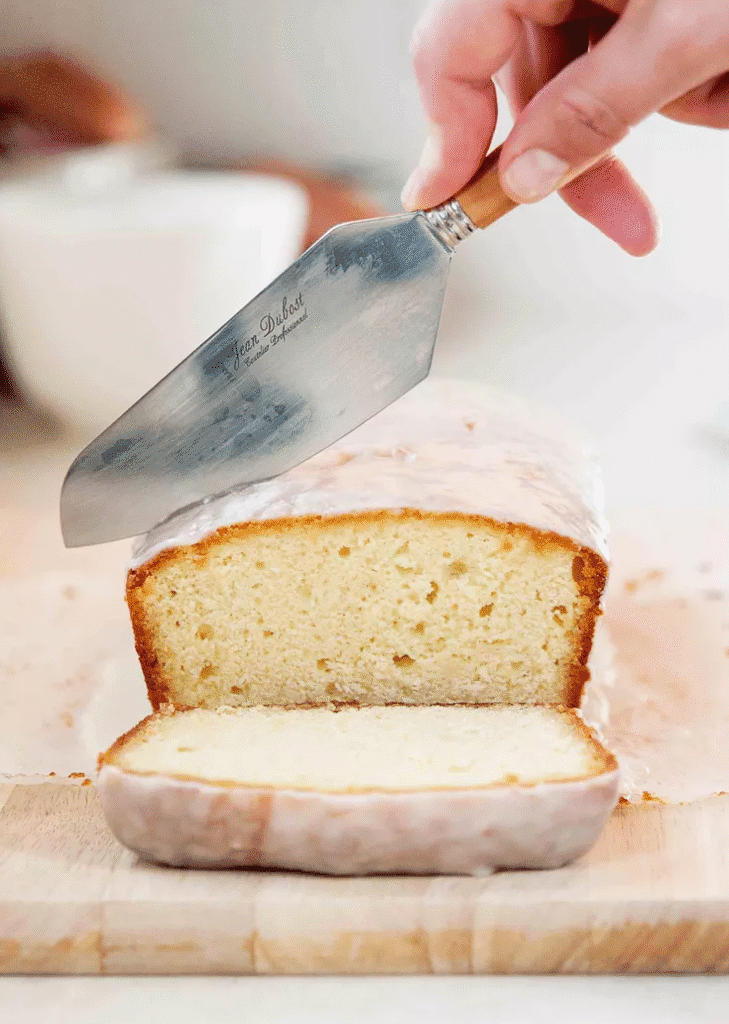
A classic lemon pound cake is a rich butter cake with a fine, tight crumb and a pronounced lemon flavor. It should slice cleanly, without crumbling, and feel moist and almost velvety when you press a crumb between your fingers. The top usually has a deep golden color with a natural crack along the center, which is completely normal for dense cakes like this. Many baking guides note that pound cakes set on the outside first and then split as the center continues to rise.
This style of lemon pound cake is different from a simple lemon loaf or sponge cake.
- A simple lemon loaf often uses more liquid and more leavening, which gives a looser, more open crumb, closer to a quick bread.
- A sponge or genoise relies on whipped eggs rather than creamed butter, so the texture is lighter and springy instead of compact and buttery.
Here, we use the classic creaming method that many respected baking sources recommend for pound cakes. Creaming room temperature butter with sugar traps tiny air bubbles in the fat, which helps the cake rise in the oven and gives the crumb a finer, more tender texture.
A few more choices help this loaf stay moist and lemony:
- Sour cream adds extra fat and acidity, which softens the crumb and helps prevent dryness. According to many baking resources, cultured dairy such as sour cream or yogurt tenderizes cakes by interfering with gluten formation and adding moisture.
- Bread flour provides extra structure so the cake can hold a high percentage of butter, sugar, and lemon juice without collapsing. Bread flour usually has about 12 to 14 percent protein, compared to about 9 to 12 percent for all purpose flour, which gives more gluten strength.
- Lemon zest provides most of the aromatic lemon flavor, because the oils live in the colored part of the peel, while the juice adds acidity and fresh tang.
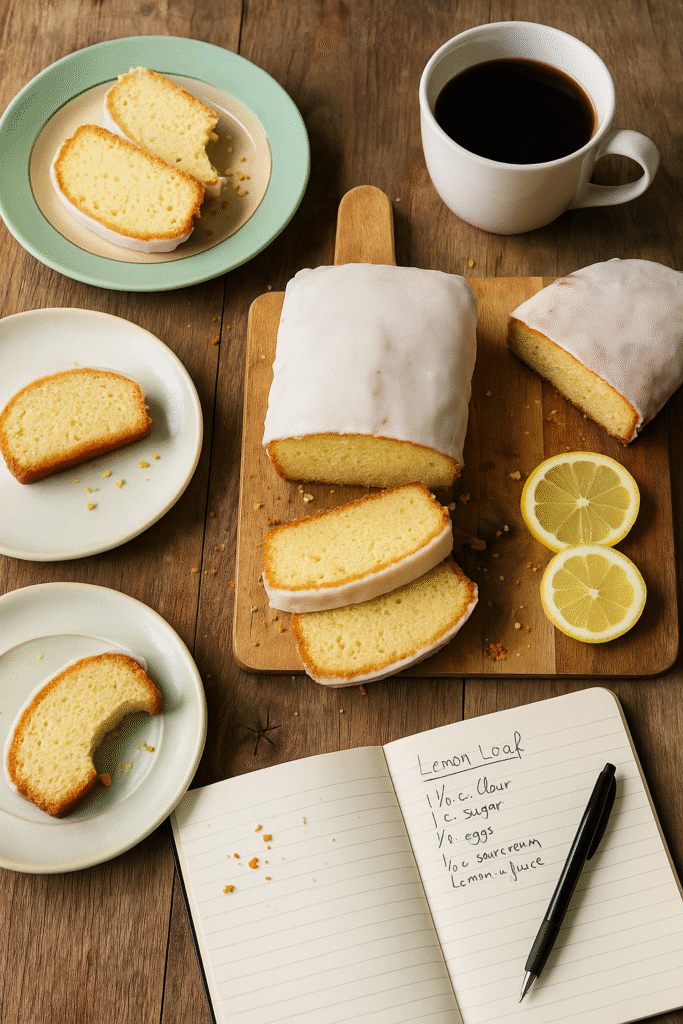
This recipe is particularly useful if you like to bake for gatherings and make ahead desserts. A well wrapped loaf keeps its moisture for several days at room temperature and freezes very well, which is a benefit that many popular lemon pound cake recipes also highlight. You can slice and serve it for brunch, afternoon tea, or an easy dessert with berries and whipped cream.
Ingredients

For the lemon pound cake batter
- 2 and one half cups bread flour, about 350 grams
- One quarter teaspoon baking soda
- One half teaspoon fine salt
- 1 and three quarter cups granulated sugar, about 350 grams
- 1 cup unsalted butter, about 227 grams, at room temperature
- Finely grated zest from 3 medium lemons
- One third cup full fat sour cream, about 80 grams, at room temperature
- 4 large eggs, at room temperature
- 1 large egg yolk, at room temperature
- One quarter cup freshly squeezed lemon juice, about 60 milliliters, from about 1 large lemon
- 1 teaspoon pure vanilla extract
Why these ingredients matter
- Bread flour: The higher protein content gives extra structure to support all the butter, sugar, and liquid. According to articles on flour types from Serious Eats and other baking resources, bread flour typically ranges from about 12 to 14 percent protein, while all purpose flour is lower, which means the bread flour can create stronger gluten and a tighter crumb. You may use all purpose flour instead for a slightly softer, more tender loaf, but it may dome a bit less and be more delicate when slicing.
- Sugar: Adds sweetness, of course, but also helps with browning and moisture retention. Many test kitchen style recipes note that higher sugar in pound cake keeps it moist for several days.
- Butter: Provides flavor, richness, and a fine crumb when properly creamed with sugar. Room temperature butter is crucial so it can hold air during creaming, a point that classic pound cake guides emphasize.
- Sour cream: Adds moisture and a little tang and, together with lemon juice, provides acidity to balance the sweetness and to support the small amount of baking soda.
- Eggs plus extra yolk: Eggs provide structure and emulsify fat and liquid. An extra yolk adds richness and helps the crumb feel velvety rather than dry.
- Lemon zest and juice: Zest brings strong aromatic oils. Juice gives bright acidity but should be used in measured amounts so it does not weaken the structure. Many lemon pound cake recipes use both zest and juice in the batter plus more in the syrup and glaze for bold flavor.
If you own a kitchen scale, weighing flour, sugar, and butter is the most consistent approach. King Arthur Baking and other professional resources repeatedly recommend weighing flour to avoid the large variations that can happen with cup measures. If you use cups, spoon flour into the cup and level it off instead of scooping directly from the bag, which can pack in more flour and lead to a dense, dry cake.
For the lemon syrup
- One half cup granulated sugar, about 100 grams
- One quarter cup freshly squeezed lemon juice, about 60 milliliters
- 2 tablespoons water
The syrup lightly soaks the warm cake, which adds moisture and sends lemon flavor deeper into the crumb, a technique that many respected lemon pound cake recipes use for extra flavor.
For the lemon glaze
- 1 tablespoon unsalted butter, melted
- 1 and one quarter cups powdered sugar, about 150 grams, sifted
- 2 to 3 tablespoons freshly squeezed lemon juice, enough to make a thick, pourable glaze
- Pinch of fine salt to balance the sweetness
You can adjust the glaze tartness by using more or less lemon juice. Several lemon loaf recipes suggest this simple adjustment to suit personal taste.
Required Tools for Making the Recipe

- Standard metal loaf pan, about 9 by 5 inches. A light colored metal pan promotes more even baking and reduces over browning on the sides, which many baking guides prefer for pound cakes.
- Parchment paper to create a sling, which makes it much easier to lift the cake out without breaking it.
- Large mixing bowl and medium mixing bowl.
- Hand mixer or stand mixer with paddle attachment. You can mix by hand with a sturdy whisk and wooden spoon, but an electric mixer makes the creaming step more reliable.
- Fine mesh whisk or regular whisk for dry ingredients and glaze.
- Flexible spatula for folding in the flour and scraping the bowl.
- Microplane or fine grater for lemon zest so you get flavorful zest without bitter white pith. Many baking resources recommend this style of grater for citrus zest.
- Kitchen scale if available for accurate flour and sugar measurements.
- Long wooden skewer or thin cake tester to check doneness. Pound cakes are dense, so several expert bakers recommend a longer skewer instead of a short toothpick.
- Wire cooling rack so the cake can cool evenly and the glaze can drip a little without pooling around the base.
Optional but helpful tools include an oven thermometer to verify that your oven runs at the correct temperature and a small offset spatula for smoothing the batter and spreading the glaze.
Method: Step by Step Preparation Guide
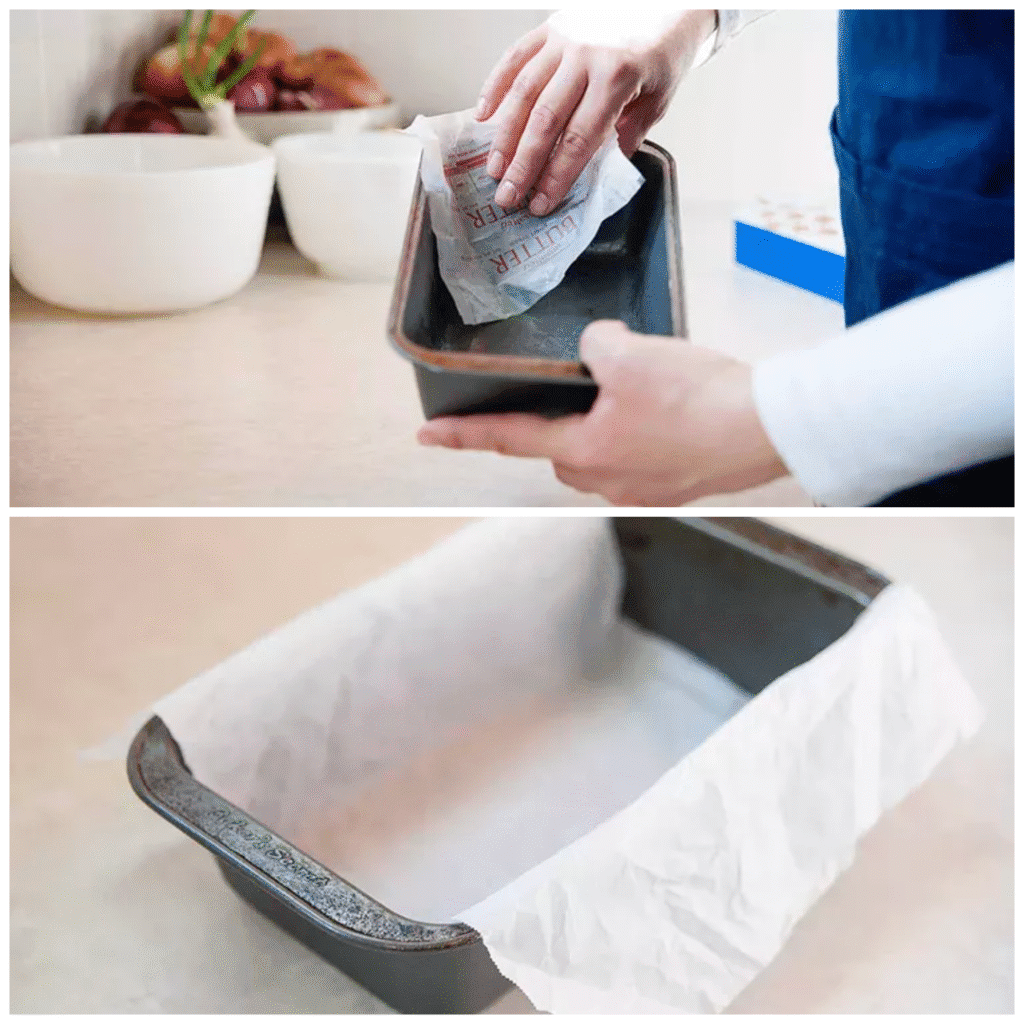
Step 01: Prepare the pan
- Preheat your oven to 325 degrees Fahrenheit, with a rack in the center. Many pound cake bakers prefer a slightly lower temperature and a longer bake so the cake cooks evenly without a burnt crust.
- Grease the bottom and sides of your loaf pan with a thin layer of butter or neutral oil.
- Cut a strip of parchment long enough to line the bottom and run up the two long sides, with a little overhang. Press it into the pan so it sticks to the grease. This parchment sling helps you lift the delicate loaf out without tearing the crust.
Step 02: Bring ingredients to room temperature
Take the butter, sour cream, and eggs out of the refrigerator about 30 to 45 minutes before you start, so they come to a cool room temperature. Many cake recipes from professional sources stress that when butter, eggs, and dairy are all at similar temperatures, the batter emulsifies better and bakes more evenly.
Room temperature butter should give gently when pressed but should not look oily or melting.
Step 03: Mix the dry ingredients
- In a medium bowl, whisk together the bread flour, baking soda, and salt until well combined.
- Set this bowl aside. Whisking breaks up any lumps and distributes the leavening and salt evenly so you do not get pockets of uneven flavor or rise.
Step 04: Cream butter, sugar, and zest

- In a large mixing bowl, place the room temperature butter, granulated sugar, and lemon zest.
- Beat with a hand mixer or stand mixer on medium speed for about 3 to 4 minutes. Stop once or twice to scrape down the sides and bottom of the bowl.
- The mixture should become paler in color, look fluffy, and feel a bit lighter. If you rub a tiny bit between your fingers, the sugar will still feel slightly gritty but less so than at the beginning.
According to classic pound cake recipes from sources such as Serious Eats, this creaming step is what creates much of the cake’s internal structure by trapping air in the butter, which then expands in the heat of the oven. Under creamed butter and sugar can lead to a dense cake that does not rise well.
Step 05: Add sour cream
- Add the sour cream to the creamed butter mixture.
- Beat on low to medium speed just until it is fully blended and smooth, then scrape the bowl again.
The sour cream will loosen the mixture slightly but should not cause it to separate. Its fat and acidity will help keep the baked cake moist and tender.
Step 06: Add eggs gradually

- Beat in the eggs one at a time, mixing on low to medium speed after each addition until the yolk is fully incorporated.
- Add the extra egg yolk at the end and mix again.
- Scrape the bowl well.
If the batter looks slightly curdled at any point, do not worry. A slight curdled appearance is common when combining fat, eggs, and acidic ingredients, and the flour will usually bring it back together later. Many baking guides point out that adding eggs one at a time helps the batter emulsify and reduces the risk of a grainy texture.
Step 07: Add lemon juice and vanilla
- Add the lemon juice and vanilla extract.
- Mix on low speed just until combined.
The batter may look a bit looser and possibly slightly curdled here because of the acidity of the lemon juice. That is expected. Try not to over mix at this stage, since you still need to add the dry ingredients and you want to avoid excessive gluten development.
Step 08: Fold in the dry ingredients

- Sprinkle about one third of the flour mixture over the batter.
- Mix on the lowest speed until it is almost combined, then stop and finish folding in with a spatula.
- Repeat with the remaining flour mixture in two more additions.
Stop folding as soon as no dry pockets remain. According to many cake science articles, once flour meets liquid, gluten begins to form, and too much mixing can lead to a tough crumb. The finished batter should be thick, smooth, and slightly velvety.
Step 09: Fill the pan
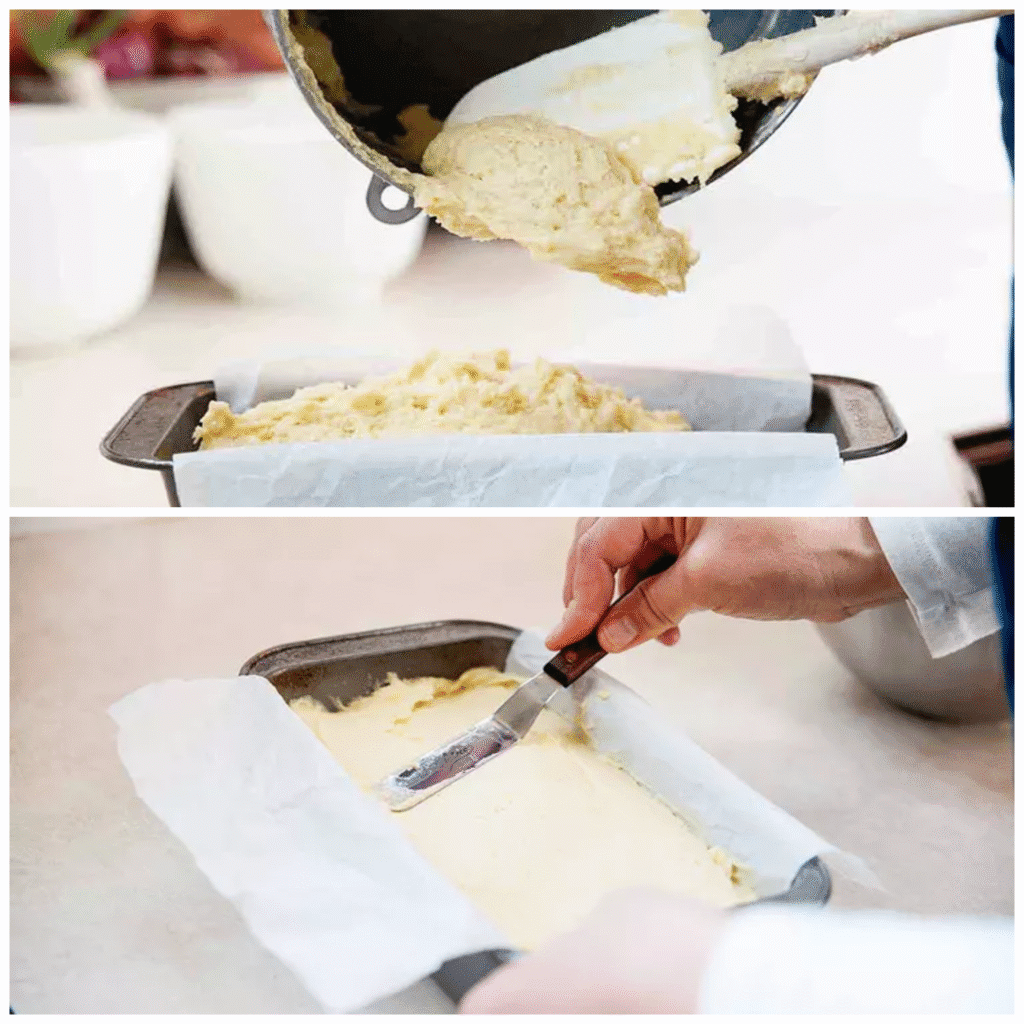
- Scrape the batter into the prepared loaf pan.
- Use the spatula or an offset spatula to spread it evenly and smooth the top, nudging the batter slightly higher at the edges and a touch lower in the center. This can encourage a more even rise.
- Tap the pan gently on the counter once or twice to release any large air bubbles.
Aim to fill the pan about two thirds full. Many loaf cake recipes mention that filling beyond this point can cause overflow or an overly domed top.
Step 10: Bake the cake
- Place the pan on the center rack of the preheated oven.
- Bake for about 80 to 95 minutes. Start checking around 75 minutes.
Visual and physical cues are more reliable than the clock, and many respected baking sources emphasize using multiple tests rather than relying only on time. Look for:
- The top is deep golden and has a natural crack down the center.
- The sides have pulled just slightly away from the pan.
- A skewer inserted into the center comes out with a few moist crumbs but no wet batter.
- If you use an instant read thermometer, the internal temperature near the center is usually around 205 to 210 degrees Fahrenheit for a fully baked pound cake, according to cake doneness guides from thermometer makers and baking experts.
If you notice the top browning too quickly before the center is close to done, tent the pan loosely with foil for the last part of baking to protect the crust.
Step 11: Make the lemon syrup
While the cake bakes, prepare the syrup.
- In a small saucepan, combine the sugar, lemon juice, and water.
- Place over medium heat and stir occasionally until the mixture comes to a gentle simmer and the sugar has dissolved and the liquid looks clear. This usually takes about 3 to 5 minutes.
- Remove from the heat and let the syrup cool slightly.
Simple syrups like this are a common technique for adding flavor and moisture to cakes without making the crumb soggy, as many bundt and pound cake recipes demonstrate
Step 12: Soak the warm cake

- Once the cake is done, remove the pan from the oven and set it on a cooling rack.
- Let the cake rest in the pan for about 10 minutes. This allows the structure to set so it is less fragile.
- Using a skewer, poke small holes all over the top of the warm cake, going down about halfway.
- Slowly spoon or pour about half of the warm lemon syrup over the surface, letting it sink in. Wait a minute, then add the remaining syrup gradually.
If you pour too quickly, the syrup may run down the sides and pool at the bottom instead of soaking in. The natural crack on top actually helps the syrup penetrate deeper, which is one reason many bakers embrace those cracks rather than trying to prevent them.
- Let the cake sit in the pan another 15 minutes as the syrup absorbs.
- Run a thin knife along the short sides of the pan, then use the parchment sling to carefully lift the cake out and set it on a wire rack.
- Let it cool completely to room temperature before glazing.
Step 13: Make the lemon glaze
Once the cake is at room temperature, prepare the glaze.
- In a medium bowl, whisk the melted butter and powdered sugar together.
- Add 2 tablespoons of lemon juice and whisk until smooth.
- If the glaze looks too thick to flow slowly off the spoon, add a few drops more lemon juice. If it is too thin and runs like water, add a little more sifted powdered sugar.
Many lemon pound cake recipes recommend a glaze that is thick enough to sit white and opaque on top of the loaf while still gently dripping down the sides.
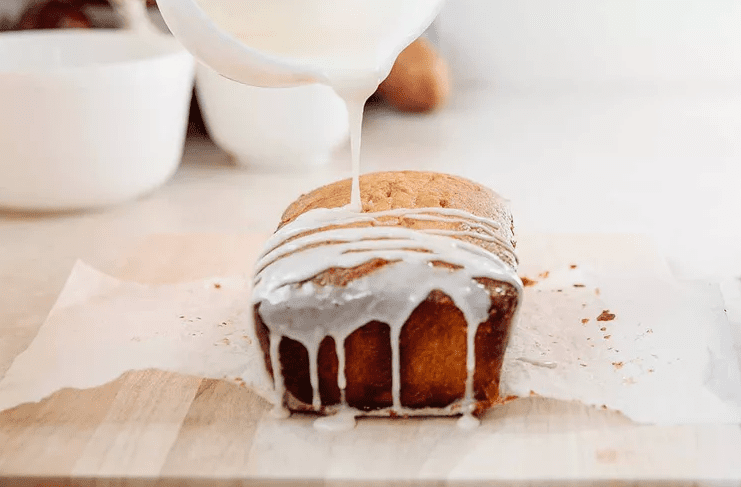
Step 14: Glaze, cool, slice, and serve
- Place a piece of parchment or a tray under the cooling rack to catch drips.
- Pour the glaze slowly along the center of the cooled cake, letting it run toward the edges and down the sides.
- Let the glaze set for at least 20 to 30 minutes.
- Slice with a long, sharp serrated knife, wiping the blade between cuts for clean slices.
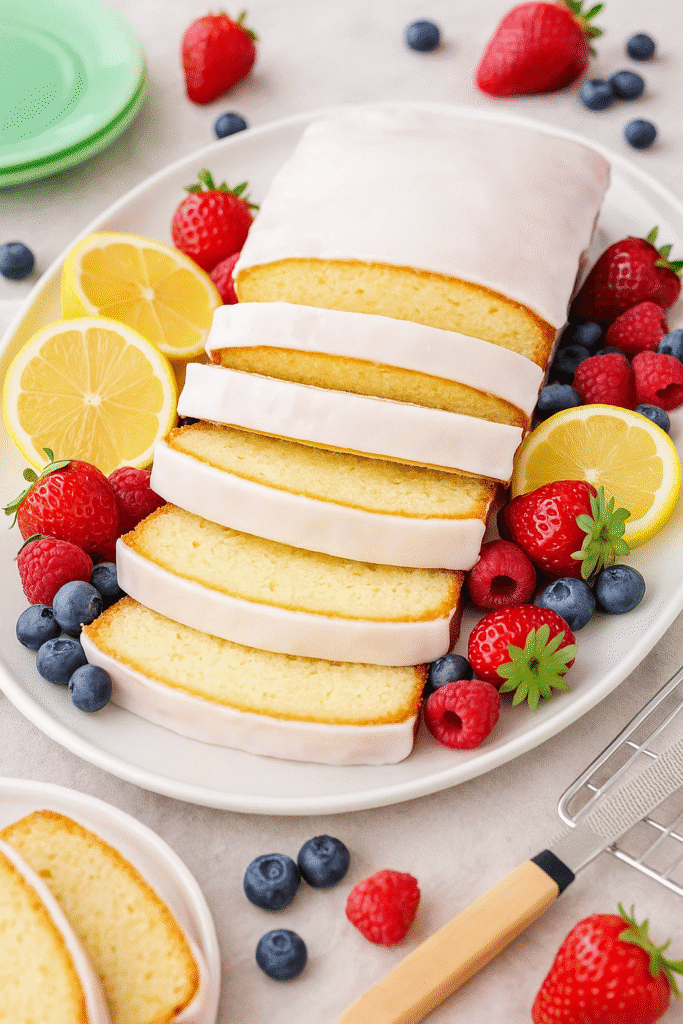
You can serve slices plain, with fresh berries, or with softly whipped cream. Many lemon pound cake recipes suggest pairing with strawberries or mixed berries to complement the citrus.
Variations and adjustments
- For a more tart glaze: Use only lemon juice for the liquid and add a pinch of extra salt.
- For a milder glaze: Replace part of the lemon juice with milk or water.
- Lemon poppy seed variation: Stir 1 to 2 tablespoons of poppy seeds into the finished batter. The seeds add visual interest and a slight crunch but may slightly thicken the batter.
- Berry variation: Scatter a handful of fresh blueberries, well dried and tossed in a little flour, over the batter once it is in the pan. Bake until the same doneness cues are met, but expect that berries can slightly increase bake time and may create a more tender center. Many baking sources caution that juicy add ins can affect bake time and structure.
Key Advantages of Making Lemon Pound Cake
- Bold lemon flavor from zest in the batter, lemon juice in the batter, a lemon syrup soak, and a lemon glaze.
- Moist crumb that still has enough structure to slice neatly, thanks to the combination of bread flour and sour cream.
- Very versatile: works for breakfast, brunch, afternoon coffee, or dessert with fruit and cream.
- Keeps well at room temperature for several days when wrapped, and freezes nicely for longer storage, similar to many well tested lemon loaf recipes.
- Friendly to newer bakers because the method is straightforward and uses visual cues that are easy to recognize.
Mistakes to Avoid
Packing too much flour
Scooping flour directly from the bag can compress it, leading to significantly more flour per cup, which makes pound cake dry and dense. Many baking resources estimate that this can easily add thirty percent more flour. Either weigh your flour or use the spoon and level method.
Under creaming the butter and sugar
If you stop creaming too early, the mixture will stay dense and grainy, and the cake may not rise properly. Aim for noticeably lighter color and volume, as described earlier. Serious Eats and other test kitchens emphasize that proper creaming is one of the biggest factors in cake texture.
Over mixing after adding flour
Once flour and liquid meet, gluten starts to form. Over mixing can make the crumb tough. Mix on low speed and finish with gentle folding, stopping as soon as the batter looks uniform. Many cake science articles highlight this as a main cause of rubbery cakes.
Incorrect oven temperature
If the oven runs too hot, the outside will brown and set before the inside is cooked. If the oven is too cool, the cake can dry out before it fully sets. Using an oven thermometer and baking at a moderate 325 degrees Fahrenheit is a common recommendation in pound cake guides.
Removing the cake from the pan too early
Taking the cake out of the pan immediately can cause it to crack or break because the structure is still very delicate. Letting it rest in the pan for about 10 minutes gives the crumb time to firm up.
Glazing a hot cake
If you pour glaze over a hot cake, it tends to melt and soak in rather than sitting in a pretty layer on top. Some bakers like this effect, but if you want a classic white glaze, wait until the cake is fully cooled before glazing, a tip repeated in several lemon loaf recipes.
Expert Tips and Real Life Examples
How I check doneness in my own kitchen
I start checking around the earliest suggested time with a long skewer. I look for a few moist crumbs but no streaks of wet batter. I also gently press the top near the center. It should feel set and spring back. If it still feels squishy, I give it another 5 to 10 minutes. When I use a thermometer, I aim for just over 205 degrees Fahrenheit in the center, which matches guidance from cake doneness charts.
Adjusting for different pans or ovens
If I use a slightly smaller loaf pan that is taller, I expect the cake to take closer to the high end of the time range. If I use a wider pan, it may bake a bit faster. My oven runs slightly hot, so I have learned to trust my oven thermometer rather than the dial, a tip many professional bakers also share.
Getting the most zest and juice from lemons
I always choose lemons that feel heavy for their size. Several reputable cooking sites point out that heavier citrus usually means more juice. I zest them before cutting, using a microplane and only removing the colored part, not the white pith, which can taste bitter. Then I roll each lemon firmly on the counter before juicing to help release more juice.
Serving ideas
For guests, I like to serve slightly thicker slices with a spoonful of macerated berries and a little whipped cream or a scoop of vanilla ice cream. Many lemon pound cake recipes suggest berries and cream as a natural pairing that balances the rich crumb.
Refreshing leftovers
If a slice feels a little firm after a day or two, I warm it gently in the microwave for about 10 to 15 seconds, just until the crumb softens and the lemon aroma blooms again. You can also toast a slice lightly and serve it with fresh berries for a breakfast treat.
Nutrition Facts (Per Serving)
Exact nutrition will vary with brands and exact slice size. Large recipe sites that publish nutrition analysis for similar lemon pound cakes report values in roughly the low three hundreds to mid four hundreds calories per slice when a loaf is divided into about 12 to 16 servings.
Using those references as a guide and assuming 12 servings, a rough estimate for this recipe per slice is:
- Calories: about 380
- Total fat: about 18 grams
- Carbohydrates: about 50 grams
- Protein: about 5 grams
These numbers are approximate and based on comparison with published nutrition labels for similar formulas, not a lab test. For medical or strict dietary needs, it is best to run the ingredients you use through a dedicated nutrition calculator.
Frequently Asked Questions
Q1: Can I use all purpose flour instead of bread flour in lemon pound cake?
Yes. All purpose flour has a lower protein content than bread flour, usually around 9 to 12 percent instead of the 12 to 14 percent often found in bread flour, so it will create slightly less gluten. In practice, this means the cake may be a bit more tender and fragile, with a crumb that is slightly looser. The loaf can still be excellent, but it might dome a bit less and be more delicate when you slice it.
Q2: How do I make sure my lemon pound cake stays moist?
Moisture in this cake comes from several places: the butter and sour cream, the sugar which holds onto moisture, the controlled amount of flour, and the lemon syrup soak. Measuring flour carefully, not over baking, and soaking the warm cake with syrup are the three biggest factors. Many lemon pound cake recipes stress the importance of pulling the cake from the oven as soon as a skewer comes out with a few moist crumbs rather than waiting until it is completely dry.
Q3: Can I make this lemon pound cake ahead and freeze it?
Yes. As with many well tested lemon loaf recipes, this cake freezes very well. For best results, bake and soak it with syrup, let it cool completely without glaze, then wrap it tightly in plastic wrap and place in a freezer safe bag or container. Freeze for up to about three months. Thaw at room temperature in the wrapping to prevent condensation from forming on the surface, then glaze just before serving.
Q4: What is the best way to store lemon pound cake and how long does it keep?
Once the glaze has set, store the loaf in an airtight container at cool room temperature. Most similar pound cakes keep their quality for about four to five days, thanks to the relatively high fat and sugar content which slows staling. If your kitchen is very warm, refrigerate the cake and bring slices back toward room temperature before serving for the best texture.
Q5: How can I adjust the recipe if I like a milder or stronger lemon flavor?
For a milder lemon flavor, use zest from two lemons instead of three, replace part of the lemon juice in the syrup with water, and use more sugar and less lemon juice in the glaze. For a stronger lemon punch, keep the full amount of zest, use the full lemon juice in batter and syrup, and make the glaze with only lemon juice as the liquid. Many lemon pound cake recipes offer this exact kind of adjustment in the glaze so bakers can tune the level of tartness to their taste.
Conclusion
A good lemon pound cake should deliver bright citrus flavor, a fine and velvety crumb, and a beautiful glazed top that makes every slice feel special. By leaning on proven techniques from trusted baking sources, such as thorough but not excessive creaming, careful flour measurement, moderate baking temperature, and a gentle lemon syrup soak, this recipe is designed to be reliable and forgiving, even if it is your first time baking a pound cake.
If you follow the visual cues and troubleshooting tips here, you will have a moist, lemon scented loaf that slices neatly, keeps well, and still tastes fresh days later. As you get comfortable with the method, you can start playing with variations, from poppy seeds to berries or different levels of lemon intensity, knowing that the core structure is sound.
And if your first loaf is not perfect, treat it as a baker’s learning slice. Use the notes on common mistakes and expert tips to adjust your next batch. Lemon pound cake is the kind of recipe that quickly becomes a go to dessert in a home baker’s repertoire, and each time you make it, you will gain a little more confidence and intuition.
Lemon Pound Cake Loaf for Bright, Moist Slices Every Time